How To Clean Whirlpool Oven Door Quickly And Easily
Cleaning your Whirlpool oven door is simpler than you think. With the right supplies and a few easy steps, you can remove grease, baked-on residue, and stubborn stains in under 30 minutes. This guide walks you through every method, from basic soap and water to powerful natural solutions.
Your Whirlpool oven door takes a beating every single day. Splatters, grease spots, and baked-on food residue build up fast. Over time, this grime dulls the glass and makes your oven look neglected. The good news is that how to clean Whirlpool oven door is something you can master with just a few household items and a little patience.
Whether you deal with light splatters or heavy baked-on grease, this guide covers every method you need. You will learn the safest techniques, the best natural cleaners, and simple habits that keep your oven door sparkling between deep cleans. No expensive products required. No complicated steps. Just straightforward cleaning that actually works.
Let us be honest. Most of us avoid cleaning the oven door because it feels like a huge chore. But once you see how easy it is with the right approach, you will wonder why you waited so long. A clean oven door not only looks better but also helps your oven heat more evenly and perform at its best.
Below you will find everything you need to know about Whirlpool oven door cleaning. From preparation to finishing touches, each step is designed to be simple and effective. Let us get started.
Key Takeaways
- Regular cleaning prevents buildup: Wiping your oven door after each use keeps grease from hardening and makes deep cleaning much easier.
- Baking soda and vinegar are your best friends: These natural ingredients tackle tough stains safely without harsh chemicals.
- Know when to remove the door: Some cleaning tasks are much easier when the oven door is detached from the hinges.
- Avoid abrasive tools: Steel wool and harsh scrubbers can scratch the glass and damage the door finish.
- Maintain the seal and track: Cleaning the door gasket and track prevents odors and keeps your oven running efficiently.
- Use the self-clean function wisely: It works well but has limitations for everyday grime on the door glass.
- Consistency beats intensity: A quick weekly wipe-down saves you from hours of deep cleaning later.
📑 Table of Contents
- Why Your Whirlpool Oven Door Gets So Dirty
- What You Need Before You Start Cleaning
- Step-by-Step Guide to Clean Your Whirlpool Oven Door
- Dealing with Tough Stains and Burnt-on Grime
- Maintaining Your Whirlpool Oven Door for Long-Lasting Cleanliness
- Common Mistakes People Make When Cleaning Oven Doors
- Expert Tips for a Spotless Whirlpool Oven Door
- Conclusion
Why Your Whirlpool Oven Door Gets So Dirty
Understanding why your oven door gets dirty is the first step toward keeping it clean. When you cook, fats, oils, and food particles become airborne. They stick to the inside of your oven and especially to the door glass. Over time, repeated cooking cycles bake this residue into a hard, stubborn layer of grime.
The Role of Heat and Grease
Heat plays a big role in how quickly grime builds up. When oil splatters hit the hot door glass, they cook and harden. This process is called polymerization. It makes the grease bond tightly to the surface. What starts as a light spray becomes a thick, dark coating after just a few weeks of regular cooking.
Foods that are high in fat or sugar cause the most damage. Think about roasting chicken, baking pizza, or broiling cheese. Each of these releases grease and sugars that caramelize onto the glass. The oven door window is especially vulnerable because it is the largest exposed surface inside the oven.
Common Culprits of Grime Buildup
Certain cooking habits accelerate dirt buildup on your oven door. Here are the most common culprits:
- High-heat cooking: Broiling and frying release more grease than baking or steaming.
- Overfilling pans: This causes spills that rise up and hit the door glass.
- Cooking without lids: Uncovered dishes allow splatters to escape freely.
- Infrequent cleaning: Letting grime sit for weeks makes it much harder to remove later.
- Using the wrong cookware: Pans with rough bottoms can shed particles that stick to the door.
Knowing these causes helps you take preventive steps. A little awareness goes a long way in reducing the frequency of deep cleaning sessions.
What You Need Before You Start Cleaning
Gathering your supplies before you begin makes the entire process smoother. You do not need anything fancy or expensive. Most of what you need is already in your kitchen. Here is a simple list of everything required for effective oven door glass cleaning.
Essential Cleaning Supplies
- Baking soda: A gentle abrasive that lifts stains without scratching.
- White vinegar: Cuts through grease and deodorizes naturally.
- Dish soap: Cuts through light grease and surface grime.
- Warm water: The foundation of most cleaning solutions.
- Spray bottle: For applying solutions evenly.
- Microfiber cloths: Lint-free and safe for glass surfaces.
- Soft sponge or scrub pad: For gentle scrubbing without scratches.
- Rubber gloves: Protects your hands from cleaning solutions.
- Plastic scraper or old credit card: For removing hardened residue safely.
Safety Precautions to Keep in Mind
Before you start any oven door cleaning project, make sure your oven is completely cool. Never clean a hot oven door. The heat can cause cleaning solutions to evaporate instantly, reducing their effectiveness and potentially causing steam burns.
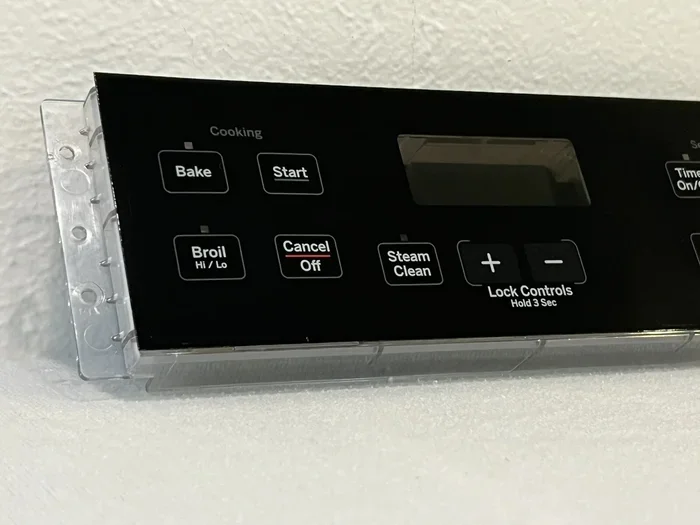
Also, if your oven has a self-cleaning oven function, do not use chemical cleaners on the door during or immediately after a self-clean cycle. The extreme heat from self-cleaning makes the surfaces sensitive. Wait at least 30 minutes before applying any cleaning product.
Ventilate your kitchen by opening a window or turning on the range hood. Even natural cleaners like vinegar can produce strong fumes in enclosed spaces. Good airflow keeps you comfortable throughout the cleaning process.
Step-by-Step Guide to Clean Your Whirlpool Oven Door
Now that you have your supplies and your oven is cool, it is time to start cleaning. This step-by-step approach works for most Whirlpool oven models. Follow each step carefully for the best results.
Step 1: Remove the Oven Door (If Possible)
Not all Whirlpool oven doors can be removed easily, but many models allow you to lift the door off its hinges. Check your owner manual for specific instructions. Removing the door gives you better access and lets you work at a comfortable height.
If you cannot remove the door, no worries. You can still clean it effectively while it is attached. Just be mindful of the oven door hinge and latch area, as these spots tend to collect grease too.
Step 2: Mix Your Cleaning Solution
For a basic but effective cleaning paste, mix three parts baking soda with one part warm water. Stir it until it forms a thick, spreadable consistency. This baking soda oven cleaner works wonders on grease and baked-on food without any harsh chemicals.
For a lighter cleaning solution, mix warm water with a few drops of dish soap. This works well for routine maintenance and light grease removal. If you are dealing with stubborn stains, the baking soda paste is your best bet.
Step 3: Apply the Solution to the Door Glass
Spread the cleaning paste evenly across the oven door glass. Use your fingers or a soft cloth to apply it in a thin, uniform layer. Make sure to cover all areas, including the edges and corners where grime tends to accumulate.
Let the paste sit for at least 15 to 20 minutes. This dwell time allows the baking soda to break down the grease and loosen the baked-on residue. For really tough tough stains, you can let it sit for up to 30 minutes.
Step 4: Scrub the Glass Gently
After the paste has had time to work, dip a soft sponge or microfiber cloth in warm water and start scrubbing in gentle circular motions. Do not press too hard. Let the baking soda do the heavy lifting.
For areas with heavy grease buildup, use a plastic scraper or an old credit card to gently lift off loosened residue. Avoid metal scrapers or steel wool. These can scratch the glass and leave permanent marks that attract more dirt in the future.
Step 5: Clean the Door Frame and Handle
The door frame and handle are often overlooked during cleaning. Wipe them down with a damp cloth and a small amount of dish soap. Pay special attention to the crevices around the handle where grease collects. A cotton swab works great for getting into tight spaces.
Do not forget the oven door latch area either. This small mechanism can accumulate grime that affects how smoothly the door opens and closes. A quick wipe with a soapy cloth keeps it functioning properly.
Step 6: Rinse and Dry Thoroughly
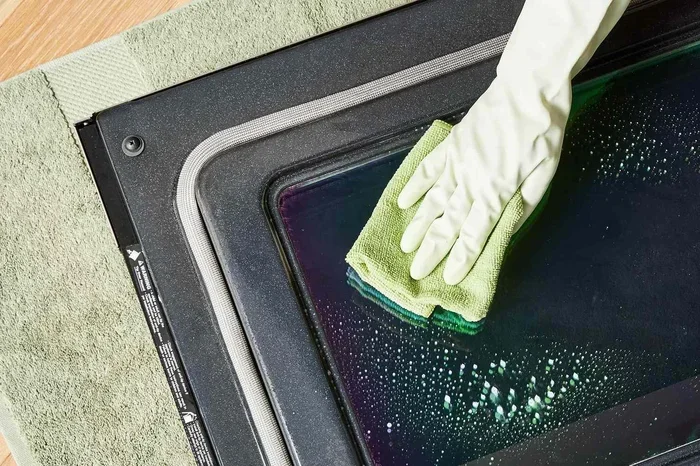
Once you have scrubbed the entire door, rinse it thoroughly with clean water. Use a separate damp cloth to remove all traces of the cleaning paste. Residue left behind can leave streaks or attract dust.
Dry the door completely with a clean microfiber cloth. Water spots can form if the glass air dries, especially in hard water areas. A thorough drying step ensures a streak-free, sparkling finish.
Dealing with Tough Stains and Burnt-on Grime
Sometimes regular soap and water are not enough. Heavy baked-on grease and carbonized food require more powerful treatment. Here are three proven methods for tackling the toughest oven door cleaning challenges.
Method 1: The Baking Soda Paste Power Wash
This is the go-to method for most home cooks. Make a thick paste of baking soda and water. Apply it generously to the stained areas. Cover it with a damp cloth and let it sit for 30 minutes to an hour. The alkaline nature of baking soda breaks down acidic food residues and dissolves grease effectively.
After soaking, scrub gently with a soft sponge. The loosened grime should come off with minimal effort. For best results on burnt food residue, repeat the process once if needed. Most stains respond well after one or two treatments.
Method 2: The Vinegar Steam Technique
Vinegar is a fantastic natural degreaser. To use the steam method, boil a pot of water with a cup of white vinegar. Place the pot inside the oven (with the door closed) and let it steam for 10 to 15 minutes. The steam loosens hardened grease and makes it much easier to wipe away.
After steaming, remove the pot carefully and wipe the door with a microfiber cloth. The grime should slide off almost effortlessly. This method is especially effective for grease removal on the door window and edges.
Method 3: Commercial Oven Cleaners
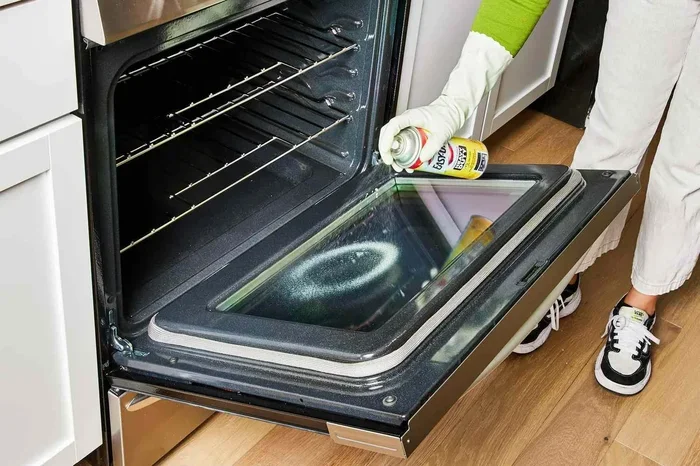
When natural methods fall short, a commercial oven cleaner can do the job. Look for products labeled safe for use on glass oven doors. Always follow the manufacturer instructions and wear gloves.
Spray the cleaner on the stained areas and let it sit for the recommended time. Wipe away with a damp cloth. Be sure to rinse the door thoroughly afterward to remove any chemical residue. Commercial cleaners are powerful but should be used sparingly to avoid buildup on the glass.
Comparison of Cleaning Methods
| Method | Best For | Time Required | Cost | Eco-Friendly |
|---|---|---|---|---|
| Baking Soda Paste | Moderate grease and light stains | 20-30 minutes | Very low | Yes |
| Vinegar Steam | Hardened grease and baked-on grime | 15-20 minutes | Very low | Yes |
| Commercial Cleaner | Heavy, stubborn stains | 10-15 minutes active | Moderate | No |
| Soap and Water | Light maintenance and routine wiping | 5-10 minutes | Very low | Yes |
Each method has its place. For everyday cleaning, stick with soap and water or the baking soda paste. Reserve commercial cleaners for those rare occasions when nothing else works. The vinegar steam method is a great middle ground for moderate buildup.
Quick Tips for Stubborn Stains
- Repeat the process: Sometimes two applications are better than one aggressive scrub.
- Use heat carefully: A hairdryer on low heat can soften hardened grease before cleaning.
- Try hydrogen peroxide: A 3% solution mixed with baking soda creates a powerful stain-lifting paste.
- Be patient: Letting the cleaning solution sit longer always improves results.
- Never use a knife or metal tool: These scratch the glass and create grooves where future grime collects faster.
Maintaining Your Whirlpool Oven Door for Long-Lasting Cleanliness
Cleaning your oven door once is great. But keeping it clean over time is even better. A simple maintenance routine saves you from heavy cleaning sessions and extends the life of your oven door glass and seal.
Daily Habits That Make a Difference
Wipe down the oven door after every cooking session if possible. A quick pass with a damp microfiber cloth removes fresh splatters before they have a chance to harden. This takes less than a minute and prevents grease buildup from accumulating over time.
Also, place a baking sheet or oven-safe mat on the rack below your dish when cooking. This catches drips and splatters that would otherwise travel up to the door glass. It is one of the simplest oven maintenance habits you can adopt.
Weekly and Monthly Maintenance Routine
Set aside 10 minutes once a week for a light oven door cleaning session. Spray the door glass with a mixture of equal parts water and white vinegar. Wipe it down with a microfiber cloth. This keeps the surface clean and prevents deep staining.
Once a month, give the door a more thorough cleaning. Remove the door if possible and clean the edges, hinges, and seal. Check the oven door gasket for any trapped food particles or signs of wear. A clean seal ensures your oven maintains proper temperature and energy efficiency.
Protecting the Door Glass Over Time
Prevention is always better than cure. Consider using an oven door window liner or heat-resistant mat on the lower portion of the door. These accessories catch splatters and are easy to wash separately. They protect the main glass surface from constant exposure to grease and food particles.
Also, avoid slamming the oven door. Repeated impact can crack the glass or loosen the hinges over time. A gentle close protects both the door and the internal components of your Whirlpool oven.
Common Mistakes People Make When Cleaning Oven Doors
Even with the best intentions, many people make mistakes that damage their oven doors or reduce cleaning effectiveness. Knowing what to avoid makes your cleaning sessions more productive and safer.
Using Abrasive Tools and Harsh Chemicals
The biggest mistake people make is reaching for steel wool or abrasive scrubbers. These scratch the glass and the door finish. Scratches create tiny grooves where grease and food particles lodge, making future cleaning even harder.
Similarly, avoid using bleach or ammonia-based cleaners on oven door glass. These chemicals can etch the surface and leave a cloudy film that is nearly impossible to remove. Stick to gentle, non-abrasive cleaners for the best results.
Skipping the Door Seal and Track
The door seal and track are breeding grounds for mold, grease, and food debris. Many people focus only on the glass and forget these areas. A dirty seal can cause heat loss, uneven cooking, and unpleasant odors. Make sure to clean the seal and track every time you deep clean your oven door.
Not Letting Cleaning Solutions Work Long Enough
Patience is key when it comes to how to clean Whirlpool oven door effectively. Rushing through the process by scrubbing immediately after applying a cleaner wastes the product’s potential. Always allow adequate dwell time for the solution to break down the grime before you start scrubbing.
Using Too Much Water
Excess water can seep into the door hinges and internal mechanisms, causing rust or damage over time. Use damp cloths rather than soaking wet ones. Dry the door thoroughly after every cleaning session to prevent moisture-related issues.
Expert Tips for a Spotless Whirlpool Oven Door
Professional cleaners and appliance experts share a few extra tips that take your oven door cleaning to the next level. These insights come from years of experience and can save you significant time and effort.
Clean in sections. Divide the door into quadrants and clean one section at a time. This ensures you do not miss any spots and gives each cleaning solution enough time to work before you move on.
Use a toothbrush for detail work. An old soft-bristle toothbrush is perfect for cleaning around the door handle, latch, and seal. It reaches tight spaces that cloths and sponges cannot access.
Buff the glass after drying. Once the door is clean and dry, give it a final buff with a dry microfiber cloth. This removes any remaining streaks and leaves the glass crystal clear.
Clean the outside too. The exterior of the oven door collects fingerprints, grease splatters, and dust. Wipe it down with a damp cloth and mild soap during your cleaning routine for a complete result.
Check your owner manual. Different Whirlpool models may have specific cleaning recommendations or restrictions. Your manual is the best resource for model-specific guidance on oven door panel care and maintenance.
Consider steam cleaning periodically. Running the self-clean cycle once every few months helps maintain the oven interior. While it does not replace manual door cleaning, it reduces overall buildup and makes regular maintenance easier.
Conclusion
Keeping your Whirlpool oven door clean does not have to be a dreaded chore. With the right approach and a few simple supplies, you can achieve excellent results quickly and safely. Whether you prefer natural methods like baking soda and vinegar or opt for a commercial cleaner when needed, the key is consistency and gentle technique.
Remember to clean regularly, avoid abrasive tools, and pay attention to the door seal, handle, and track. These small habits make a big difference in the long run. A well-maintained oven door looks better, performs better, and lasts longer.
Now that you know exactly how to clean Whirlpool oven door effectively, you have no excuse to let grime build up. Start with a quick wipe-down today and build a routine that keeps your oven looking and working its best. Your kitchen and your oven will thank you for it.
Frequently Asked Questions
Can I use Windex or glass cleaner on my Whirlpool oven door?
Yes, you can use a standard glass cleaner like Windex on the oven door glass for light cleaning. However, avoid using it on the door frame, seal, or handle as the chemicals may damage rubber gaskets and plastic components over time.
How often should I deep clean my Whirlpool oven door?
A deep clean every one to two months is sufficient for most households. If you cook frequently or use high-heat methods like broiling, you may need to clean more often. Weekly quick wipes can reduce the need for deep cleaning sessions significantly.
Is it safe to remove the oven door to clean it?
Yes, removing the oven door is safe for most Whirlpool models and makes cleaning much easier. Refer to your owner manual for specific removal instructions. Most doors release by lifting slightly and swinging outward from the top hinge points.
What is the best natural cleaner for baked-on oven grease?
A mixture of baking soda and white vinegar is the most effective natural cleaner for baked-on oven grease. The baking soda acts as a gentle abrasive while the vinegar dissolves grease. Let the paste sit for at least 30 minutes before scrubbing for the best results.
Can I use the self-clean function to clean just the oven door?
The self-clean function cleans the entire oven interior, including the door, but it works best for light to moderate buildup. It uses extreme heat to burn off food residue. For heavy grease on the door glass, manual cleaning with a baking soda paste is more effective and uses less energy.
Why is my oven door streaky after cleaning?
Streaks usually result from residue left behind by cleaning products or from not drying the glass thoroughly. Rinse the door well with clean water after cleaning and dry it completely with a lint-free microfiber cloth. Buffing in circular motions removes any remaining streaks.