How Do You Turn On An Oven A Simple Step By Step Guide
Learning how do you turn on an oven is easier than you think. This guide walks you through every step for gas and electric models. You will learn about oven settings, preheating, and safety tips. Whether you are a beginner or just need a refresher, this article covers it all. Follow along and you will be cooking confidently in no time.
You just bought a new oven or maybe you are using one for the first time. The question on your mind is simple: how do you turn on an oven? It sounds basic, but many people feel unsure the first time they stand in front of a brand-new appliance. The good news is that it is not complicated at all. Once you understand the basics, you will wonder why you ever worried.
This guide breaks everything down into easy steps. We cover gas ovens, electric ovens, and even modern convection models. You will learn what each button and knob does. We also share safety tips and common mistakes to avoid. By the end, you will feel confident walking up to any oven and turning it on.
Key Takeaways
- Know your oven type: Gas and electric ovens have different ignition methods.
- Always preheat: Preheating ensures even cooking and better results.
- Check the oven light: It helps you monitor food without opening the door.
- Master the control panel: Understanding knobs and buttons prevents mistakes.
- Safety first: Never leave a turned-on oven unattended.
- Use the right rack position: It affects cooking quality and heat distribution.
- Troubleshoot common issues: Many oven problems have simple fixes you can do yourself.
📑 Table of Contents
Understanding Your Oven Type
Before you do anything, you need to know what kind of oven you have. Different ovens use different methods to produce heat. Knowing your oven type makes the whole process much easier. Most homes have either a gas oven or an electric oven. Some kitchens also have a convection oven, which uses a fan to circulate hot air.
Gas Ovens
Gas ovens use natural gas or propane to create a flame. When you turn the knob, gas flows out and ignites. You may hear a clicking sound before you see a flame. This is the igniter doing its job. Gas ovens heat up quickly and are popular among home cooks who love baking bread.
Older gas ovens sometimes use a standing pilot light. This is a small flame that stays on all the time. Newer models use an electronic igniter instead. Both types work well, but the electronic version is more energy efficient.
Electric Ovens
Electric ovens use heating elements to generate warmth. These elements are usually located at the top and bottom of the oven cavity. When you turn on the oven, electricity flows through the elements and they glow red hot. Electric ovens are known for providing steady, even heat.
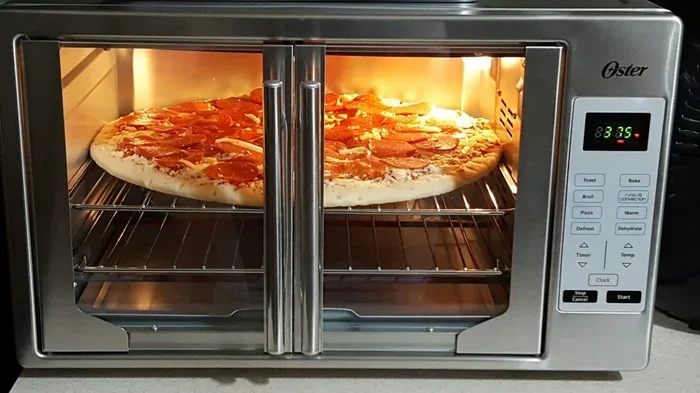
Many electric ovens come with a digital control panel. You will see buttons, a digital display, and sometimes touch-sensitive sliders. These make it easy to set the exact temperature you want. Some models also include a convection fan, which helps food cook more evenly.
Convection Ovens
A convection oven has a fan and an exhaust system. The fan blows hot air around the food. This reduces hot spots and speeds up cooking. Many people love convection ovens because they cook food faster than standard models. If your oven has a convection setting, you will see a special button or symbol on the control panel.
Step-by-Step Guide To Turning On Your Oven
Now that you know what type of oven you have, let us walk through the process. Follow these steps carefully and you will have your oven running in seconds.
Step 1: Make Sure the Oven Is Plugged In
For electric ovens, check that the power cord is securely plugged into the outlet. Some ovens are hardwired into the home’s electrical system. If you are not sure, check your user manual. A loose connection can prevent the oven from turning on, and this is a very common issue for first-time users.
For gas ovens, make sure the gas supply valve is open. The valve is usually located behind or near the oven. If the gas is turned off, the oven will not ignite. This is an easy fix but easy to overlook.
Step 2: Open the Oven Door Slightly
Before setting the temperature, open the oven door just a crack. This lets you check for any leftover food or debris from previous use. It also lets you look at the oven interior and make sure nothing is blocking the heating elements. A quick visual check takes only a few seconds but can save you from a smoky kitchen later.
Step 3: Set the Temperature
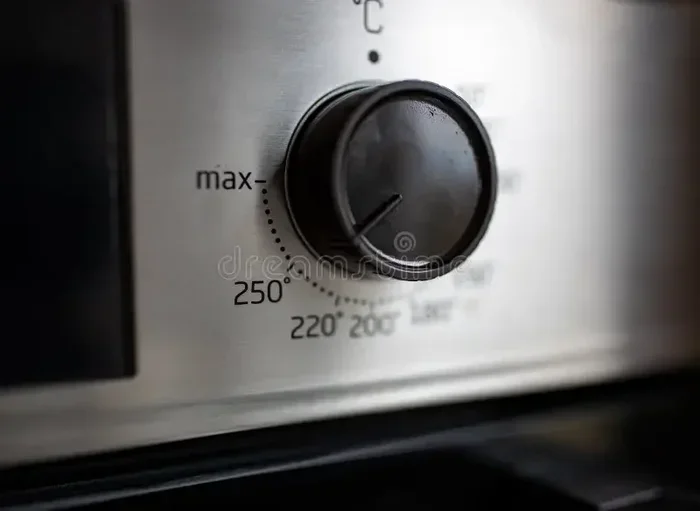
Now it is time to set your desired temperature. On older ovens, you will find a dial or knob labeled with temperature numbers. Turn the knob clockwise to increase the temperature. Turn it counterclockwise to decrease it.
On modern electric ovens, you will use the control panel. Press the temperature up or down buttons until you reach your desired setting. Most recipes call for temperatures between 325 and 450 degrees Fahrenheit. Always double-check your recipe before you set the temperature.
Here are some common oven temperatures for reference:
- 250°F – Slow warming or keeping food warm
- 350°F – Most baking and roasting
- 400°F – Roasting vegetables and meats
- 450°F – Pizza and high-heat baking
Step 4: Select the Cooking Mode
Many ovens offer multiple cooking modes. The most common modes include bake, broil, convection, and self-clean. For most recipes, you will use the bake mode. Bake mode uses both the top and bottom heating elements to create even heat throughout the oven.
If you want to brown the top of a dish, use the broil setting. Broil uses only the top element and produces intense direct heat. Use broil carefully because food can burn quickly. The convection mode is great for roasting and baking multiple dishes at once. Each mode serves a different purpose, so choose wisely based on what you are cooking.
Step 5: Press Start or Turn the Knob
Once you have set the temperature and mode, it is time to start the oven. On older models, you simply turn the oven knob to the start position. On newer models, press the start button on the control panel. You may hear a beep or see a light turn on.
Watch for the oven light to come on. This is a good sign that the oven has started heating. Some models also show a preheat indicator on the display. Wait until the indicator goes off before putting your food inside.
Step 6: Wait for Preheat
Preheating is one of the most important steps in oven use. It allows the oven to reach the target temperature before you place food inside. Most ovens take 10 to 15 minutes to preheat fully. Do not skip this step or your food may cook unevenly.
You can use an oven thermometer to check the internal temperature. Many ovens display the wrong temperature on their built-in thermostat. A standalone oven thermometer gives you a more accurate reading. Place it on the middle rack for the best results.
Common Oven Settings and What They Mean
Modern ovens come packed with settings that can confuse beginners. Let us break down the most common ones so you feel confident using them.
Bake Mode
Bake mode is the default setting for most recipes. It uses both the top and bottom heating elements to create a balanced heat environment. Use bake mode for cakes, cookies, casseroles, and roasted meats. This is the setting you will use most often, so it is worth memorizing.
Broil Mode
Broil mode uses only the top heating element. It produces very high direct heat, similar to a grill. Use broil for melting cheese on top of dishes, browning the surface of casseroles, or cooking thin cuts of meat. Always keep a close eye on food in broil mode because it can burn in seconds.
Convection Mode
Convection mode adds a fan to the baking process. The fan circulates hot air around the food, which promotes even cooking and browning. Convection ovens cook food about 25 degrees faster than conventional ovens. When using convection, you may need to reduce the temperature or cooking time. Check your recipe for convection-specific adjustments.
Self-Clean Mode
Self-clean mode heats the oven to extremely high temperatures, usually around 900 degrees Fahrenheit. This burns off food residue and grease inside the oven cavity. Never use self-clean mode right after cooking. Let the oven cool down first. Also, make sure the oven is empty before starting a self-clean cycle. Ventilate your kitchen because this mode can produce smoke and odors.
Warm Mode
Warm mode keeps food at a safe serving temperature without overcooking it. It typically operates between 150 and 200 degrees Fahrenheit. Use warm mode for bread rolls, prepared meals, or any dish you want to keep warm until everyone is ready to eat.
Safety Tips For Using Your Oven
Ovens are safe when used correctly, but they do come with risks. Follow these safety tips every time you turn on your oven.
Never Leave a Running Oven Unattended
Always stay in the kitchen when your oven is on, especially during the first few minutes. This is when the oven is heating up and things can go wrong quickly. If you must leave the room, turn off the oven first.
Keep Flammable Items Away
Oven mitts, towels, paper, and plastic should never be near a hot oven. These items can catch fire easily. Keep your stovetop and oven area clear of clutter. A clean cooking space is a safe cooking space.
Use Oven Gloves
Always wear oven mitts when handling hot trays and dishes. The inside of an oven can reach temperatures above 400 degrees. A single touch of a hot rack can cause a serious burn. Keep a pair of oven gloves within easy reach at all times.
Check for Gas Leaks
If you have a gas oven, be alert for the smell of gas. A gas leak is dangerous and requires immediate action. If you smell gas, do not turn on the oven. Open windows, leave the house, and call your gas company. Safety should always come first.
Troubleshooting Common Oven Problems
Sometimes ovens do not turn on the way they should. Before you call a repair technician, try these simple troubleshooting steps.
The Oven Does Not Turn On At All
Check the power source first. For electric ovens, make sure the outlet is working. You can test it by plugging in another appliance. If the outlet is fine, check the circuit breaker. A tripped breaker is a common cause of oven failure. For gas ovens, verify that the gas supply is on.
The Oven Heats Unevenly
If your food cooks faster on one side, the heating element may be faulty. You can test this by placing a piece of bread on the middle rack and checking for brown spots. Uneven heating often means a bad element or a broken fan in convection models. Replacing these parts is usually affordable and straightforward.
The Oven Does Not Reach the Right Temperature
Use an oven thermometer to check accuracy. If the displayed temperature does not match the thermometer reading, your thermostat may need recalibration. Some ovens allow you to adjust the thermostat yourself. Consult your user manual for calibration instructions.
The Oven Door Will Not Close Properly
A door that does not seal properly wastes heat and energy. Check for debris or food buildup around the door edges. Also inspect the door gasket for cracks or damage. A damaged gasket is an easy and inexpensive fix. Replace it and your oven will perform like new again.
Expert Tips To Get The Most From Your Oven
Even experienced cooks can learn new tricks for getting better results from their oven. Here are some expert tips that make a real difference.
Always place food on the middle rack. This position allows for the best air circulation and the most even heat distribution. The top rack is hotter, and the bottom rack receives more direct heat from the bottom element. The middle rack is the sweet spot for most cooking tasks.
Do not open the oven door too often. Every time you open the door, heat escapes and the temperature drops. This can cause cakes to sink and bread to fail to rise. Use the oven light to check on your food instead of opening the door. It is a small habit that leads to much better results.
Let your oven preheat fully before baking. Many people rush this step, but it really matters. A fully preheated oven ensures your food starts cooking at the right temperature from the very first moment. Patience pays off in the kitchen.
Clean your oven regularly to maintain its performance. Grease and food buildup can affect heating elements and cause smoke. A quick wipe-down after each use keeps your oven in top shape. A clean oven also smells better and cooks more evenly.
How Do You Turn On An Oven: Quick Recap
Let us quickly recap the entire process so you have it all in one place. First, make sure your oven is connected to power or gas. Next, open the door slightly and check the interior. Set your desired temperature using the knob or control panel. Choose the right cooking mode for your recipe. Press start or turn the knob to begin heating. Wait for the preheat indicator to go off. Then place your food inside and enjoy the cooking process.
Remember that every oven is slightly different. Your model may have extra features or a slightly different layout. Always refer to your user manual for model-specific instructions. The basic principles remain the same across all oven types. Once you understand those principles, you can confidently use any oven you encounter.
Conclusion
Turning on an oven is a simple skill that everyone can learn. Whether you have a gas oven, an electric oven, or a modern convection model, the process follows the same basic steps. Know your oven type, set the temperature, choose the right mode, and press start. Add in a little patience for preheating, and you are ready to cook delicious meals.
Safety should always be your top priority. Never leave a running oven unattended, keep flammable items away, and use oven mitts when handling hot dishes. Follow the troubleshooting tips if something goes wrong. Most issues have simple solutions that you can handle yourself.
Now that you know how do you turn on an oven, you are one step closer to becoming a more confident home cook. Put what you have learned into practice. Try a new recipe, experiment with different oven settings, and enjoy the process. The kitchen is your playground, and your oven is the tool that makes it all possible. Happy cooking!
Frequently Asked Questions
How long does it take to preheat an oven?
Most ovens take 10 to 15 minutes to preheat to the desired temperature. Convection ovens may preheat slightly faster due to the fan. Always wait for the preheat indicator to go off before placing food inside.
Can you turn on a gas oven without electricity?
Yes, many gas ovens can be lit with a match or lighter if the igniter fails. However, modern gas ovens rely on electricity for the igniter and control panel. Check your user manual for specific guidance on your model.
What is the difference between bake and broil mode?
Bake mode uses both the top and bottom heating elements for even, gentle heat. Broil mode uses only the top element for intense direct heat. Use bake for most cooking and broil for browning and melting.
Why does my oven smell when I first turn it on?
A slight smell when turning on a new oven is normal. It comes from the manufacturing residue burning off during the first few uses. If the smell persists or is strong, turn off the oven and check for any packaging or debris left inside.
Should I use convection mode for baking?
Convection mode works well for many baked goods, but it can dry out delicate items like souffles and custards. Reduce the temperature by 25 degrees when using convection mode for baking. Experiment to find what works best for your recipes.
How often should I clean my oven?
You should wipe down your oven after each use to prevent grease buildup. A deep clean every one to three months keeps the oven performing well. Use the self-clean cycle sparingly, as it uses a lot of energy and can produce smoke.