How To Clean Oven With Heat And Grease Effortlessly
Learning how to clean oven with heat is the easiest and most effective way to tackle baked-on grease and grime. You can use the self-cleaning cycle, steam cleaning, or simple heat-based tricks to remove stubborn food residue without harsh chemicals. This guide walks you through every method step by step so anyone can achieve a sparkling clean oven at home.
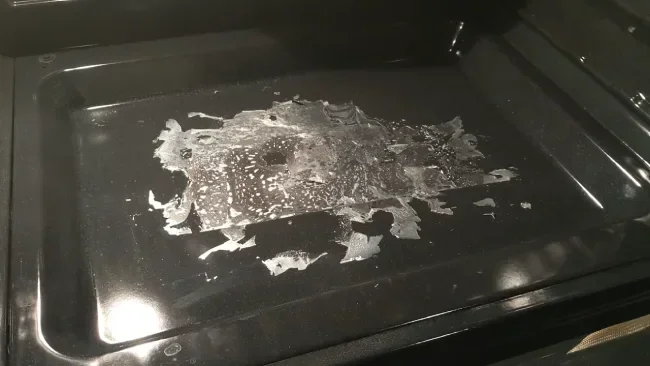
Every home cook knows the frustration of opening an oven and seeing layers of baked-on grease staring back. Food spills, drips, and splatters turn into stubborn carbonized grime that seems impossible to remove. The good news is that you do not need expensive chemical sprays or hours of scrubbing to fix this problem.
How to clean oven with heat is a question many homeowners are discovering has a surprisingly simple answer. Heat breaks down grease and food residue at a molecular level, making it one of the most effective oven cleaning methods available today. Whether you have a modern self-cleaning oven or a traditional model, you can use heat to your advantage.
In this guide, we will walk you through every proven method for cleaning your oven using heat. You will learn how the self-cleaning cycle works, how to steam clean with heat, and how to handle the oven racks and door glass. By the end, you will have all the knowledge you need to keep your oven spotless without harsh chemicals.
Key Takeaways
- Heat-based cleaning melts and loosens grease: Using high temperatures breaks down baked-on grime faster than scrubbing alone.
- Self-cleaning cycles are powerful but need preparation: Removing racks and wiping loose debris first ensures better results.
- Steam cleaning is a gentler alternative: It uses lower heat and moisture to dissolve grease without heavy smoke or fumes.
- Regular maintenance prevents buildup: Quick wipe-downs after each use keep your oven interior fresh and reduce deep cleaning sessions.
- Common mistakes can damage your oven: Avoid using water on hot surfaces and never skip ventilation during heat cleaning.
- Oven racks and door glass need special attention: These areas collect the most grease and benefit from targeted heat cleaning methods.
- Natural cleaning solutions boost heat effectiveness: Baking soda and vinegar pair well with heat to cut through tough grease stains.
📑 Table of Contents
- Why Cleaning Your Oven With Heat Works So Well
- How The Self-Cleaning Oven Cycle Works
- Step-By-Step Guide To Heat-Based Oven Cleaning
- Cleaning Oven Racks And Door Glass With Heat
- Quick Tips For Maintaining A Clean Oven
- Common Mistakes To Avoid When Cleaning With Heat
- Comparison Of Heat-Based Oven Cleaning Methods
- Key Takeaways
Why Cleaning Your Oven With Heat Works So Well
Heat is one of nature’s most powerful grease-fighting tools. When you apply high temperatures to baked-on food residue, the fats and oils in the grime begin to break apart. This process, called thermal decomposition, turns solidified grease into ash and powder that wipes away easily.
Most commercial oven cleaners contain harsh chemicals that can leave behind fumes and residues. Heat cleaning offers a chemical-free alternative that is safer for your household. It is especially appealing for families with children, pets, or anyone with sensitivities to strong cleaning products.
The science behind heat-based grease removal is straightforward. When oven temperatures reach above 400 degrees Fahrenheit, the proteins and carbohydrates in food spills undergo a chemical change. They become brittle and crumble, which makes them far easier to remove. This is exactly how the self-cleaning oven cycle was designed to work.
The Role Of Thermal Decomposition
Thermal decomposition happens when organic matter is exposed to sustained high heat. In an oven, this means that baked-on food particles lose their structure and turn into ash. The grease component undergoes a process called saponification when combined with the alkalinity found in oven interiors, which further loosens the bond between the grime and the oven surface.
Understanding this process helps you appreciate why heat is so effective for grease removal. Instead of fighting the grease with chemicals, you simply let heat do the heavy lifting. The oven does most of the work for you.
Benefits Over Chemical Cleaners
Using heat to clean your oven comes with several clear advantages. Chemical cleaners often contain ammonia, lye, or other caustic substances that can irritate your skin and lungs. Heat cleaning eliminates the need for these products entirely.
Here are the key benefits of heat-based oven cleaning:
- No toxic fumes: You avoid breathing in harsh chemical vapors during and after the cleaning process.
- Less scrubbing: Heat does the hard work, so you spend less time on your hands and knees scrubbing the oven interior.
- Cost-effective: You do not need to buy special cleaning products or replacements.
- Environmentally friendly: Heat cleaning produces no chemical runoff or packaging waste.
- Reaches hard-to-access areas: Heat penetrates corners, crevices, and hidden spots that chemical sprays often miss.
How The Self-Cleaning Oven Cycle Works
Most modern ovens come with a built-in self-cleaning feature. This function locks the oven door and raises the internal temperature to extremely high levels, typically between 800 and 1,000 degrees Fahrenheit. At these temperatures, all food residue and grease inside the oven turns to ash within two to four hours.
The self-cleaning cycle is one of the most convenient ways to clean oven with heat without any manual effort. However, there are important steps you should take before starting the cycle to get the best results and protect your oven.
Preparing Your Oven Before The Self-Cleaning Cycle
Proper preparation makes a big difference in how well the self-cleaning cycle performs. Skipping these steps can lead to excessive smoke, unpleasant odors, or even damage to your oven.
Follow this preparation checklist before starting the cycle:
- Remove all oven racks: The extreme heat can warp or discolor metal racks. Take them out and clean them separately.
- Wipe out loose debris: Use a damp cloth to remove any loose food particles or crumbs from the oven bottom.
- Clean the oven door glass: The glass can trap grease that may smoke excessively during the cycle.
- Remove the oven thermometer: If you have a standalone thermometer inside, take it out to prevent damage.
- Check for plastic or paper items: Make sure no oven-safe mats, stickers, or other heat-sensitive items are left inside.
- Ventilate your kitchen: Open windows and turn on the exhaust fan before starting the cycle.
Running The Self-Cleaning Cycle Safely
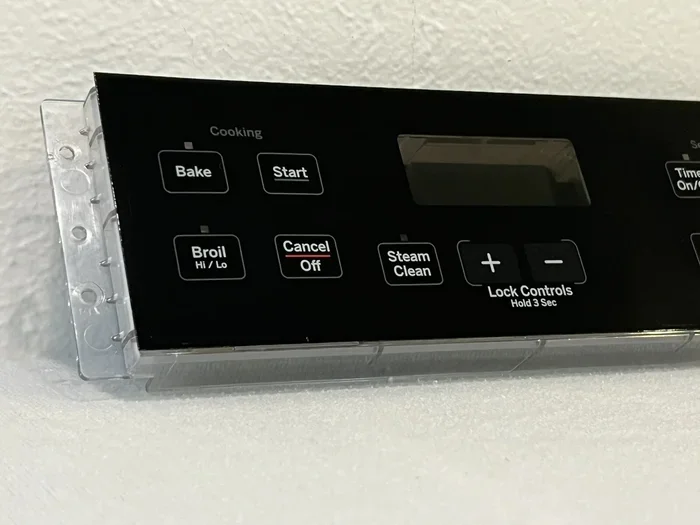
Once your oven is prepared, close the door firmly and select the self-cleaning setting. The oven will lock automatically during the cycle, which is a safety feature to prevent burns. The entire process usually takes about two to four hours depending on how dirty the oven is.
After the cycle finishes, the oven will unlock once it cools down to a safe temperature. You will find a fine ash residue covering the interior. Use a damp cloth or sponge to wipe this away gently. Avoid using abrasive scrubbers, as they can scratch the oven coating.
One common concern about self-cleaning ovens is the smoke and odor produced during the cycle. This is completely normal and happens because the heat is burning off organic material. However, if the smoke becomes excessive or smells unusually chemical, it could mean there is a plastic item or excessive food buildup that needs attention.
Step-By-Step Guide To Heat-Based Oven Cleaning
The self-cleaning cycle is not the only way to use heat for oven cleaning. There are several other heat-based methods that work well for different situations and levels of grime buildup. Let us walk through each one.
Method One: The Steam Cleaning Approach
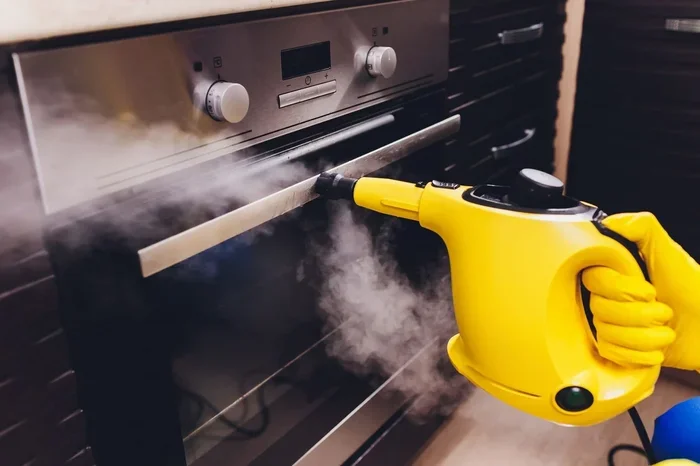
Steam cleaning uses lower heat combined with moisture to dissolve grease gently. This method is ideal for routine maintenance and light-to-moderate grease buildup. It produces less smoke than the self-cleaning cycle and is safer for ovens that may not have a dedicated self-cleaning feature.
Here is how to do it:
- Fill a small oven-safe bowl with water and add two tablespoons of white vinegar or lemon juice.
- Place the bowl on the lower oven rack.
- Set the oven temperature to 350 degrees Fahrenheit.
- Let the oven run for about 30 minutes. The steam will loosen the grease and food residue.
- Turn off the oven and let it cool slightly.
- Wipe the interior with a damp cloth or sponge. The grime should come off easily.
This steam-based approach is one of the most popular oven cleaning methods for everyday maintenance. It works wonders on light grease splatters and keeps your oven fresh between deeper cleaning sessions.
Method Two: The Boiling Water Technique
The boiling water technique is a variation of steam cleaning that targets heavily soiled oven bottoms. You boil water directly on the stove and place it in a heat-safe dish inside the oven. The rising steam penetrates baked-on grease and softens it for easy removal.
Follow these steps for best results:
- Bring a pot of water to a rolling boil on your stovetop.
- Place the boiling pot on the bottom oven rack.
- Add a cup of baking soda to the water for extra grease-cutting power.
- Let the steam circulate inside the closed oven for 15 to 20 minutes.
- Remove the pot carefully and wipe the interior with a damp cloth.
- For stubborn spots, make a paste of baking soda and water and gently scrub.
The boiling water method is especially effective for baked-on grease that has built up over weeks of cooking. The combination of heat and moisture softens even the toughest carbonized grime.
Method Three: Low-Heat Soak For Stubborn Stains
For extremely stubborn stains that have been building up for months, a low-heat soak can work miracles. This method uses moderate heat over a longer period to gradually break down tough grease layers.
Here is what you need to do:
- Apply a thin layer of baking soda paste to the stained areas.
- Place a shallow dish of water on the top rack.
- Set the oven to 200 degrees Fahrenheit.
- Let it run for one to two hours.
- The low heat will activate the baking soda and create a gentle cleaning reaction.
- After the cycle, wipe the interior with a damp cloth.
- Repeat if necessary for particularly stubborn areas.
This low-heat method is gentle enough for regular use and is one of the best ways to maintain a clean oven interior without the intense heat of a full self-cleaning cycle.
Cleaning Oven Racks And Door Glass With Heat
Oven racks and door glass are two areas that collect the most grease and food residue. These components are exposed to direct heat and dripping food during every cooking session. Cleaning them requires a slightly different approach than cleaning the oven interior.
Cleaning Oven Racks Using Heat
Oven racks can be cleaned using heat in a few different ways. The most effective method involves using your oven’s self-cleaning cycle or a dedicated high-heat approach outside the oven.
For racks removed from the oven, you can place them in a large trash bag with a cup of ammonia, seal the bag, and leave it in a well-ventilated area overnight. The ammonia fumes will loosen the grease. However, if you prefer a heat-only method, try this:
- Place the racks in a large bathtub or utility sink.
- Pour boiling water over them until fully submerged.
- Add a quarter cup of dishwasher detergent.
- Let them soak for two to three hours.
- The heat combined with the detergent will dissolve the grease, making the racks easy to scrub clean.
Alternatively, you can heat the racks in your oven at 400 degrees Fahrenheit for 20 minutes, then immediately submerge them in hot soapy water. The rapid temperature change causes the grease to contract and release from the metal surface.
Cleaning The Oven Door Glass With Heat
The oven door glass tends to accumulate a thick layer of grease that can obscure your view of the food inside. Heat cleaning is particularly effective for this area because the glass conducts and retains heat well.
Try this heat-based approach for the door glass:
- Mix baking soda and water into a thick paste.
- Spread the paste generously over the greasy glass.
- Place a bowl of boiling water inside the oven on the rack below.
- Close the door and let the steam and heat work for 15 minutes.
- The warmth will activate the baking soda and soften the grease.
- Wipe the glass with a damp cloth. The grime should lift off with minimal effort.
- For any remaining residue, use a razor scraper at a 45-degree angle to gently remove it.
Regularly cleaning the door glass with this steam and heat method keeps it clear and prevents buildup from becoming a long-term problem.
Quick Tips For Maintaining A Clean Oven
The best way to keep your oven in great shape is to prevent heavy grease buildup in the first place. Regular maintenance using simple heat-based techniques can save you from deep cleaning sessions in the future.
Here are some practical tips to keep your oven clean between thorough cleaning sessions:
- Line the oven bottom with foil: Place a sheet of aluminum foil on the bottom rack to catch drips and spills. Replace it after each use.
- Wipe up spills immediately: When the oven is still warm after cooking, wipe up any spills with a damp cloth. The heat helps the residue come off easily.
- Use oven-safe baking sheets: Placing a baking sheet under dishes that may bubble over catches messes before they reach the oven floor.
- Run a quick steam clean monthly: Once a month, place a bowl of water with vinegar in the oven, heat to 350 degrees for 20 minutes, and wipe down. This prevents buildup from becoming a serious problem.
- Keep the oven door slightly ajar after cooking: This allows heat and moisture to escape, reducing condensation that can trap grease on interior surfaces.
- Use the broiler for spot cleaning: After removing racks, turn the broiler on high for five minutes to burn off any remaining loose food particles. Let it cool and wipe the interior clean.
Expert Insight
Professional oven cleaners recommend combining heat methods with natural cleaning agents for the best results. The heat loosens the grease while baking soda or vinegar provides additional cutting power. This combination is safe, effective, and works on virtually all oven types and models.
Common Mistakes To Avoid When Cleaning With Heat
While heat-based oven cleaning is highly effective, there are some common mistakes that can reduce its effectiveness or even damage your oven. Being aware of these pitfalls helps you avoid problems and get the best results every time.
Mistake One: Skipping Ventilation
One of the biggest mistakes people make is starting the self-cleaning cycle without proper ventilation. The process produces significant smoke and odors as it burns off grease and food particles. Without good airflow, the smoke can set off your smoke alarm and leave lingering odors in your kitchen.
Always open windows and turn on the exhaust fan before running any heat-based cleaning cycle. If your kitchen lacks a window, consider running a portable air purifier during the process.
Mistake Two: Leaving Racks Inside During Self-Cleaning
Some people leave oven racks inside during the self-cleaning cycle to save time. This is a mistake. The extreme heat can warp, discolor, or permanently damage metal racks. Always remove racks before running the self-cleaning cycle and clean them separately using one of the methods described above.
Mistake Three: Using Water On Hot Surfaces
Never introduce water or cold cloths to a hot oven surface. The sudden temperature change can cause thermal shock, which may crack the glass or damage the oven’s interior coating. Always wait for the oven to cool completely before wiping it down after any heat cleaning method.
Mistake Four: Overusing The Self-Cleaning Cycle
Running the self-cleaning cycle too frequently can wear out the oven’s insulation and heating elements over time. Most experts recommend using the self-cleaning cycle no more than three to four times per year. For regular maintenance, stick with the gentler steam cleaning methods.
Mistake Five: Ignoring The Oven Thermostat
If your oven’s thermostat is not calibrated correctly, the self-cleaning cycle may not reach the proper temperature. This means grease and food residue may not fully decompose, leaving behind a messy residue instead of turning to ash. Have your oven thermostat checked annually to ensure accurate temperature readings.
Comparison Of Heat-Based Oven Cleaning Methods
Not all heat-based cleaning methods are created equal. Different approaches work better for different situations, oven types, and levels of grime. Here is a comparison to help you choose the right method for your needs.
| Method | Best For | Time Required | Smoke Level | Effectiveness |
|---|---|---|---|---|
| Self-Cleaning Cycle | Heavy buildup and deep cleaning | 2-4 hours | High | Excellent |
| Steam Cleaning | Light grease and routine maintenance | 30 minutes | Low | Good |
| Boiling Water Method | Moderate baked-on grease | 20-30 minutes | Low to Medium | Very Good |
| Low-Heat Soak | Stubborn long-term stains | 1-2 hours | Low | Very Good |
| Broiler Spot Cleaning | Quick touch-ups and loose debris | 5-10 minutes | Medium | Good |
As you can see, each method has its place in an effective oven cleaning routine. For the best results, combine methods based on your needs. Use steam cleaning for regular maintenance and reserve the self-cleaning cycle for deeper cleaning sessions every few months.
Which Method Should You Choose?
The right method depends on how dirty your oven is and how much time you have. If your oven has not been cleaned in months and has visible layers of baked-on grease, the self-cleaning cycle or low-heat soak will give you the best results. For weekly or monthly maintenance, the steam cleaning approach takes only half an hour and keeps your oven in great shape.
If you are dealing with a specific problem area, such as the oven bottom or door glass, target that area with the boiling water method or a baking soda paste combined with steam. These focused approaches save time and effort compared to cleaning the entire oven interior.
Key Takeaways
- Heat breaks down grease naturally: Thermal decomposition turns baked-on grime into ash that wipes away easily.
- The self-cleaning cycle is powerful but needs preparation: Remove racks, wipe loose debris, and ventilate your kitchen before starting.
- Steam cleaning is the best gentle option: It uses moderate heat and moisture to dissolve grease without heavy smoke or fumes.
- Oven racks and door glass need targeted cleaning: These areas collect the most grease and benefit from specific heat-based methods.
- Regular maintenance prevents buildup: Quick steam cleans and wipe-downs after cooking keep your oven fresh and reduce deep cleaning needs.
- Avoid common mistakes: Never leave racks inside during self-cleaning, skip ventilation, or use water on hot surfaces.
- Combine heat with natural cleaners: Baking soda and vinegar enhance the effectiveness of heat-based cleaning methods.
Frequently Asked Questions
Can I use the self-cleaning cycle if my oven has a lot of loose food debris?
You should always remove loose food debris before starting the self-cleaning cycle. Large pieces of food can burn excessively and create thick smoke or even small flames inside the oven. A quick wipe-down with a damp cloth before running the cycle ensures a safer and more effective cleaning process.
Is it safe to use heat cleaning methods in a gas oven?
Yes, heat cleaning methods work safely in both gas and electric ovens. The self-cleaning cycle is available in most gas oven models and operates the same way. However, gas ovens may produce more combustion odors during the cycle due to the burner igniting at high temperatures, which is completely normal and temporary.
How often should I clean my oven using heat methods?
For most households, using the steam cleaning method once a month and the self-cleaning cycle two to three times per year is sufficient. The frequency depends on how often you cook and what types of food you prepare. Heavy baking or roasting may require more frequent deep cleaning sessions.
Why does my oven smell bad during the self-cleaning cycle?
The smell during a self-cleaning cycle comes from the burning of food residue and grease at very high temperatures. This is completely normal and expected. The odor usually dissipates within a few hours after the cycle completes. Ventilating your kitchen by opening windows and running the exhaust fan helps reduce the smell significantly.
Can I clean the oven racks in the self-cleaning cycle?
It is not recommended to clean oven racks in the self-cleaning cycle. The extreme heat can cause metal racks to warp, discolor, or become misshapen. Instead, remove racks and clean them separately using the boiling water method, a soaking solution, or by hand with a non-abrasive cleaner.
Does heat cleaning damage the oven’s interior coating?
When used correctly, heat cleaning does not damage the oven’s interior coating. In fact, the self-cleaning cycle is designed by manufacturers specifically for this purpose. However, using abrasive scrubbers or harsh chemical cleaners after the heat cycle can scratch or damage the coating. Always use soft cloths and gentle wiping motions.
=== CONCLUSION ===
How to clean oven with heat is one of the simplest and most effective approaches to keeping your kitchen appliance in top condition. Whether you use the self-cleaning cycle, steam cleaning, or the boiling water method, heat breaks down grease and food residue in a way that chemical cleaners simply cannot match.
The methods in this guide give you everything you need to tackle any level of oven grime without harsh chemicals or back-breaking scrubbing. From routine monthly steam cleans to deep cleaning sessions with the self-cleaning cycle, you now have a full toolkit of heat-based strategies at your fingertips.
Remember, the key to a consistently clean oven is regular maintenance. A few simple habits, like wiping up spills while the oven is still warm and running a quick steam clean once a month, will keep grease buildup under control. Your oven will look better, smell fresher, and perform more efficiently when it is properly maintained.
Start applying these heat-based cleaning techniques today, and you will wonder why you ever relied on chemical sprays and endless scrubbing. A clean oven is not just about appearances. It also improves cooking performance, reduces unpleasant odors, and extends the life of your appliance. Take the guesswork out of oven cleaning and let heat do what it does best.