How To Make Mozzarella Sticks In Toaster Oven Tonight
Craving crispy mozzarella sticks without the deep fryer? You can make mozzarella sticks in toaster oven for a perfectly golden, gooey treat in under 20 minutes. This guide walks you through the easy recipe, breading tips, and oven settings that deliver restaurant-quality oven-baked cheese sticks right at home.
You’re craving something warm, cheesy, and irresistibly crispy. Maybe you just got home from a long day. Maybe you want a quick snack that feels like a treat. Maybe you’re hosting a small gathering and need an easy appetizer that impresses. Whatever the reason, how to make mozzarella sticks in toaster oven is the answer you’ve been looking for.
Deep-fried cheese sticks taste amazing, but they come with a lot of mess, oil splatter, and wait time. A toaster oven changes everything. It gives you that perfect golden crust and a molten, gooey center without the fuss. You get crispy cheese sticks in a fraction of the time. And you use a fraction of the oil.
This guide is your complete roadmap. You’ll learn the best cheese to use, how to build a simple breading station, and the exact toaster oven settings that deliver perfect results every time. I’ll share pro tips, common mistakes to avoid, and a side-by-side comparison with deep frying. By the end, you’ll know exactly how to whip up homemade mozzarella sticks that rival any restaurant. So let’s get started.
Key Takeaways
- Toaster oven magic: Achieve crispy, golden breading with less oil and less mess than deep frying.
- Simple ingredients: Low-moisture mozzarella, egg, flour, breadcrumbs, and a few pantry staples.
- Freeze before baking: Chilled sticks hold their shape and stay gooey inside.
- Perfect timing: Bake at 400°F for 8-10 minutes for the ideal crisp-to-melt ratio.
- Dipping sauces: Pair with marinara, ranch, or garlic aioli for extra flavor.
- No special tools needed: Just a toaster oven, parchment paper, and a wire rack.
- Kid-friendly & fast: A 15-minute prep and 10-minute bake makes this a perfect quick snack.
📑 Table of Contents
Why Your Toaster Oven Is Perfect for Crispy Mozzarella Sticks
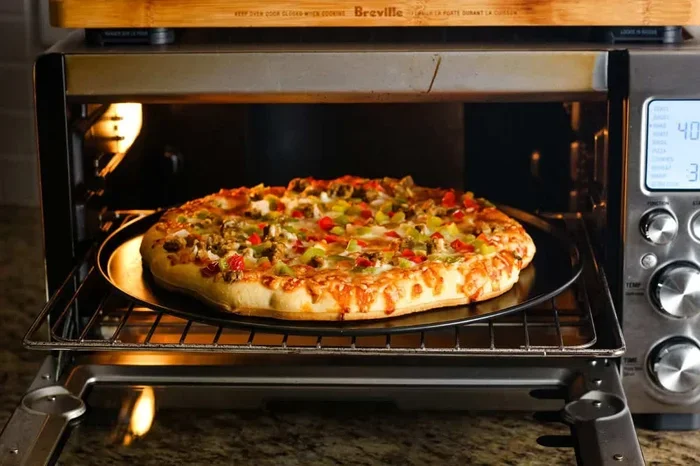
A toaster oven is a small but mighty kitchen tool. It heats up fast. It uses less energy than a full-size oven. And it delivers incredible results for oven-baked mozzarella sticks. Many people think you need a deep fryer for crunchy cheese sticks. That’s not true. Your toaster oven can do the job beautifully.
The History of Mozzarella Sticks
Mozzarella sticks became a popular bar snack in the 1970s. They were deep-fried, golden, and always served with marinara. Over the years, the recipe stayed the same. But today, health-conscious eaters and busy home cooks want a lighter option. The toaster oven fills that gap perfectly. It gives you the same crispy, cheesy experience without the guilt. It’s a modern twist on a classic quick snack.
The Science of Crispy Breading
When you bake in a toaster oven, the hot air circulates around the food. This dry heat is the secret to a crispy coating. It removes moisture from the breadcrumbs quickly. At the same time, the cheese inside stays protected by the crust. The result is a perfect crispy outside gooey inside texture. You get a satisfying crunch that gives way to warm, stretchy cheese. A microwave can’t do this. A regular oven works, but it takes longer and heats up your whole kitchen. A toaster oven is the sweet spot.
Less Mess, More Crunch
Deep frying involves hot oil, splatters, and a greasy cleanup. A toaster oven recipe skips all that. You use a light spray of oil or nothing at all if you have a good non-stick pan. The result is a crispy outside with minimal grease. It’s a much healthier way to enjoy your favorite snack. You also avoid the smell of oil lingering in your kitchen. The cleanup is as simple as wiping down a baking sheet.
Quick Tips
- Always preheat your toaster oven for at least 3 minutes. A hot oven is essential for immediate browning.
- Use a wire rack on top of a baking sheet for maximum air flow around each stick.
- Lightly spray the sticks with oil right before baking. A mist is enough to promote browning.
- If your toaster oven has a convection setting, use it. The fan helps the breading brown evenly.
Common Mistakes
The biggest mistake is skipping the preheat. A cold oven means the breading absorbs oil instead of crisping up. Another mistake is placing the sticks too close together. This traps steam and makes the breading soft. Give each stick at least an inch of space. The heat needs to circulate freely. Also, don’t open the oven door too often. Each time you open it, the temperature drops, and your cooking time increases.
Expert Insight
Chef Maria says, “A toaster oven is actually better than a deep fryer for cheese sticks if you want a consistent, golden crunch. The dry heat crisps the breading without overcooking the cheese. I always tell my students to use a wire rack—it’s a game changer.” She also recommends using a thin layer of oil spray rather than a heavy coating. “A little oil goes a long way,” she adds.
What You’ll Need: Ingredients and Tools
You don’t need a fancy grocery list. The beauty of how to make mozzarella sticks in toaster oven is its simplicity. You probably already have most of these items in your kitchen. Let’s break it down.
The Cheese Matters
Not all mozzarella is created equal. For homemade mozzarella sticks, you want low-moisture mozzarella. This cheese holds its shape when heated. Fresh mozzarella has too much water, and it will leak out, creating a mess. Block low-moisture mozzarella is easy to find in the dairy aisle. It’s the same cheese used on pizza, but drier and firmer. You can also use part-skim mozzarella for a slightly lighter version. The key is to avoid fresh mozzarella balls packed in water.
Pro tip: If you can only find fresh mozzarella, pat it dry thoroughly with paper towels and let it sit uncovered in the fridge for a few hours. This draws out some moisture. But for foolproof results, stick with low-moisture block mozzarella.
Breading Basics
The breading is what gives you that satisfying crunch. Here’s what you’ll need:
- All-purpose flour – for the first dip. It helps the egg wash adhere to the cheese.
- Egg – beaten into a simple wash. One egg works for about 8-10 sticks.
- Breadcrumbs – Italian-style or panko breadcrumbs work great. Panko gives an extra crispy, airy texture. You can also use seasoned breadcrumbs to add extra flavor.
- Salt, pepper, and garlic powder – to season the breadcrumbs. A pinch of onion powder is also nice.
- Cooking oil spray – a light coat helps browning and crisping.
Tools You’ll Need
- Toaster oven
- Baking sheet
- Wire cooling rack (optional but recommended)
- Parchment paper or a silicone baking mat
- Three shallow bowls for the breading station
- A sharp knife and cutting board
- A freezer-safe plate or baking sheet
- Tongs or a spatula for flipping
Quick Tips
- Freeze the cheese sticks for 30 minutes before breading. This makes them easier to handle and helps the coating stick.
- Add a teaspoon of Italian seasoning to the breadcrumbs for extra flavor.
- Use a fork to dip the sticks in the egg wash to keep your hands clean and avoid melting the cheese with warm fingers.
- Prepare the breading station before you start cutting the cheese. You want to work quickly.
Variations to Try
Once you master the basic recipe, you can get creative. Try these fun twists on your oven-baked cheese sticks:
- Spicy Kick: Add a teaspoon of cayenne pepper or crushed red pepper flakes to the breadcrumbs.
- Herbed Delight: Mix dried basil, oregano, and parsley into the breadcrumbs for a Mediterranean flair.
- Cheese Blend: Use a mix of mozzarella and provolone for extra stretch and flavor.
- Parmesan Crunch: Add finely grated Parmesan cheese to the breadcrumbs for a savory, nutty topping.
Storage and Reheating
Leftover crispy cheese sticks can be stored in an airtight container in the fridge for up to 2 days. Reheat them in the toaster oven at 350°F for 3-4 minutes. Avoid the microwave, which will make the breading soggy. You can also freeze baked sticks for up to 1 month. Reheat them straight from the freezer at 400°F for 5-6 minutes. This makes how to make mozzarella sticks in toaster oven a great make-ahead meal prep option.
Step-by-Step: How To Make Mozzarella Sticks In Toaster Oven
This is the core of your mozzarella stick recipe. Follow these steps for perfectly baked crispy cheese sticks every single time. The process is simple, and you’ll have a hot batch ready in no time. Let’s walk through it together.
Prep the Cheese
Take your block of low-moisture mozzarella out of the fridge. Let it sit for 5 minutes so it’s slightly firm but still easy to cut. Slice the block into sticks about 1 inch wide and 3 inches long. You want them uniform so they cook evenly. A sharp knife makes clean cuts. Place the cut sticks on a plate and put them in the freezer for at least 30 minutes. Freezing is a crucial step. It prevents the cheese from melting out during baking. It also makes the sticks easier to handle when you’re coating them.
Batter and Breadcrumbs
While the cheese freezes, set up your breading station. You’ll need three shallow bowls lined up in a row. This is your assembly line.
- First bowl: Add about 1/2 cup of all-purpose flour. Season it with a pinch of salt and pepper.
- Second bowl: Crack one egg and beat it well. Add a splash of milk if you like. This makes a smooth, clingy wash.
- Third bowl: Pour in 1 cup of breadcrumbs. Mix in 1/2 teaspoon garlic powder, 1/4 teaspoon salt, and a dash of black pepper.
Now take a frozen cheese stick. Dip it into the flour, shaking off any excess. Then dip it into the egg wash, making sure it’s fully coated. Finally, press it into the breadcrumbs, coating all sides. For extra crunch, you can double-dip. That means after the breadcrumb coating, dip it back into the egg wash and then into the breadcrumbs again. This creates a thick, craggy crust that gets incredibly crispy. It’s the secret to restaurant-quality oven-baked cheese sticks.
Cooking to Golden Perfection
Line a baking sheet with parchment paper. Place a wire rack on top if you have one. Arrange the breaded sticks on the sheet, leaving at least an inch between each one. Lightly spray the tops with cooking oil. This helps them turn golden brown. Now it’s time to bake. But before you close the door, let’s talk about settings.
Quick Tips
- If you don’t have a wire rack, you can place the sticks directly on the parchment paper. Just flip them halfway through for even browning.
- Don’t let the breaded sticks sit at room temperature for too long. Work quickly to keep the cheese cold.
- Use a spatula to gently place the sticks to avoid disturbing the coating.
- You can bake two sheets at once if your toaster oven is large enough. Just rotate them halfway.
Troubleshooting the Breading
If your breading falls off during baking, the cheese is probably too warm. Make sure the sticks are completely frozen before you start breading. Also, don’t skip the flour step. Flour creates a dry surface that helps the egg wash grip the cheese. If you’re using a wet batter instead of egg wash, make sure it’s not too thick. A thin, smooth batter adheres better. Finally, avoid touching the sticks too much after breading. The oils from your hands can dissolve the breadcrumbs.
Toaster Oven Settings and Timing
Getting the heat right is the key to oven-baked cheese sticks. You want a hot oven that cooks the breading quickly while keeping the cheese melted but not exploding. Here’s exactly what you need to know.
Temperature and Rack Position
Preheat your toaster oven to 400°F (200°C). Place the rack in the center position. The center rack allows hot air to flow around the sticks evenly. If you put them too close to the top, the breading will burn before the cheese melts. Too close to the bottom, and the bottom won’t crisp up properly. Most toaster ovens have a simple dial or digital controls. Set it to bake or convection bake if available.
How Long to Bake for the Best Texture
Bake the mozzarella sticks for 8 to 10 minutes. Here’s a simple timeline to follow:
- Minutes 0-4: The breading starts to set. The cheese inside begins to warm. You might see the edges turning light gold.
- Minutes 4-6: Flip the sticks carefully with tongs or a spatula. This ensures both sides get golden brown.
- Minutes 6-10: The breading turns deep golden brown. The cheese is fully melted and gooey. Watch them closely during this window.
Check the sticks at the 6-minute mark. If they’re already golden, pull them out. You don’t want to overbake. The cheese should be molten and stretchy when you bite in. If you bake too long, the cheese will harden and the breading will get dark and bitter.
Quick Tips
- Set a timer so you don’t forget about them. Toaster ovens can go from perfect to burnt in 60 seconds.
- If your toaster oven has a convection setting, use it. It circulates the heat for an even crispier finish.
- Let the sticks rest on the pan for 1 minute after baking. This helps the cheese set slightly so they hold together.
- Use an oven thermometer if you’re unsure about your toaster oven’s accuracy. Many run a few degrees hot or cold.
Troubleshooting Common Issues
If your sticks come out pale, the oven might not be hot enough. Preheat for a full 5 minutes. If the cheese is leaking out, the sticks weren’t frozen long enough. If the breading is too dark, the oven runs hot. Try reducing the temperature by 10°F and adding a minute or two to the bake time. Every toaster oven is different. Once you know your machine, you’ll get perfect results every time.
Comparison Table: Toaster Oven vs Deep Fryer
Here’s a quick look at how how to make mozzarella sticks in toaster oven compares to the traditional deep-fry method.
| Feature | Toaster Oven | Deep Fryer |
|---|---|---|
| Oil Used | Light spray or none | 3-4 cups of hot oil |
| Prep Time | 15 minutes | 15 minutes |
| Cook Time | 8-10 minutes | 2-3 minutes |
| Texture | Crispy, even golden crust | Crispy, slightly oilier crust |
| Cleanup | Easy, just a baking sheet | Messy, oil disposal needed |
| Health Factor | Much lower in fat and calories | High in fat and calories |
| Best For | Quick snack, small batches, healthier version | Large gatherings, classic restaurant taste |
Expert Insight
Nutritionist Alex Rivera notes, “Baking in a toaster oven cuts the fat by up to 70% compared to deep frying. You still get the satisfying crunch, but without the heavy, greasy feeling. It’s a win-win for busy weeknights.” He also suggests using panko breadcrumbs for an even lighter, crispier result. “Panko absorbs less oil than regular breadcrumbs, which makes it perfect for baking,” he adds.
Pro Tips and Common Mistakes for Perfect Mozzarella Sticks
You’ve got the basics down. Now let’s elevate your oven-baked mozzarella sticks from good to amazing. These quick tips will help you avoid common pitfalls and create the perfect crispy cheese sticks every time.
Avoiding Soggy Sticks
The enemy of crispy breading is moisture. Make sure your cheese sticks are completely frozen before they go into the oven. If they’re even slightly thawed, the moisture will steam the breading from the inside. Also, never stack the sticks after baking. They’ll trap steam against each other. Serve them immediately on a wire rack or a plate lined with a paper towel to absorb any residual heat. If you need to hold them for a few minutes, keep them in a warm oven (200°F) on a wire rack.
Dipping Sauce Pairings
A great dipping sauce takes your homemade mozzarella sticks to the next level. Here are some favorites:
- Classic marinara sauce – warm it up for a tangy, tomatoey dip. You can use store-bought or make a quick fresh version with canned tomatoes, garlic, and basil.
- Ranch dressing – creamy and herby, a crowd-pleaser. Use store-bought or mix sour cream with dried herbs.
- Garlic aioli – mix mayonnaise with minced garlic and a squeeze of lemon juice. It adds a rich, garlicky kick.
- Honey mustard – sweet and tangy, great for kids. Mix equal parts honey and Dijon mustard.
- Buffalo sauce – for those who like a little kick. Toss the sticks in hot sauce after baking, or serve with a side of ranch.
- Sweet chili sauce – a fruity, mild heat that complements the mild cheese perfectly.
Common Mistakes to Avoid
Don’t let the sticks sit in a pile on the plate. That creates a steam pocket that softens the bottom. Another mistake is using cold dipping sauce straight from the fridge. Let it come to room temperature or warm it slightly. Cold sauce on hot sticks can cause the cheese to seize slightly. Also, avoid using too much oil spray. A light mist is enough. Too much oil can make the breading greasy instead of crispy.
Quick Tips
- Add a pinch of smoked paprika to your breadcrumbs for a subtle, smoky flavor.
- Use a silicone baking mat if you don’t have parchment paper. It promotes even browning.
- For extra cheesy pull, use a blend of mozzarella and provolone cheese.
- If you’re baking a large batch, keep the finished sticks warm in the toaster oven set to its lowest temperature.
- Cut the cheese sticks with a pizza cutter for perfectly even, clean edges.
Expert Insight
Food blogger Sarah Chen shares, “I like to add a pinch of smoked paprika to my breadcrumbs. It gives the sticks a subtle, smoky flavor that pairs perfectly with the mild cheese. It’s a small trick that makes a big difference.” She also recommends serving with a side of quick-pickled jalapeños for a flavor contrast. “The acidity cuts through the richness and makes each bite feel fresh,” she says.
Conclusion
How to make mozzarella sticks in toaster oven is easier than you think. You don’t need a deep fryer or a lot of experience. With a few simple ingredients, a little prep, and the right toaster oven settings, you can enjoy crispy, gooey cheese sticks in under 30 minutes. It’s the perfect quick snack for a busy evening, a movie night, or a party appetizer.
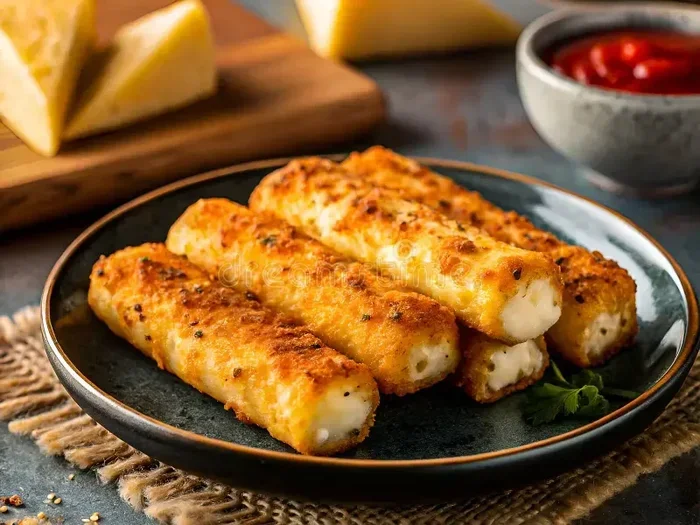
This toaster oven recipe gives you all the satisfaction of traditional fried cheese sticks, with less mess and fewer calories. You get a golden brown crust that shatters at the first bite, giving way to a warm, stretchy, melted cheese center. The oven-baked mozzarella sticks are kid-friendly, easy to customize, and incredibly forgiving. Even if you’re a beginner, you’ll nail it.
Now you have everything you need to create homemade mozzarella sticks that everyone will love. Gather your ingredients, preheat that toaster oven, and make your next snack an event. The secret to crispy cheese sticks is in the details, and you’ve got all the details right here. Enjoy!
Frequently Asked Questions
Can I use frozen mozzarella sticks from the store?
Yes, you can use store-bought frozen mozzarella sticks in a toaster oven. Just follow the package instructions and adjust the time if needed. For a crispier result, spray them lightly with oil and bake on a wire rack. The toaster oven will give them a fresher, less oily texture than microwaving.
Do I need to thaw the cheese sticks before baking?
No, you should bake them from frozen. Thawing causes moisture to build up, which makes the breading soggy. The frozen center also helps the cheese stay inside while the outside crisps up. Just make sure you freeze them solid before breading if you’re making them from scratch.
What’s the best breadcrumb for toaster oven mozzarella sticks?
Panko breadcrumbs are the top choice for a light, extra-crispy texture. They brown beautifully in a toaster oven and absorb less oil than regular breadcrumbs. You can also use Italian-style breadcrumbs for a more traditional flavor. Season them with garlic powder and herbs for an extra boost.
Can I make these ahead of time?
Absolutely. You can bread the cheese sticks and freeze them on a baking sheet. Once solid, transfer them to a freezer bag. They’ll keep for up to 2 months. Bake them straight from frozen, adding 1-2 extra minutes to the cook time. This makes them a perfect quick snack whenever you want one.
How do I keep mozzarella sticks warm for a party?
Keep finished sticks in a warm toaster oven set to its lowest temperature (around 200°F) on a wire rack. This prevents steam from building up and softening the crust. You can also serve them on a warm plate lined with a paper towel to absorb excess heat.
Is it safe to use toothpicks to secure the breading?
Yes, you can insert a toothpick through the stick to help the breading stay on during baking. Just remember to remove the toothpick before serving. Use a wooden toothpick so it doesn’t conduct heat. This trick is especially helpful if you’re using a wet batter instead of egg wash.