How To Clean The Worst Oven And Restore It Like New
Discover how to clean the worst oven and bring it back to life with simple household ingredients and proven techniques. This guide covers everything from tough burnt grease to stubborn stains, giving you step-by-step instructions that actually work. You will learn safe, effective methods that save money and protect your appliance. Whether your oven looks beyond saving, these tips will help you restore it like new.
Have you opened your oven door and felt your stomach drop? The worst kind of oven grime has taken over. Blackened walls, caked-on grease, and burnt food residue make even opening the door feel like a chore. But here is the good news. Cleaning the worst oven is totally doable, and you do not need expensive products or professional help to do it.
In this guide, we will walk you through every step to bring your dirty oven back to life. You will learn proven methods using simple ingredients you probably already have at home. We will cover everything from the inside oven walls to the oven racks and even the door glass. By the end, you will know exactly how to clean the worst oven and keep it sparkling for months to come.
Key Takeaways
- Baking soda and vinegar are your best friends: These affordable, natural ingredients break down even the worst oven grease safely.
- Patience is key: Letting your cleaning solution sit overnight makes removing tough burnt-on residue much easier.
- Never use harsh abrasives: They can damage your oven interior and void warranties. Stick to gentle but effective methods.
- Regular maintenance prevents buildup: A quick wipe after each use keeps your oven in great shape and reduces deep cleaning sessions.
- Oven racks need separate treatment: Soaking them in hot water with dish soap or using the bathtub method works wonders.
- Safety first: Always turn off and cool your oven before cleaning, and ensure good ventilation during the process.
📑 Table of Contents
- Why Ovens Get So Dirty So Fast
- What You Need Before You Start
- Step-by-Step: How To Clean The Worst Oven
- Cleaning Oven Racks Like a Pro
- Tackling Stubborn Stains and Heavy Grease Buildup
- How To Maintain Your Oven After Cleaning
- Common Mistakes People Make When Cleaning Their Oven
- Expert Tips for a Sparkling Oven
- Comparing Cleaning Methods
- Frequently Asked Questions
- Conclusion
Why Ovens Get So Dirty So Fast
Understanding what causes oven grime helps you prevent it. Every time you cook, fats, oils, and food particles splatter onto the oven walls. Over time, these residues bake on and harden into tough stains. The more you use your oven, the worse the buildup gets.
The Science Behind Burnt Grease
Grease undergoes a process called polymerization when exposed to high heat. This means it transforms from a liquid into a hardened, sticky substance. That is why splashes from last week’s roast feel like concrete now. Regular oven use accelerates this process, especially if you cook fatty foods often.
Common Mistakes That Make It Worse
Many people make small mistakes that speed up oven grime buildup. Here are a few to watch out for:
- Skipping the oven liner or aluminum foil on the bottom
- Not wiping spills right after they happen
- Using the wrong cleaning products that leave residue
- Ignoring the oven door seals where grease collects
- Never running a self-clean cycle when recommended
Avoiding these habits keeps your oven cleaner for longer and makes deep cleaning sessions far less frequent.
What You Need Before You Start
Gathering your supplies ahead of time saves you frustration. You do not need anything fancy. Most of what you need is already in your kitchen or bathroom cabinet.
Essential Cleaning Supplies
- Baking soda — the star of most oven cleaning methods
- White vinegar — cuts through grease and deodorizes
- Dish soap — cuts through surface grime
- Warm water — for mixing solutions and soaking
- Spray bottle — for applying solutions evenly
- Microfiber cloths or sponges — gentle on surfaces
- Rubber gloves — protects your hands
- Old toothbrush — great for tight corners and crevices
- Plastic scraper or putty knife — for removing hardened residue
What to Avoid
Some products do more harm than good. Stay away from steel wool pads, harsh chemical oven cleaners with strong fumes, and abrasive scrubbers. These can scratch the oven interior and damage the enamel coating over time. Your goal is to dissolve the grime, not scrape it away aggressively.
Step-by-Step: How To Clean The Worst Oven
Now for the main event. This is your complete roadmap for tackling even the filthiest oven. Follow these steps in order for the best results.
Step 1: Remove Everything from the Oven
Take out all oven racks, trays, and any removable parts. This gives you full access to every surface. Set the racks aside — we will clean them separately. Make sure the oven is completely cool before you start working inside it.
Step 2: Make Your Baking Soda Paste
Mix about half a cup of baking soda with a few tablespoons of warm water. Stir it until it forms a thick paste, similar to the consistency of toothpaste. This paste is your main weapon against grease and burnt-on food. It is gentle on the oven but tough on grime.
Step 3: Apply the Paste Generously
Put on your rubber gloves. Using your fingers or an old cloth, spread the baking soda paste all over the inside of the oven. Focus on the worst areas — the corners, the back wall, and anywhere you see heavy grease buildup. Avoid touching the heating elements directly with the paste. Let it sit for at least 12 hours or overnight.
Step 4: Wipe Away the Loosened Grime
After the paste has had time to work, use a damp microfiber cloth to wipe away the paste and dissolved grime. You will notice the dirt comes off much more easily than before. For stubborn spots, use an old toothbrush to gently scrub the area. Rinse the cloth frequently and keep going until most of the paste is gone.
Step 5: Use Vinegar for a Final Boost
Fill a spray bottle with white vinegar and spritz it over any remaining baking soda residue. The vinegar will fizz and react with the baking soda. This reaction helps lift the last bits of dirt and leaves your oven smelling fresh. Wipe everything down with a clean, damp cloth.
Step 6: Clean the Oven Door Glass
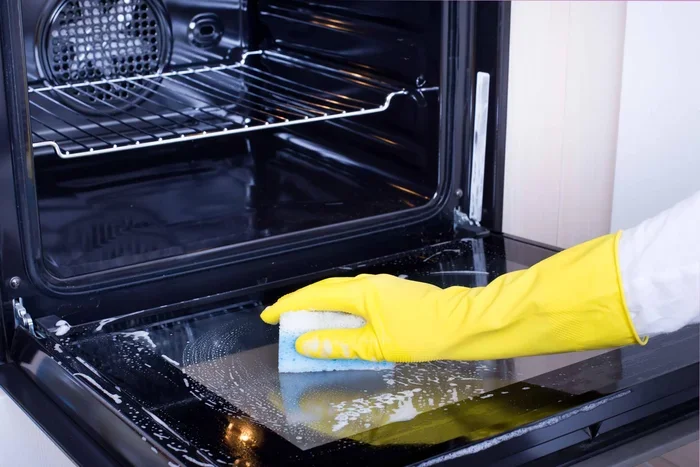
The oven door glass often shows every stain. Make a paste of baking soda and water, apply it to the glass, and let it sit for 30 minutes. Then wipe it clean with a damp cloth. For really tough marks on the door, mix a small amount of dish soap with warm water and use a sponge to work through the grime gently.
Cleaning Oven Racks Like a Pro
Oven racks collect a lot of grease and food debris. They need special attention to get truly clean. Here are two effective methods.
Method 1: The Bathtub Soak
Fill your bathtub with the hottest water you can tolerate. Add a generous squirt of dish soap and two tablespoons of baking soda. Submerge your oven racks completely and let them soak for several hours or overnight. The hot water softens the baked-on grease, making it easy to scrub off with a non-abrasive sponge.
Method 2: The Bag Method
Place your racks inside a large garbage bag. Add a mixture of dish soap and warm water. Seal the bag and leave it in the sun or a warm area for a few hours. The heat accelerates the cleaning process. After soaking, scrub the racks and rinse them thoroughly.
Once your racks are clean and dry, slide them back into the oven. You will immediately notice the difference they make in how your oven looks and performs.
Tackling Stubborn Stains and Heavy Grease Buildup
Sometimes the worst oven has stains that refuse to budge with baking soda alone. Here are a few extra tricks for those tough situations.
For Carbonized Burnt Food
Make a thick paste using cream of tartar and water. Apply it to the burnt spots and let it sit for 30 minutes. Cream of tartar is a mild acid that helps dissolve carbonized food without scratching the oven surface. Wipe clean with a damp cloth.
For Grease Stains on the Oven Floor
Sprinkle a layer of salt on fresh grease spills while they are still warm. The salt absorbs the grease and makes cleanup easier. For older, set-in grease stains, apply a mixture of dish soap and baking soda, let it sit for an hour, and scrub gently with a sponge.
For Lingering Odors
Even after cleaning, a bad smell can linger. Place a small bowl of white vinegar inside the oven and heat it to around 200 degrees Fahrenheit for about 15 minutes. The vinegar neutralizes odors naturally. You can also leave a box of baking soda inside the oven overnight to absorb any remaining smells.
How To Maintain Your Oven After Cleaning
Getting your oven clean is only half the battle. Keeping it that way requires a few simple habits. Regular maintenance makes future deep cleans much faster and easier.
Quick Daily Habits
- Wipe up spills immediately after the oven cools down
- Use an oven liner on the bottom to catch drips
- Cover dishes with foil when cooking messy foods
- Run a quick self-clean cycle once a month if your oven has this feature
Weekly and Monthly Routine
Once a week, give the inside of your oven a quick wipe with a damp cloth. Once a month, do a light deep clean using the baking soda paste method described above. This routine prevents heavy buildup and keeps your oven running efficiently.
When to Call a Professional
There are times when professional help makes sense. If your oven has a damaged interior coating, electrical issues, or persistent problems even after thorough cleaning, it is best to consult a technician. Never attempt to repair heating elements or electrical components yourself. Safety always comes first.
Common Mistakes People Make When Cleaning Their Oven
Even with the best intentions, people sometimes make mistakes that cause more harm than good. Here are the most common ones to avoid.
- Using oven cleaner on every surface: Some commercial cleaners are too harsh for certain oven parts. Always check your oven manual first.
- Scrubbing too hard: Aggressive scrubbing damages the oven’s protective coating. Let the cleaning solution do the work for you.
- Skipping the racks: Dirty racks affect how evenly your oven heats. Always clean them as part of your routine.
- Not ventilating the kitchen: Even natural cleaners produce fumes in enclosed spaces. Open a window or turn on a fan while cleaning.
- Rushing the process: Letting the cleaning solution sit is the most important step. Skipping the wait time means you are fighting stubborn stains twice.
Avoiding these mistakes saves you time, protects your oven, and ensures a much better result every time you clean.
Expert Tips for a Sparkling Oven
Professional cleaners share a few insider tips that make oven cleaning faster and more effective.
- Heat the oven first: Warming the oven to about 200 degrees before cleaning softens the grease and makes it easier to wipe away.
- Use a steam method: Boil a pot of water inside the oven for 10 minutes. The steam loosens caked-on grime, making it much easier to wipe clean.
- Clean after every use: A quick wipe with a damp cloth after each cooking session prevents buildup from becoming a nightmare.
- Replace oven seals when needed: Damaged door seals trap grease and odors. Inspect them regularly and replace them if they look worn or torn.
- Use lemon for freshness: Boil lemon slices in water inside the oven for a natural deodorizer and a fresh citrus scent.
These small changes add up over time. Your oven stays cleaner longer, and each cleaning session becomes quicker and less tedious.
Comparing Cleaning Methods
Not all oven cleaning methods are created equal. Here is a simple comparison to help you choose the best approach for your situation.
| Method | Best For | Time Required | Cost | Effectiveness |
|---|---|---|---|---|
| Baking Soda Paste | Moderate to heavy grime | 12+ hours (overnight) | Very low | High |
| Vinegar and Baking Soda | Light to moderate buildup | 1-2 hours | Very low | Moderate to high |
| Steam Method | Loosening stubborn grime | 30 minutes | Low | Good as a prep step |
| Commercial Oven Cleaner | Extremely tough, set-in stains | 1-2 hours | Moderate | Very high |
| Bathtub Soak for Racks | Dirty oven racks | 4-12 hours | Very low | High |
| Self-Clean Cycle | Routine maintenance | 2-4 hours | Free (built-in) | Good for light cleaning |
The baking soda paste method is the most popular and affordable approach for most people. It works well on the worst oven grime without exposing you to harsh chemicals. For extremely stubborn cases, you can combine methods — start with the paste, follow up with vinegar, and finish with a gentle scrub.
Frequently Asked Questions
Can I clean my oven without using any chemicals?
Yes, absolutely. Baking soda and vinegar are natural, non-toxic, and highly effective at breaking down oven grease. The steam method also works wonders without any chemicals at all. These approaches are safe for your family, your pets, and your oven interior.
How often should I deep clean my oven?
A deep clean every 3 to 6 months is ideal for most home cooks. However, if you use your oven daily or cook a lot of greasy foods, you may need to clean it more often. Regular light cleaning between deep sessions keeps the workload manageable.
Is the self-clean cycle safe for all ovens?
Most modern ovens have a self-clean feature that works well for routine maintenance. However, older ovens or those with damaged interiors may not handle the high heat safely. Always check your oven manual and follow the manufacturer’s guidelines before running a self-clean cycle.
What is the fastest way to clean a really dirty oven?
The fastest approach is to combine the steam method with a baking soda paste. Boil water inside the oven for 10 minutes to loosen the grime, then apply the baking soda paste and let it sit for an hour. Wipe it all away, and you will see dramatic results in under two hours.
Can I use oven cleaner on the oven racks?
It is best to avoid commercial oven cleaner on racks. The chemicals can leave a residue that affects food taste. Instead, soak the racks in hot soapy water or use the bathtub soak method for safer, more effective results.
Will cleaning my oven improve its performance?
Yes, it can. Built-up grease and food debris can block heat distribution and affect cooking efficiency. A clean oven heats more evenly, uses energy more efficiently, and lasts longer. Regular cleaning is one of the simplest ways to extend your oven’s lifespan.
Conclusion
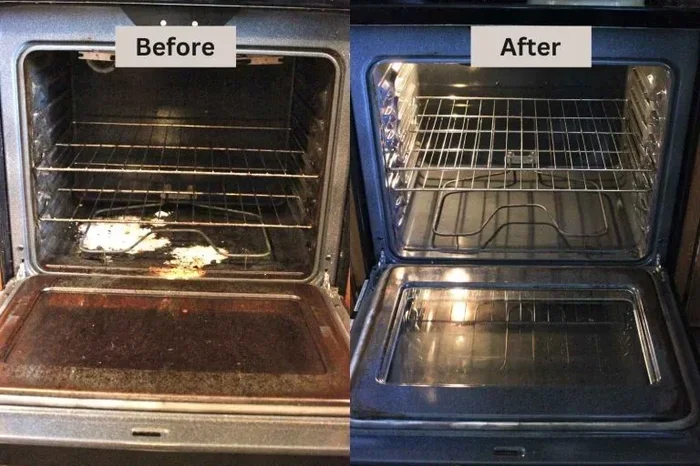
Learning how to clean the worst oven does not have to be a daunting task. With the right approach, the right supplies, and a little patience, you can transform even the filthiest oven into a sparkling, fresh-smelling appliance. The baking soda paste method, combined with vinegar and good old-fashioned elbow grease, handles nearly every level of oven grime.
Remember to clean your oven racks separately, tackle stubborn stains with targeted methods, and establish a simple maintenance routine. These habits keep your oven in top shape and make every future cleaning session faster and easier. Your oven works hard for you every day. Give it the care it deserves, and it will keep cooking your favorite meals for years to come.
Now that you have all the tools and knowledge, it is time to get started. Put on your gloves, grab that baking soda, and give your oven the deep clean it needs. You will be amazed at the results. A clean oven is not just about looks — it is about better cooking, better efficiency, and peace of mind every time you open that door.