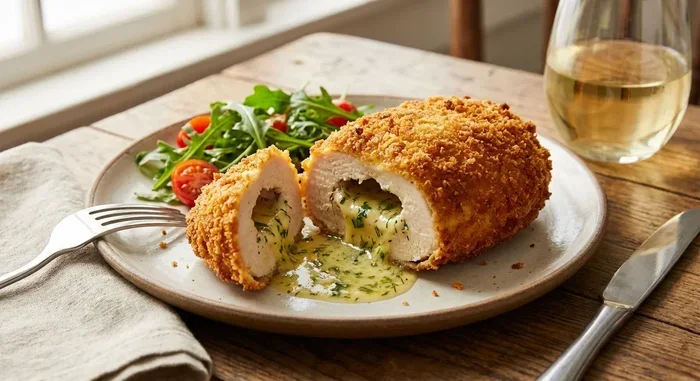
How Long To Cook Chicken Kiev In Oven A Simple Guide
How Long To Cook Chicken Kiev In Oven is easier than you think. This guide reveals the exact oven-baked chicken kiev cooking time, temperature, and pro tips for a crispy, golden crust and a juicy, butter-filled center. Whether you start with fresh or frozen chicken Kiev, you’ll learn the perfect chicken Kiev cooking time to impress everyone at dinner.
Ever wondered how long to cook chicken Kiev in oven? The answer is simpler than you think. This oven-baked chicken kiev recipe delivers a crispy golden shell and a warm, buttery center every single time. You don’t need a fancy kitchen or years of experience. With the right chicken Kiev cooking time and a hot oven, you can make this restaurant classic at home.
Chicken Kiev is a dish of chicken breast wrapped around a cold garlic-herb butter. The outside gets coated in breadcrumbs and baked until crispy. Many people fear making it from scratch, but the truth is, how long to cook chicken Kiev in oven depends on just a few simple factors. Fresh chicken needs less time than frozen. A higher temperature gives a faster, crunchier crust. I’ll walk you through every step, so you get perfect results without any guesswork.
In this guide, you’ll learn the exact temperatures, times, and tricks. I’ll share a chicken kiev recipe that works every time. You’ll also find tips for avoiding dry chicken and soggy breadcrumbs. By the end, you’ll feel confident enough to make this dish for a dinner party. Let’s get started with the basics.
Key Takeaways
- Perfect Temperature: Roast at 200°C (400°F) for even cooking and a crispy panko crust.
- Fresh vs Frozen: Fresh chicken Kiev takes 25-30 minutes; frozen needs 35-45 minutes for safe internal temp.
- Butter Matters: Use cold, seasoned butter for that classic oozing center.
- Crispy Coating: Panko breadcrumbs and a light egg wash create the best crunch.
- Resting is Key: Let the kiev rest 5 minutes to keep the butter inside.
- Internal Temp: Always check 75°C (165°F) for food safety.
📑 Table of Contents
What Is Chicken Kiev And Why Oven-Bake It?
Chicken Kiev is a breaded chicken cutlet with a cold garlic-herb butter filling. The classic version uses a whole chicken breast, pounded thin, wrapped around a cylinder of cold butter mixed with garlic, parsley, and sometimes lemon zest. The outside is dredged in flour, dipped in egg, and coated with panko breadcrumbs. Then it’s baked until the crust is golden and the chicken is cooked through.
The history of chicken Kiev is a bit murky, but it’s widely believed to have originated in Ukraine or Russia. Immigrants brought the recipe to the United States and Europe, where it became a staple of fine dining. For decades, it was a symbol of elegant home cooking. Today, oven-baked chicken kiev has made a comeback because it’s easier and healthier than deep-frying. You get all the flavor and crunch without the extra oil.
The beauty of this dish is its contrast. The outside is crunchy and savory. The inside is rich and juicy when you cut into it. Many people think chicken Kiev must be deep-fried. But baking in the oven is healthier and just as delicious. It also reduces the mess and risk of hot oil splatter. If you want a crispy chicken kiev without the deep fryer, the oven is your best friend. You can cook it on a sheet pan with minimal cleanup. It’s a perfect weeknight dinner that feels special.
Oven-baking also gives you more control. You can set a timer and walk away. The even heat of a chicken Kiev oven ensures the crust browns uniformly. There’s no need to flip or monitor constantly. This makes it ideal for beginners. Once you master the basic chicken kiev recipe, you can experiment with different herbs, spices, and even add a sprinkle of parmesan to the breadcrumbs.
Popular Variations
The classic garlic chicken Kiev is just the beginning. Some cooks add spinach and feta cheese to the butter filling for a Greek twist. Others use sun-dried tomatoes and basil for a Mediterranean flavor. You can even mix in a small cube of mozzarella so it melts into a gooey center. These variations don’t change the chicken Kiev cooking time much, but they add exciting new flavors. The core method stays the same: cold butter, panko crust, and a hot oven.
Step-By-Step Chicken Kiev Preparation
Before you think about how long to cook chicken Kiev in oven, you need to prepare the chicken properly. Good prep is the secret to a great result. Here’s how to do it, step by step.
Equipment You Need
You’ll need a meat mallet or rolling pin, plastic wrap, a baking sheet, a wire rack, and a meat thermometer. A sharp knife helps with trimming the chicken. A small offset spatula makes coating easier. You don’t need anything fancy. A simple kitchen setup works perfectly for this chicken kiev recipe. The most important tool is a reliable meat thermometer. It takes the guesswork out of doneness and ensures your oven-baked chicken kiev is always safe and juicy.
Gather Your Ingredients
You’ll need boneless, skinless chicken breasts, cold butter, garlic, fresh herbs like dill or parsley, panko breadcrumbs, all-purpose flour, eggs, salt, and pepper. Garlic chicken Kiev is the most popular version, but you can add a pinch of herbes de Provence for a French twist. Keep the butter very cold. Cold butter holds its shape inside the chicken and melts slowly during baking, creating that signature burst of flavor. If you can’t find panko, regular breadcrumbs work, but panko gives a lighter, crunchier texture.
For the best chicken kiev recipe, use unsalted butter so you can control the salt level. European-style butter with higher fat content works wonderfully because it’s firmer and holds its shape better. You’ll also want a good quality egg. Free-range eggs give a richer color to the wash. Don’t forget a pinch of smoked paprika in the panko. It adds depth and a beautiful golden color to the crust.
Make the Butter Filling
Soften the butter slightly, then mix in minced garlic, chopped herbs, salt, and pepper. Roll the mixture into a log using plastic wrap. Freeze it for 15 minutes until firm. This step is crucial. If the butter is too soft, it will leak out during baking and make a mess. A firm, cold log stays inside the chicken and melts perfectly in the oven.
You can prepare the butter log a day ahead. Just wrap it tightly and store it in the freezer. This makes the chicken kiev recipe even easier on the day you cook. Some cooks add a tiny bit of lemon zest to the butter. It brightens the flavor and cuts through the richness. I love that little touch. It makes the oven-baked chicken kiev taste fresher and more balanced.
Wrap and Coat the Chicken
Pound each chicken breast to an even thickness, about 1.5 to 2 centimeters. Place the cold butter log in the center. Wrap the chicken tightly around the butter, sealing the seam with a toothpick if needed. Then dredge in flour, dip in beaten egg, and coat with panko breadcrumbs. For extra crunch, you can double-dip in egg and panko. This chicken kiev recipe method ensures a thick, even crust that stays crispy even after baking.
Work quickly during coating. The warmth of your hands can soften the butter. If the butter starts to melt, pop the wrapped kiev back in the freezer for a few minutes. This is a pro trick for crispy chicken kiev. The colder the chicken goes into the oven, the better the final result.
Chill Before Baking
Place the wrapped kiev pieces on a tray and refrigerate for at least 30 minutes. Chilling helps the coating set and prevents the butter from melting too early. This is a key tip for oven-baked chicken kiev that stays intact and looks beautiful when served. You can also freeze the coated kiev for up to 2 hours. This is perfect if you want to how long to cook chicken Kiev in oven straight from frozen, but I’ll cover that in the next section.
How Long To Cook Chicken Kiev In Oven
This is the heart of the guide. The chicken Kiev cooking time varies based on whether your chicken is fresh or frozen, and what oven temperature you use. I’ll break it down clearly so you never have to guess again.
Fresh Chicken Kiev Cooking Time
For fresh, prepped chicken Kiev, how long to cook chicken Kiev in oven at 200°C (400°F) is about 25 to 30 minutes. The chicken should reach an internal temperature of 75°C (165°F) in the thickest part. The panko crust turns deep golden brown by then. If you like a thicker crust, you can bake for an extra 5 minutes, but watch the butter so it doesn’t burst out too early.
A standard chicken breast weighs about 150 to 200 grams. Thicker cuts may need an additional 5 minutes. Always use a meat thermometer. The chicken Kiev oven time is a guideline, but the thermometer is the truth. Without it, you’re just guessing, and guessing can lead to dry chicken or undercooked centers.
Frozen Chicken Kiev Cooking Time
If you’re using frozen chicken Kiev, you need more time. Place the frozen pieces on a lined baking tray and bake at 200°C (400°F) for 35 to 45 minutes. The chicken Kiev oven time is longer because the center must thaw and cook through. Always check the internal temperature. It must reach 75°C (165°F) for food safety. Frozen kiev can sometimes have a soggy bottom if not placed on a wire rack. Use a rack for even air circulation.
Never thaw frozen chicken Kiev at room temperature. This encourages bacteria growth. If you want to thaw it, do so in the fridge overnight. But honestly, baking from frozen works perfectly fine and saves time. Just add a few extra minutes to the chicken Kiev cooking time.
Temperature Guide Comparison
Here’s a quick comparison table to help you choose the right settings.
| Type | Oven Temp | Cooking Time | Internal Temp | Rest Time |
|---|---|---|---|---|
| Fresh Chicken Kiev | 200°C (400°F) | 25-30 minutes | 75°C (165°F) | 5 minutes |
| Frozen Chicken Kiev | 200°C (400°F) | 35-45 minutes | 75°C (165°F) | 5 minutes |
| High-Heat Crispy Method | 220°C (425°F) | 20-25 minutes (fresh) | 75°C (165°F) | 5 minutes |
The high-heat method gives an extra-crispy crust in less time. Just be careful not to burn the panko. How long to cook chicken Kiev in oven at 220°C (425°F) works well for thin-cut breasts. Thicker cuts need the standard 200°C to cook through without burning the outside. I recommend the standard 200°C for most home cooks. It’s forgiving and gives you a wider window of perfect doneness.
Quick Tips For Perfect Timing
Set a Timer: Even if you think you know the time, set a timer. Ovens vary, and the first batch is always a learning experience.
Use a Wire Rack: This is the single biggest upgrade for crispy results. It lifts the kiev off the tray and allows hot air to flow underneath.
Don’t Overcrowd the Pan: Leave at least 2 centimeters between each piece. Overcrowding traps steam and makes the breadcrumbs soggy.
Check Early: Start checking at the lower end of the time range. A slightly undercooked kiev can go back in for a few more minutes. An overcooked one is ruined.
These chicken Kiev tips are simple but powerful. They take the guesswork out of how long to cook chicken Kiev in oven and give you consistent, delicious results every time.
Checking Doneness
The best way to know your chicken Kiev is done is with a meat thermometer. Insert it into the thickest part of the chicken, avoiding the butter center. The reading should be 75°C (165°F). If you don’t have a thermometer, cut into the thickest part. The juices should run clear, not pink. The butter will be melted and slightly golden. A slight hiss when you cut in means the butter is hot and ready to burst out.
Some people worry about the butter exploding. It can happen if the chicken is undercooked or if the butter was too warm to start. To prevent this, make sure the butter log is frozen solid before wrapping. Also, don’t skip the resting time after baking. The butter settles and the crust firms up. When you cut in, the butter will flow out slowly and beautifully, not spurt everywhere.
Expert Tips For Crispy, Juicy Results
Getting the perfect crispy chicken kiev is all about small details. These chicken Kiev tips come from years of testing this chicken kiev recipe. Follow them and you’ll never have a soggy kiev again.
Use Cold Butter: This cannot be overstated. Cold butter melts slowly, giving the chicken time to cook through before the center gives way. If your butter is room temperature, it will leak out immediately and you’ll have a flat, greasy kiev. Always start with butter straight from the fridge or freezer.
Double Coat the Panko: After the first egg wash and panko layer, dip again in egg and panko. This creates a thick, crunchy shell that stays crisp even after resting. It’s the secret to restaurant-quality oven-baked chicken kiev. The double coat also helps seal in the juices, keeping the chicken moist.
Rest on a Wire Rack: Never place your kiev directly on a paper towel or plate. The steam will make the bottom soggy. A wire rack set over a baking tray lets hot air circulate all around the piece. The crust stays crispy from all sides. This is one of the most overlooked tips for crispy chicken kiev.
Don’t Skip the Rest: Let the kiev rest for 5 minutes after baking. This allows the juices to redistribute and the butter to settle. If you cut in too soon, the melted butter will pour out onto the plate instead of staying inside the chicken. The resting time also lets the internal temperature rise slightly, ensuring a perfectly safe and juicy bite.
Add a Pinch of Paprika: Mix a little smoked paprika into the panko for color and a subtle smoky flavor. This is a small change that makes a big difference in the final chicken kiev recipe. You can also add a tiny bit of garlic powder or onion powder to the panko for extra savory depth.
Use a Meat Mallet: Pounding the chicken evenly is a game-changer. Uneven thickness leads to uneven cooking. A mallet or rolling pin takes just a few minutes and ensures every piece cooks at the same rate. This is especially important when you’re cooking how long to cook chicken Kiev in oven for a crowd.
Pro Insights From Professional Cooks
Professional chefs often say that the secret to great chicken Kiev is confidence. Don’t be afraid to handle the cold butter. The more you practice, the easier it becomes. I’ve made hundreds of these, and I can tell you that the first few might not be perfect. That’s okay. The flavor will still be amazing. The crust might not be picture-perfect, but it will still be crispy and delicious. The key is to keep trying and adjust your chicken Kiev cooking time based on your own oven.
Another expert insight is to use a chicken Kiev that’s slightly larger than you think you need. The chicken shrinks as it cooks. A generous wrap ensures the butter stays fully enclosed. You can also experiment with different herb combinations. Fresh tarragon and chives make a classic French-style oven-baked chicken kiev. Rosemary and thyme give it a Mediterranean twist. The possibilities are endless, and that’s what makes this dish so fun to cook.
Common Mistakes And How To Fix Them
Even experienced cooks make mistakes with chicken Kiev. Knowing what can go wrong helps you avoid it. Here are the most common issues and simple fixes.
Butter Leaking Out: If the butter melts and leaks during baking, your chicken Kiev cooking time was probably too short, or the butter was too warm. Make sure the butter log is rock-hard from the freezer before wrapping. Also, don’t skip the chilling step after wrapping. If butter still leaks, you can try sealing the seam with a toothpick, but remove it before serving. The best fix is prevention: colder butter and a tighter wrap.
Dry Chicken: Overcooking is the number one cause of dry chicken Kiev. Use a meat thermometer and pull the kiev out as soon as it hits 75°C (165°F). The carryover heat will raise the temperature a few more degrees while it rests. If you leave it in too long, the chicken breast will lose its juiciness. I like to pull my kiev at 72°C and let it rest. The final temperature will reach 75°C safely, and the chicken stays incredibly juicy.
Soggy Breadcrumbs: This happens when the kiev is placed on a flat surface that traps steam. Always use a wire rack. Also, make sure the panko is dry and not clumped. A light, even coat of egg helps the panko stick without becoming soggy. If you’re using frozen chicken Kiev, the thawed surface moisture can cause sogginess. Pat the outside dry with paper towels before coating. This small step makes a huge difference.
Uneven Cooking: If the chicken breasts are different thicknesses, they’ll cook unevenly. Pound them to a uniform 2cm thickness before wrapping. This ensures how long to cook chicken Kiev in oven is consistent for every piece. No more raw centers or overcooked edges. Uniform thickness also means the butter melts at the same rate throughout, giving you that perfect burst of flavor every time.
Burnt Panko: If the top is browning too fast, tent the kiev loosely with foil for the last 5 minutes. This reflects some heat and slows down the browning without steaming the crust. It’s a simple trick that saves many a crispy chicken kiev from turning dark and bitter.
Serving, Storing, And Final Thoughts
Chicken Kiev is best served hot and crispy. Place each piece on a warm plate with a wedge of lemon and a sprinkle of fresh herbs. Classic sides include roasted potatoes, steamed green beans, or a simple mixed salad. A light garlic aioli or lemon butter sauce pairs beautifully with the rich, herby butter inside the chicken. I love serving it with creamy mashed potatoes and roasted asparagus. The combination is comforting and elegant.
Side Dish Ideas: Try a crisp arugula salad with shaved parmesan and lemon vinaigrette. Or serve with garlic roasted baby potatoes and broccolini. A warm crusty bread is perfect for mopping up any extra butter sauce. For a lighter meal, pair with a simple cucumber and dill yogurt sauce and some quinoa.
Storing Leftovers: Let the kiev cool completely, then store in an airtight container in the fridge for up to 2 days. Reheat in the oven at 180°C (350°F) for 10-15 minutes. Avoid the microwave, which will make the panko soggy and the butter rubbery. For the best crispy chicken kiev experience, always reheat in the oven or air fryer. The air fryer is a fantastic tool for reviving leftover kiev. It restores the crunch in just 3-4 minutes at 180°C.
Freezing Uncooked Kiev: You can freeze the prepared, uncooked kiev for up to 3 months. Wrap each piece tightly in plastic wrap and foil. When ready to cook, bake from frozen, adding 10 minutes to the chicken Kiev oven time. This is a great make-ahead chicken kiev recipe for busy weeknights. I often prep a batch on Sunday and freeze them. During the week, I just pop one in the oven and have a restaurant-quality dinner in 40 minutes.
Freezing Cooked Kiev: You can also freeze cooked kiev, but the texture won’t be as crispy when reheated. If you must freeze cooked kiev, wrap it tightly and reheat in the air fryer at 180°C for 8-10 minutes. The air fryer will crisp up the outside better than the oven alone. Just remember that the butter filling might not be as dramatic after freezing and reheating. The flavor is still great, though.
How Long To Cook Chicken Kiev In Oven is a question with a simple, satisfying answer. With the right temperature and a little patience, you can create a restaurant-quality dish in your own kitchen. Fresh chicken Kiev bakes in 25-30 minutes at 200°C. Frozen pieces need 35-45 minutes. Always use a meat thermometer to ensure the internal temperature reaches 75°C. The secret to perfect oven-baked chicken kiev lies in cold butter, a double panko coating, and a wire rack for resting. Follow these steps, and you’ll have crispy, juicy chicken Kiev that will impress anyone at the table.
Now it’s your turn. Try this chicken kiev recipe tonight and enjoy the magic of a perfectly baked chicken Kiev. You’ll be surprised how easy it is. Once you make it once, you’ll want to make it again and again. Serve it at your next dinner party, or enjoy it as a cozy family meal. The chicken Kiev cooking time is short, and the results are always worth it. Happy cooking!
Frequently Asked Questions
Can I use regular breadcrumbs instead of panko for chicken Kiev?
Yes, you can, but panko gives a lighter, crunchier crust that stays crispy longer. Regular breadcrumbs work in a pinch and will still give you a golden coating. The chicken Kiev cooking time stays the same regardless of which breadcrumb you choose.
How do I know if my frozen chicken Kiev is cooked through?
Use a meat thermometer inserted into the thickest part of the chicken. It must read 75°C (165°F). If you don’t have a thermometer, cut into the center and check that the juices run clear and the butter is fully melted and hot.
Can I bake chicken Kiev on a baking sheet without a wire rack?
You can, but the bottom will likely become soggy because steam gets trapped. A wire rack is highly recommended for the crispiest results. If you only have a baking sheet, place a cooling rack on top of it to lift the kiev off the surface.
What temperature should I use for frozen chicken Kiev?
Bake frozen chicken Kiev at 200°C (400°F) for 35 to 45 minutes. The higher temperature ensures the outside crisps while the inside thaws and cooks through. Always check the internal temperature before serving.
How long can I store leftover chicken Kiev in the fridge?
Leftover chicken Kiev keeps in the fridge for up to 2 days when stored in an airtight container. Reheat it in the oven or air fryer to maintain the crispy coating. Avoid the microwave, which will make the breadcrumbs soft and the butter rubbery.
Is it safe to cook chicken Kiev from frozen?
Yes, it is completely safe to cook chicken Kiev from frozen as long as you bake it long enough for the internal temperature to reach 75°C (165°F). Just add about 10 extra minutes to the standard chicken Kiev oven time and always use a meat thermometer to confirm doneness.