How To Make Perfectly Crispy Pierogies In The Oven Today
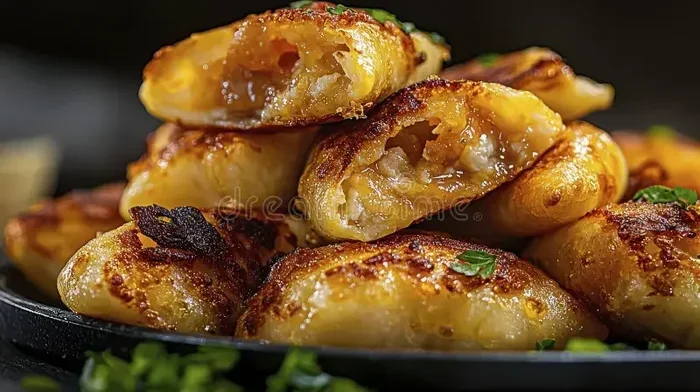
Making pierogies in the oven is the easiest way to get perfectly crispy edges without all the fuss of frying. This guide walks you through everything from making the dough to choosing the best fillings and toppings. You will learn how to bake frozen or homemade pierogies so they come out golden, crunchy, and full of flavor. Whether you are a beginner or a seasoned cook, these simple steps will transform your pierogies game. Get ready to enjoy bakery-quality crispy pierogies in the oven with minimal effort.
There is something deeply satisfying about pierogies in the oven. They come out golden, crispy, and loaded with flavor without requiring a pot of boiling water or a skillet full of oil. If you have been wondering how to make pierogies in the oven, you have come to the right place.
This guide covers everything from scratch-made dough to delicious fillings and the best oven-baked pierogies tips. You will learn the exact temperatures, timing, and tricks that guarantee crispy edges every single time. Whether you are cooking for a family dinner or meal prepping for the week, oven-baked pierogies are a game changer.
The beauty of making crispy pierogies in the oven lies in the simplicity. You do not need fancy equipment or years of cooking experience. A basic pantry, a baking sheet, and about an hour of your time is all it takes. Let us dive in and make the best pierogies you have ever tasted.
Key Takeaways
- Oven-baked pierogies are healthier and easier: You skip the oil and stovetop monitoring while still getting crispy results.
- Parboiling before baking is the secret: This step ensures the filling cooks through while the outside gets perfectly golden.
- You can use frozen pierogies directly: No need to thaw them first, which saves time and keeps the dough intact.
- Toppings make all the difference: Sour cream, caramelized onions, and butter elevate baked pierogies from simple to restaurant-quality.
- Temperature and timing matter: Baking at 400°F for 20-25 minutes gives you the best crispy pierogies in the oven.
- You can customize fillings endlessly: Potato, cheese, meat, and fruit fillings all work beautifully in the oven.
- Leftover pierogies reheat wonderfully: The oven keeps them crispy even on day two.
📑 Table of Contents
- Why Oven-Baked Pierogies Are a Game Changer
- Ingredients You Will Need
- How To Make the Pierogies Dough
- Filling Options and How To Prepare Them
- Step-by-Step: Baking Pierogies In The Oven
- Toppings and Serving Ideas
- Common Mistakes to Avoid
- Expert Insights on Oven-Baked Pierogies
- Comparison: Oven-Baked vs. Pan-Fried Pierogies
- Frequently Asked Questions
- Conclusion
Why Oven-Baked Pierogies Are a Game Changer
Healthier Than Traditional Frying
Traditional pierogies are pan-fried in butter or oil. That gives them a rich flavor but adds a lot of extra fat. Baking pierogies in the oven uses dry heat, which means you skip the oil entirely. The result is a lighter dish that still has a satisfying crunch.
Many people love homemade pierogies but feel guilty about the frying process. Oven baking solves that problem. You get the same crispy exterior and soft, pillowy interior without the extra calories from oil or butter. It is a win-win for your taste buds and your health goals.
Less Hands-On Effort
When you pan-fry pierogies, you need to watch them constantly. You have to flip them at the right time and manage the heat carefully. One moment of distraction and they burn.
Oven-baked pierogies recipe methods are much more forgiving. You place them on a lined baking sheet, set the timer, and walk away. While they bake, you can prep your toppings, set the table, or relax with a drink. The oven does all the work for you.
Perfect for Batch Cooking
One of the biggest advantages of oven-baked pierogies is scalability. You can fit dozens of pierogies on a single baking sheet. This makes them ideal for feeding a crowd or preparing meals for the entire week.
Frozen pierogies also work beautifully in the oven. You do not even need to thaw them first. Just spread them out on the sheet and bake. This makes how to make pierogies in the oven one of the easiest dinner solutions for busy weeknights.
Ingredients You Will Need
For the Pierogies Dough
Making the dough from scratch is simpler than most people think. You only need a few basic ingredients that you probably already have in your kitchen.
- All-purpose flour: About 2 cups forms the base of the dough.
- Egg: One large egg binds everything together.
- Sour cream: This adds softness and a slight tang to the dough.
- Salt: A teaspoon enhances the overall flavor.
- Warm water: Just a few tablespoons to bring the dough together.
If you do not want to make dough from scratch, store-bought wonton wrappers or pre-made pierogi dough work perfectly. This shortcut still gives you delicious homemade pierogies without the extra effort.
For the Classic Potato and Cheese Filling
This is the most popular filling for oven-baked pierogies. It is creamy, comforting, and pairs beautifully with a crispy exterior.
- Russet potatoes: About 3 medium potatoes, boiled and mashed.
- Farmer’s cheese or cottage cheese: One cup, drained.
- Butter: Two tablespoons for richness.
- Salt and pepper: To taste.
- Fresh chives: Optional but highly recommended for color and flavor.
For the Meat Filling Option
Meat-filled pierogies are a hearty favorite. Ground pork or beef works wonderfully here.
- Ground pork: Half a pound, cooked and seasoned.
- Onion: One small onion, finely diced and sautéed.
- Garlic: Two cloves, minced.
- Salt, pepper, and paprika: For seasoning the filling.
For Baking and Topping
- Butter or olive oil: For brushing the pierogies before baking.
- Sour cream: The classic topping.
- Caramelized onions: Adds sweetness and depth.
- Fresh dill or parsley: For a bright, fresh finish.
How To Make the Pierogies Dough
Mixing the Dough
Start by placing 2 cups of flour in a large mixing bowl. Make a well in the center and add one egg, two tablespoons of sour cream, and a teaspoon of salt. Pour in a few tablespoons of warm water gradually while mixing with a fork.
Once the mixture starts coming together, use your hands to knead the dough. Knead for about 4 to 5 minutes until the dough becomes smooth and elastic. It should not be sticky. If it feels too dry, add a tiny bit more water. If it is too wet, sprinkle in a little more flour.
Rolling and Cutting
Divide the dough into two equal portions. This makes it easier to work with. On a lightly floured surface, roll one portion out to about 1/8 inch thickness. Use a round cutter or a glass to cut out circles about 3 inches in diameter.
Repeat with the second portion of dough. You should get around 20 to 24 circles from this recipe. Gather any leftover dough, re-roll it, and cut more circles. Oven-baked pierogies benefit from a thin, even dough because it crisps up nicely in the heat.
Filling and Sealing
Place a small spoonful of filling in the center of each dough circle. Do not overfill. Too much filling makes it hard to seal the edges and can cause the pierogies to burst in the oven.
Fold the dough over the filling to form a half-moon shape. Press the edges firmly to seal them. You can use a fork to crimp the edges, which also adds a decorative touch. Place the sealed pierogies on a lightly floured surface and repeat until all the dough and filling are used up.
Filling Options and How To Prepare Them
Potato and Cheese Filling
This is the classic pierogies filling that most people love. Boil peeled potatoes until they are completely tender, about 15 to 20 minutes. Drain them well and mash until smooth.
Add the farmer’s cheese, melted butter, salt, and pepper. Mix everything together until it forms a creamy, spreadable filling. Let it cool completely before filling the dough. Warm filling can make the dough soggy and difficult to work with.
Sauerkraut and Mushroom Filling
This filling is a traditional Eastern European favorite. Sauté diced mushrooms in a little butter until golden. Add drained sauerkraut and cook for another 5 minutes. Season with salt, pepper, and a pinch of caraway seeds.
This combination of baked pierogies with sauerkraut filling has a tangy, earthy flavor that pairs perfectly with a dollop of sour cream. It is one of the most popular variations for oven-baked pierogies.
Blueberry or Fruit Filling
Do not overlook sweet pierogies! Blueberry, strawberry, or apple fillings make a delicious dessert option. Mix fresh or frozen berries with a little sugar and a squeeze of lemon juice.
For fruit pierogies recipe variations, you can also add a touch of cinnamon. These sweet pierogies bake beautifully in the oven and get lightly caramelized edges. Serve them with a sprinkle of powdered sugar and a side of whipped cream.
Step-by-Step: Baking Pierogies In The Oven
Step One: Preheat Your Oven
Preheat your oven to 400°F. This is the sweet spot for crispy pierogies in the oven. The high heat creates a golden-brown crust while keeping the inside soft and fully cooked. Line a large baking sheet with parchment paper or a silicone baking mat to prevent sticking.
Step Two: Prepare the Pierogies
If you are using homemade pierogies, place them on the baking sheet with a little space between each one. If you are using frozen pierogies, you do not need to thaw them first. Just spread them out in a single layer on the baking sheet.
Brush each pierogi lightly with melted butter or olive oil. This step is what creates the crispy, golden exterior. Do not skip it. The butter or oil helps the dough brown and become beautifully crunchy in the oven.
Step Three: Bake to Perfection
Place the baking sheet in the preheated oven and bake for 15 minutes. After 15 minutes, carefully flip each pierogi using a spatula. This ensures both sides get evenly crispy.
Return the baking sheet to the oven and bake for another 10 to 15 minutes. The pierogies cooking time is complete when they are golden brown and the edges look slightly crispy. If you are using frozen pierogies, add an extra 5 minutes to the bake time to make sure the inside is fully heated through.
Step Four: The Secret Parboiling Step
For homemade pierogies, there is one extra step that takes the results to the next level. Before baking, bring a pot of salted water to a boil. Drop the pierogies in and cook for 2 to 3 minutes, or until they float to the surface.
Remove them with a slotted spoon and let them drain on a towel. Then place them on the baking sheet and proceed with the oven step. Boiled then baked pierogies have a perfectly cooked interior and an even crispier outside. This is the method that separates good oven-baked pierogies from great ones.
Quick Tips for the Best Results
- Do not overcrowd the baking sheet: Leave space between each pierogi so hot air circulates freely.
- Use parchment paper: It prevents sticking and makes cleanup a breeze.
- Flip halfway through: This is the single biggest tip for even browning.
- Brush with butter: It adds flavor and helps achieve that golden crunch.
- Let them rest for 2 minutes: This allows the filling to set slightly before serving.
Toppings and Serving Ideas
Classic Sour Cream and Onions
The most traditional way to serve pierogies in the oven is with a generous dollop of sour cream and sautéed caramelized onions. The cool, creamy sour cream balances the warm, crispy pierogies perfectly.
To caramelize onions, cook thinly sliced onions in butter on low heat for about 20 to 25 minutes. Stir occasionally until they turn deep golden brown and sweet. Spread them over the pierogies right before serving for the best flavor.
Butter and Fresh Herbs
For a simpler approach, melt a few tablespoons of butter and drizzle it over the hot pierogies. Sprinkle with fresh dill, parsley, or chives. This classic combination lets the flavor of the crispy pierogies in the oven shine on its own.
Spicy and Bold Toppings
If you like a little heat, try topping your oven-baked pierogies with a drizzle of hot sauce or a sprinkle of red pepper flakes. Pickled jalapeños and sliced radishes also add a nice crunch and tang.
For a more substantial meal, serve the pierogies alongside a crisp green salad or roasted vegetables. A side of applesauce is another traditional pairing that works wonderfully, especially with potato-filled pierogies.
Meal Pairing Ideas
- Weeknight dinner: Serve oven-baked pierogies with a simple side of steamed broccoli and crusty bread.
- Brunch option: Pair pierogies with scrambled eggs and a fresh fruit salad.
- Game day snack: Set up a pierogi bar with multiple toppings and let everyone customize their plate.
- Holiday meal: Serve alongside roasted meats and a hearty vegetable casserole.
Common Mistakes to Avoid
Overfilling the Pierogies
The most common mistake when making homemade pierogies is adding too much filling. When the pierogies bake, the filling expands and pushes against the dough. This causes them to burst open in the oven, and the filling leaks out.
Use about one teaspoon of filling per pierogi. It might feel like not enough, but it is the perfect amount. Leave at least a half-inch border around the edge before sealing.
Skipping the Parboiling Step
Some people skip boiling and go straight to the oven. While this works for store-bought frozen pierogies, homemade pierogies really benefit from parboiling. Without it, the dough can become tough and the filling may not cook through evenly.
If you are short on time, at least make sure the filling is fully cooked before you seal it inside the dough. This partially compensates for skipping the boil.
Overcrowding the Baking Sheet
It is tempting to fit as many pierogies as possible on one sheet. But overcrowding traps steam and prevents the edges from crisping up. The pierogies will steam instead of bake, and you will end up with soft, soggy results instead of crispy pierogies in the oven.
Use two baking sheets if you need to cook a large batch. The extra sheet is worth it for that perfect golden crunch.
Not Flipping Halfway Through
Baking pierogies on one side only gives you uneven results. One side might be perfectly crispy while the other stays pale and doughy. Flipping them halfway through ensures both sides get that beautiful golden-brown color and satisfying crunch.
Expert Insights on Oven-Baked Pierogies
Why Temperature Control Matters
Professional chefs emphasize that 400°F is the ideal temperature for baking pierogies. Lower temperatures cause the pierogies to dry out before the crust crisps up. Higher temperatures can burn the outside while leaving the inside raw.
If your oven runs hot or cold, use an oven thermometer to verify the actual temperature. This small adjustment makes a big difference in the final result. Consistent heat is the key to perfectly crispy pierogies in the oven every time.
The Role of Fat in Getting Crispy Results
Brushing the pierogies with fat before baking is not optional if you want crispy edges. Butter is the traditional choice and adds rich flavor. Olive oil works well for a lighter option.
Some bakers even mix butter with a pinch of garlic powder and brush it on for extra flavor. The fat creates a barrier that helps moisture escape from the dough, which is what creates that satisfying crunch. Without it, the pierogies will be soft and pale no matter how long you bake them.
Freezing and Reheating Tips
One of the best things about oven-baked pierogies is that they freeze and reheat beautifully. Let freshly baked pierogies cool completely, then arrange them in a single layer on a baking sheet lined with parchment paper.
Freeze them for about 2 hours until solid, then transfer them to a freezer bag. When you are ready to eat them, place the frozen pierogies directly on a baking sheet and bake at 400°F for 25 to 30 minutes. No need to thaw them first. This makes how to make pierogies in the oven an excellent meal prep strategy for busy families.
Comparison: Oven-Baked vs. Pan-Fried Pierogies
| Factor | Oven-Baked | Pan-Fried |
|---|---|---|
| Oil/Butter Needed | Light brushing only | Generous amount |
| Hands-On Time | Minimal, mostly passive | Constant monitoring |
| Crispiness | Even golden crust | Varied, depends on flipping |
| Batch Size | Large, up to 30 per sheet | Limited to pan space |
| Health Factor | Lower fat content | Higher fat content |
| Texture | Uniform crunch all around | Crispy bottom, softer top |
| Best For | Meal prep and large groups | Quick weeknight single servings |
Both methods produce delicious results, but oven-baked pierogies win for convenience and consistency. The oven delivers even heat from all sides, which means every pierogi gets the same golden, crispy treatment. Pan-frying gives you a lovely browned bottom, but the top can stay softer and sometimes doughy.
If you are cooking for a family of four or more, the oven method is clearly the better choice. You can bake a full batch in one go without standing over a hot skillet. For a quick snack or single serving, pan-frying works well too. But for the best overall pierogies recipe experience, oven baking is the way to go.
Frequently Asked Questions
Can I use frozen pierogies straight from the freezer for oven baking?
Absolutely. Frozen pierogies work perfectly in the oven without thawing. Simply spread them on a lined baking sheet, brush them lightly with butter or oil, and bake at 400°F for 25 to 30 minutes. Just remember to flip them halfway through for even crispiness. The extra few minutes of bake time ensures the inside is fully heated through.
Do I need to boil homemade pierogies before baking them in the oven?
Boiling is not strictly required, but it is highly recommended for homemade pierogies. Parboiling for 2 to 3 minutes cooks the dough partially and ensures the filling is heated through during baking. If you skip this step, make sure your filling is already fully cooked before sealing it inside the dough. The result will still be good, but the parboiled version has a better texture and more even cooking.
What is the best temperature for baking pierogies in the oven?
400°F is the ideal temperature for crispy pierogies in the oven. This high heat creates a golden-brown, crunchy exterior while keeping the inside soft and fully cooked. If you bake at a lower temperature, the pierogies may dry out before they get crispy. If you go too high, the outside can burn before the inside is heated through.
How long do oven-baked pierogies last in the fridge?
Cooked oven-baked pierogies stay fresh in an airtight container in the refrigerator for up to 4 days. Reheat them in the oven at 375°F for about 10 minutes to restore the crispy texture. Avoid microwaving if possible, as it makes the dough soft and chewy instead of crunchy. The oven reheat method is the secret to enjoying leftovers that taste just as good as fresh.
Can I make pierogies ahead of time and freeze them before baking?
Yes, you can. Assemble the pierogies, place them on a parchment-lined baking sheet, and freeze them until solid. Then transfer them to a freezer bag. When you are ready to bake, place the frozen pierogies directly on a baking sheet and bake at 400°F for 25 to 30 minutes. This is a fantastic meal prep strategy that makes how to make pierogies in the oven quick and easy on busy nights.
What are the best toppings for oven-baked pierogies?
Classic sour cream and caramelized onions are the top choices for pierogies in the oven. Fresh herbs like dill, parsley, or chives add a bright, aromatic finish. For something different, try a drizzle of garlic butter, a sprinkle of grated Parmesan, or a side of applesauce. The beauty of oven-baked pierogies is that they pair well with both savory and sweet toppings, so feel free to experiment.
Conclusion
Making pierogies in the oven is one of the simplest and most rewarding cooking skills you can learn. From the dough-making process to choosing your favorite fillings and achieving that perfect golden crunch, every step is straightforward and enjoyable.
Whether you prefer classic potato and cheese, savory meat filling, or even a sweet blueberry option, oven-baked pierogies deliver consistent, delicious results every time. The method is forgiving, scalable, and requires minimal hands-on effort. You can feed a crowd, meal prep for the week, or enjoy a cozy weeknight dinner with almost no stress.
The key to perfectly crispy pierogies in the oven comes down to a few simple details. Preheat to 400°F, brush with butter, do not overcrowd the pan, and flip halfway through. Add the parboiling step for homemade versions, and you will have pierogies that rival any restaurant or Eastern European bakery.
So grab your flour, pick your favorite filling, and get that oven preheating. Once you taste warm, crispy, golden-brown oven-baked pierogies straight from your own kitchen, you will never go back to the stovetop. This is the pierogies recipe you will come back to again and again. Enjoy every bite!