Why Put Steak In Oven After Searing To Finish Cooking
Putting steak in the oven after searing is the best way to cook a thick cut evenly. This sear and finish method gives you a crispy brown crust on the outside while keeping the inside perfectly juicy. You will learn exactly why put steak in oven after searing works so well, how to do it step by step, and what mistakes to avoid.
Key Takeaways
- Even Cooking: The oven gently finishes the steak so the center cooks at the same rate as the edges, avoiding a gray band.
- Perfect Crust: Searing first in a hot pan creates the Maillard reaction, giving you a flavorful, caramelized brown crust.
- Better Control: Using an oven lets you monitor and adjust internal temperature more precisely than just stovetop cooking.
- Works for Thick Cuts: This method shines with thick steaks that are too dense to cook through on the stove alone.
- Juicy Results: Finishing in the oven reduces the risk of overcooking, keeping your steak moist and tender.
- Simple Technique: You only need a skillet and an oven, making this accessible for home cooks of all skill levels.
📑 Table of Contents
- Why Put Steak In Oven After Searing: The Sear and Finish Method Explained
- The Science Behind Searing and Finishing Steak
- Step-by-Step: How to Sear and Finish Steak in the Oven
- Best Steaks for the Oven-Finish Method
- Common Mistakes to Avoid When Finishing Steak in the Oven
- Expert Tips for the Perfect Oven-Finished Steak
- How Oven-Finished Steak Compares to Other Methods
- Conclusion
- Frequently Asked Questions
Why Put Steak In Oven After Searing: The Sear and Finish Method Explained
If you love a great steak, you have probably heard about the sear and finish method. But what exactly is it, and why does it work so well? The idea is simple. You sear the steak on the stovetop first, then transfer it into the oven to finish cooking. This two-step process gives you the best of both worlds.
Why put steak in oven after searing? The answer comes down to heat control. A stovetop burner delivers intense, direct heat from below. That is perfect for creating a dark, flavorful crust. But when you try to cook a thick steak entirely on the stove, the outside burns before the inside reaches your desired doneness. The oven solves this problem. It surrounds the steak with gentle, even heat that cooks the center slowly and uniformly.
This technique is especially popular for thick cuts like ribeye, New York strip, and filet mignon. If your steak is over one inch thick, the oven-finish method is almost essential. It helps you hit the perfect steak doneness without guesswork. Whether you want rare, medium-rare, or medium, the oven gives you a much better chance of getting it just right.
Many professional chefs use this approach every day. They know that a thick cut steak needs more than just a hot pan. The oven acts like a gentle finish that locks in moisture and delivers consistent results. Once you try this method, you may never go back to cooking steak entirely on the stovetop.
The beauty of this technique is that it does not require fancy equipment. You just need a good skillet and a working oven. In this guide, we will walk you through every step. You will learn the science behind it, the best temperatures to use, and common mistakes to avoid. By the end, you will feel confident making restaurant-quality steak at home.
The Science Behind Searing and Finishing Steak
What Happens When You Sear a Steak
Searing is all about the Maillard reaction. This is a chemical process that happens when proteins and sugars in meat are exposed to high heat. It creates hundreds of new flavor compounds. That is what gives a seared steak its rich, complex taste and beautiful brown color.
When you place a steak in a screaming hot pan, the surface temperature quickly exceeds 300 degrees Fahrenheit. At this point, the amino acids and sugars on the meat’s surface react and form a crust. This crust is not just visually appealing. It also adds depth and umami flavor that you cannot get from any other cooking method.
Here is the key thing to remember. Searing does not seal in juices. That is a common myth. But what it does is build flavor on the outside. The inside of the steak still needs to cook, and that is where the oven comes in.
Why the Oven Finishes the Job Better
The oven uses indirect heat. Instead of blasting one side of the steak with extreme heat, the hot air circulates around it evenly. This means the steak cooks from all directions at a gentler pace. The result is a more uniform temperature from edge to center.
When you cook a steak only on the stovetop, you get a steep temperature gradient. The outside is very hot. The center is much cooler. This gradient creates a thick gray band of overcooked meat just beneath the surface. The oven reduces this gray band dramatically.
Why put steak in oven after searing comes down to physics. The oven’s lower, ambient heat allows the center to rise in temperature gradually. You have much more control. You can pull the steak out at the exact moment the steak internal temperature hits your target. This level of control is hard to achieve with stovetop-only cooking.
Another benefit is carryover cooking. After you remove the steak from the oven, its internal temperature continues to rise by a few degrees. This happens because the outer layers are hot and they transfer heat inward. Understanding carryover cooking helps you pull the steak early and still hit the perfect doneness once it rests.
Step-by-Step: How to Sear and Finish Steak in the Oven
Step 1: Choose the Right Steak
Not all steaks are created equal for this method. You want a cut that is at least one inch thick. Thinner steaks can overcook quickly in the oven. The best choices include ribeye, strip steak, filet mignon, and T-bone. Look for good marbling. Those white streaks of fat melt during cooking and keep the meat juicy.
Take the steak out of the refrigerator about 30 to 45 minutes before cooking. Let it come closer to room temperature. This helps it cook more evenly from edge to center. A cold steak straight from the fridge will cook unevenly, with a cold center even after a long oven finish.
Step 2: Season Generously
Keep it simple for the best results. Kosher salt and freshly cracked black pepper work wonders. Season both sides generously at least 40 minutes before cooking, or right before you sear. Salt draws moisture to the surface at first, but it then gets reabsorbed. This process helps create a drier surface, which leads to a better crust.
Some people like to add garlic powder, smoked paprika, or a touch of cayenne. That is fine. But do not go overboard. The steak’s natural flavor should shine through. A little seasoning goes a long way.
Step 3: Preheat the Oven
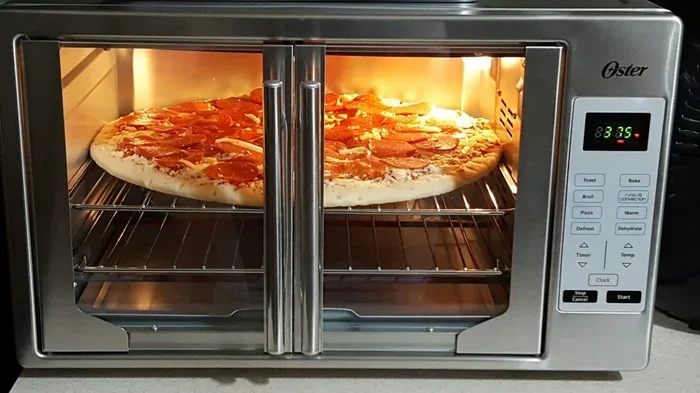
Set your oven to 375 degrees Fahrenheit for a standard finish. If you prefer a more well-done steak, you can go up to 400 degrees. For a rarer result, drop it to 350 degrees. The oven temperature matters because it controls how fast the center of the steak rises in temperature.
While the oven preheats, place a cast iron skillet on the stovetop over high heat. You want that pan ripping hot. A cast iron skillet is ideal because it holds heat extremely well and distributes it evenly. If you do not have cast iron, a heavy stainless steel pan works too.
Step 4: Sear the Steak
Add a high smoke point oil to the hot pan. Avocado oil or grapeseed oil work great because they can handle high heat without burning. Place the steak in the pan and do not touch it. Let it sear undisturbed for about 2 to 3 minutes per side.
You want a deep brown crust, not a black char. If the pan starts smoking too much, reduce the heat slightly. Flip the steak and sear the other side. You can also sear the edges if you have a thicker cut. Use tongs to hold the steak upright and press the edges against the pan for about 30 seconds each.
Once searing is done, immediately move the skillet into the preheated oven. This is the critical moment. The steak goes from extreme direct heat to gentle oven heat, and that is what makes this method so effective.
Step 5: Finish in the Oven
How long you leave the steak in the oven depends on the thickness and your target doneness. A general rule of thumb is about 4 to 6 minutes per side for a one-and-a-half-inch steak at 375 degrees. But the real guide is the internal temperature.
Use a meat thermometer to check the temperature. Here are the target temps for different levels of doneness:
- Rare: 120 to 125 degrees Fahrenheit
- Medium-Rare: 130 to 135 degrees Fahrenheit
- Medium: 140 to 145 degrees Fahrenheit
- Medium-Well: 150 to 155 degrees Fahrenheit
- Well-Done: 160 degrees Fahrenheit and above
Remember to pull the steak out a few degrees early. The carryover cooking effect will raise the temperature by 3 to 5 degrees after you take it out. This is a crucial detail that many home cooks miss.
Step 6: Rest the Steak
Once the steak reaches your target temperature, take it out of the oven and the pan. Place it on a cutting board and tent it loosely with aluminum foil. Let it rest for at least 5 to 10 minutes. This resting period allows the juices to redistribute throughout the meat.
If you cut into the steak immediately, the juices will run out onto the board instead of staying in the meat. A good rest ensures every bite is moist and flavorful. The steak resting time is just as important as the cooking itself.
Best Steaks for the Oven-Finish Method
Not every steak benefits equally from the oven-finish approach. Thicker cuts work best because they need the gentle, even heat of the oven to cook through properly. Here are the top steak choices for this method.
- Ribeye: Rich in marbling, which melts during oven cooking and keeps the meat incredibly tender and flavorful.
- New York Strip: A leaner option with a firm texture that holds up beautifully to the sear-and-finish method.
- Filet Mignon: Tender and lean, it benefits from the oven’s gentle heat to avoid drying out.
- T-Bone and Porterhouse: These dual-cut steaks have both tenderloin and strip sections. The oven helps cook them evenly.
- Flat Iron Steak: An affordable cut that becomes melt-in-your-mouth tender when finished in the oven.
Avoid thin steaks like skirt steak or flank steak for this method. These cuts cook through quickly and are better suited for direct high-heat grilling or pan-frying. The oven-finish method is designed for steaks that are at least one inch thick, ideally one-and-a-half to two inches.
Common Mistakes to Avoid When Finishing Steak in the Oven
Skipping the Rest Period
This is the number one mistake home cooks make. Cutting into a steak right after it comes out of the oven releases all the juices. You end up with a dry, less flavorful piece of meat. Always rest your steak for at least 5 minutes before slicing.
Using the Wrong Pan
A thin, lightweight pan will not hold enough heat to create a proper crust. You need a heavy skillet, preferably cast iron. If your pan is too thin, it will lose temperature the moment you place the steak in it, and you will end up with steaming instead of searing.
Overcrowding the Pan
If you are cooking multiple steaks, give them space. Overcrowding the pan traps steam and prevents proper browning. Each steak needs room to make full contact with the hot surface. Cook in batches if you need to.
Not Using a Thermometer
Guessing the doneness of a steak is a recipe for disappointment. A meat thermometer takes the guesswork out completely. Invest in a good instant-read thermometer. It is the single most useful tool for cooking steak to perfection.
Setting the Oven Too Hot
Some people crank the oven to 450 or 500 degrees, thinking more heat is better. But the whole point of finishing in the oven is gentle, even cooking. Keep the temperature between 350 and 400 degrees. Higher temperatures can dry out the steak before the center is done.
Forgetting to Pat the Steak Dry
Before searing, make sure the surface of the steak is dry. Use paper towels to pat it down. Moisture on the surface creates steam instead of allowing the Maillard reaction to happen. A dry surface equals a better, darker crust.
Expert Tips for the Perfect Oven-Finished Steak
Use the Reverse Sear for Extra-Thick Cuts
If your steak is two inches thick or more, consider flipping the method. Start in the oven at a low temperature (around 250 degrees) and cook until the center reaches about 10 to 15 degrees below your target. Then sear in a hot pan for 1 to 2 minutes per side. This reverse sear method gives you incredibly even doneness from edge to edge.
The reverse sear method is a favorite among steak enthusiasts. It gives you more control over the internal temperature and produces an edge-to-edge pink gradient. It is especially great for thick filet mignon or bone-in ribeye.
Add Butter and Herbs During the Sear
During the last 30 seconds of searing, add a tablespoon of butter, a crushed garlic clove, and a sprig of fresh thyme to the pan. Tilt the pan slightly and spoon the melted butter over the steak repeatedly. This technique, called basting, adds richness and aroma to the finished steak.
Let the Steak Shine
Do not overload the steak with heavy sauces or toppings. A great steak needs very little. Salt, pepper, and a pat of butter after resting is all you need. Let the quality of the meat and the precision of your cooking do the talking.
Use a Wire Rack for Even Airflow
If you want the most even oven finish, place the steak on a wire rack set over a baking sheet. The rack allows hot air to circulate underneath the steak, cooking it more evenly than a flat pan or sheet of foil.
How Oven-Finished Steak Compares to Other Methods
There are many ways to cook steak. Here is how the oven-finish method stacks up against other popular techniques.
- Stovetop Only: Quick and convenient, but struggles with thick cuts. Often results in a large gray band inside the steak.
- Grill Only: Great flavor from smoke, but temperature control can be tricky. Flare-ups can burn the outside before the inside is done.
- Sous Vide Then Sear: Produces the most precise doneness, but requires special equipment and more time. The oven-finish method is faster and nearly as accurate.
- Oven-Finish After Sear: Combines the best crust from searing with the even cooking of the oven. It is the sweet spot for home cooks who want restaurant-quality results.
The sear and finish method is the most practical approach for most home kitchens. It requires minimal equipment and delivers consistent, excellent results every time.
Conclusion
Why put steak in oven after searing? The answer is clear. This method gives you the best crust, the most even cook, and the juiciest results. It works by combining the intense, direct heat of a hot skillet with the gentle, surrounding heat of the oven. The result is a steak that is evenly cooked from edge to center, with a beautiful brown crust and a tender, juicy interior.
Whether you are cooking a ribeye for a special dinner or a simple weeknight steak, the sear-and-finish technique is worth mastering. It takes just a little more attention than cooking steak entirely on the stove, but the improvement in quality is enormous. You will notice the difference in every bite.
Start with a thick cut, season it well, sear it hot, finish it gently in the oven, and rest it properly. Follow these steps and you will cook steak that rivals any steakhouse. The sear and finish method is one of the most rewarding techniques you can learn in the kitchen. Give it a try, and your steak will never be the same.
Frequently Asked Questions
Can you put a hot skillet directly into the oven?
Yes, but only if your skillet is oven-safe. Cast iron skillets work perfectly for this because they handle high heat on the stovetop and in the oven. However, if your skillet has a plastic handle or a non-oven-safe coating, do not put it in the oven. Transfer the steak to a baking sheet or oven-safe dish instead.
What is the best oven temperature for finishing steak?
375 degrees Fahrenheit is the sweet spot for most steaks. It cooks the center evenly without drying out the edges. If you prefer a faster cook, you can go up to 400 degrees. For a more gentle finish, 350 degrees works well. The key is to monitor the internal temperature with a thermometer.
How long should you sear steak before putting it in the oven?
Sear each side for about 2 to 3 minutes over high heat. You are looking for a deep brown crust, not a blackened surface. For very thick steaks, you can also sear the edges for about 30 seconds each. The total searing time should be around 5 minutes before moving the steak to the oven.
Do you need to cover steak with foil when it rests?
Tenting the steak loosely with foil helps retain some warmth during the resting period. However, do not wrap it tightly, as that will trap steam and soften the crust. A loose tent is ideal. It keeps the steak warm while allowing the juices to settle back into the meat.
Is the sear and finish method better than grilling?
Both methods have their merits. Grilling adds smoky flavor that the oven cannot replicate. But the sear and finish method gives you more precise control over doneness and works well in any weather or kitchen setup. For thick cuts, the oven finish produces more even results than grilling alone.
Can you use this method for frozen steak?
It is best to thaw your steak before cooking. A frozen steak will sear unevenly and cook inconsistently in the oven. If you must cook from frozen, increase the oven time significantly and use a thermometer to check doneness. But for the best results, always cook with a fully thawed steak that has been brought close to room temperature first.