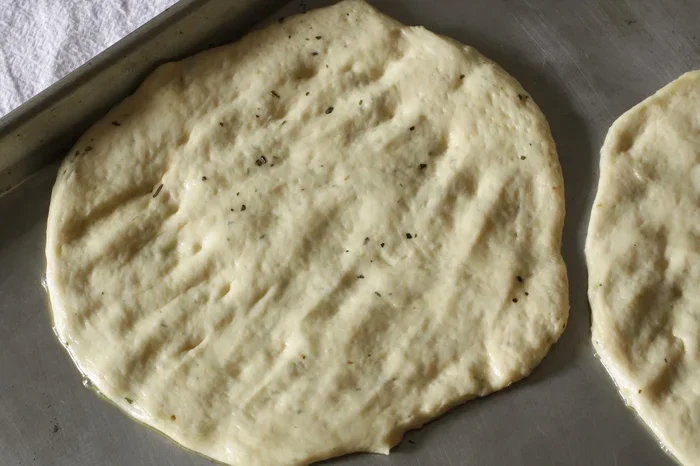
How To Pre Bake Pizza Crust In The Oven For Crispy Results
Pre baking your pizza crust is the secret to achieving a perfectly crispy base every time you bake pizza at home. This simple technique involves partially cooking the dough before adding toppings, which prevents a soggy middle and delivers that golden, crunchy texture everyone loves. Whether you use a pizza stone, a baking sheet, or a pizza pan, this method works with any oven setup and any pizza dough recipe. In this guide, you will learn exactly how to pre bake pizza crust in the oven, including the right temperature, timing, and pro tips for the best results.
There is nothing quite like a homemade pizza with a perfectly crispy base. Yet so many home cooks struggle with a doughy, soggy middle no matter what they try. The answer is simpler than you think. Pre baking your pizza crust in the oven is the game-changing step that separates a good pizza from a great one.
When you pre bake pizza crust in the oven, you partially cook the dough before adding your favorite toppings. This step drives out excess moisture, sets the structure, and creates a firm foundation that can handle sauce, cheese, and all the fixings without turning soft. The result is a crispy pizza crust with a beautiful golden color and a satisfying crunch in every bite.
In this guide, we will walk you through everything you need to know. From preparing your homemade pizza dough to nailing the oven temperature and timing, you will find every detail you need. Whether you are a beginner or a seasoned home cook, these pizza crust tips will elevate your bake pizza at home experience. Let us get started.
Key Takeaways
- Pre baking removes moisture from the dough: This prevents a soggy center and gives you a crispy pizza crust that holds up well with toppings.
- Use a pizza stone or baking steel for the best results: These tools absorb moisture and conduct heat evenly for a uniform golden crust.
- Bake at 400-425°F for 5-7 minutes: This par bakes the base without overcooking it, leaving it ready for toppings and a final bake.
- Brush with olive oil or garlic butter: This adds flavor and creates an extra crispy, golden layer on your par baked crust.
- Avoid common mistakes like skipping the rest time: Letting your dough rest before rolling ensures a tender, pliable base that bakes evenly.
- Store par baked crusts for quick weeknight pizza nights: You can freeze or refrigerate pre baked crusts and bake them fresh whenever you want.
📑 Table of Contents
Why You Should Pre Bake Your Pizza Crust
Pre baking, also known as par baking or blind baking, is the process of baking your pizza base before adding toppings. It might seem like an extra step, but it makes a huge difference. Here is why it matters so much.
The Soggy Crust Problem
When you put wet toppings like tomato sauce, fresh mozzarella, and vegetables directly onto raw dough, moisture seeps into the base. The oven cannot cook the top and bottom at the same rate. This leads to a pizza crust that is burnt on top but still doughy underneath. Pre baking pizza dough before adding toppings solves this problem completely.
The initial bake sets the outer layer of the dough. This creates a barrier that resists moisture from the sauce and cheese. Even if your toppings release liquid during the final bake, the crust stays crisp and holds its shape.
Better Texture and Structure
A crispy thin crust pizza starts with a well-prepped base. When you par bake pizza crust first, the gluten in the dough tightens up. This gives the crust more structure and a pleasant chewiness. Without pre baking, the dough can puff up unevenly or collapse under the weight of toppings.
Pre baking also allows you to control the level of doneness. You can go for a lightly baked base if you prefer a softer interior, or push it a bit longer for a fully crisp crust throughout. This level of control is what makes homemade pizza so much better than delivery.
Faster Final Bake Time
When your crust is already partially cooked, the final bake with toppings takes much less time. You might only need 8 to 12 minutes instead of 15 to 20. This means your cheese melts perfectly, your toppings stay fresh, and your crust comes out exactly the way you want it.
Less time in the oven also means less risk of overcooking. Your pizza crust browning stays even, and you get consistent results every single time you make pizza at home.
How To Prepare Your Pizza Dough
The foundation of any great crispy pizza crust starts long before it hits the oven. Proper dough preparation is the first step in the pre bake pizza crust process. Here is how to get your dough ready the right way.
Choosing or Making Your Dough
You can use store-bought pizza dough or make your own from scratch. Both work well for pre baking pizza crust. If you buy dough from a store, look for one that is fresh and has a good balance of flour and water. If you make your own, a simple pizza crust recipe with bread flour, yeast, water, salt, and a little olive oil works beautifully.
For the best results, use bread flour instead of all-purpose flour. Bread flour has a higher protein content, which develops more gluten. This gives your thin crust pizza a chewy yet crispy texture that is hard to beat.
The Importance of Dough Resting Time
One of the most overlooked pizza crust tips is letting your dough rest. After you mix and knead your homemade pizza dough, give it at least one to two hours to rise at room temperature. The gluten relaxes during this time, making the dough easier to roll out without springing back.
If you rush this step, the dough will be tight and difficult to work with. You may end up with an uneven thickness, which leads to some spots burning and others staying doughy. Patience here pays off big time when you pre bake pizza crust in the oven.
Rolling and Shaping the Base
When your dough has rested, it is time to shape it. Lightly flour your work surface and use a rolling pin to flatten the dough to your desired thickness. For a crispy thin crust pizza, aim for about one-quarter inch thick. For a thicker, more bready base, go up to half an inch.
Transfer the shaped dough to a lightly floured or cornmeal-dusted surface. If you have a pizza peel, dust it with cornmeal or flour and place the dough on top. The cornmeal helps the dough slide onto your pizza stone or pizza baking steel later. If you do not have a peel, you can also shape the dough right on a piece of parchment paper for easy transfer.
Docking the Dough
Before pre baking, use a fork to poke small holes across the surface of your dough. This process is called docking. It allows steam to escape during baking so the crust does not puff up in uneven bubbles.
Simply press the tines of a fork into the dough about half an inch apart, covering the entire surface. This small step makes a big difference in the final texture of your par baked pizza crust.
The Step-by-Step Pre Baking Process
Now that your dough is ready, it is time to actually pre bake pizza crust in the oven. This section walks you through each step in detail so you get consistent, delicious results every time.
Step 1: Preheat Your Oven
Turn your oven on and set it to 425°F (220°C). Preheating is essential. A hot oven ensures the crust starts cooking immediately when it goes in, which is key for getting that crispy texture. If you use a pizza stone or pizza baking steel, place it on the middle rack while the oven preheats. You want the stone or steel to be fully hot before the dough touches it.
Let your oven preheat for at least 30 minutes. This might seem like a long time, but a thoroughly heated stone or steel makes a dramatic difference in crust quality. Many people skip this step and wonder why their crispy pizza crust does not turn out right.
Step 2: Prepare the Dough for the Oven
Take your shaped and docked dough and gently transfer it to your pizza peel or a piece of parchment paper. If you are using parchment, you can slide the whole thing onto the pizza stone or baking sheet later. This makes the process much easier and less stressful.
If you want extra flavor and crispiness, brush the surface of the dough lightly with olive oil or melted pizza crust butter. This creates a thin barrier that enhances browning and adds a rich, savory taste to your par baked crust.
Step 3: Bake the Crust
Slide the dough onto your preheated pizza stone or place it directly on a baking sheet. Put it in the center of the oven on the middle rack. Set a timer for five to seven minutes.
You are looking for light pizza crust browning and a firm texture. The crust should look dry and slightly puffed, but not deeply browned. If it starts to darken too quickly, reduce the oven temperature by 25 degrees. You want a pale golden base that is fully set but not finished cooking.
Here is a quick reference for what to look for during this stage:
- The edges should be lightly golden
- The surface should feel dry to the touch
- The crust should be firm and not floppy
- There should be no raw dough smell
- Light bubbling on the surface is a good sign
Step 4: Remove and Cool
Once your par baked crust looks ready, carefully remove it from the oven using your pizza peel or oven mitts. Place it on a wire rack to cool for about five minutes. Cooling on a rack allows air to circulate underneath, which keeps the bottom crispy.
Do not skip this cooling step. If you add toppings to a hot crust right away, the heat can melt your cheese and sauce prematurely. A brief cooldown gives you time to add toppings and get the pizza back into the oven without rushing.
Oven Temperature and Timing Guide
The right oven temperature and timing are critical for a successful pre bake pizza crust. Too hot and you will burn the edges before the center sets. Too cool and the crust will absorb moisture from the toppings. Here is a detailed guide to help you get it right.
Temperature Settings by Crust Type
Different crust styles need different temperatures. Here is a quick breakdown:
- Thin crispy crust: 425°F for 5 to 6 minutes
- Medium thickness crust: 400°F for 6 to 7 minutes
- Thick pan-style crust: 375°F for 7 to 8 minutes
- Whole wheat crust: 400°F for 6 to 7 minutes
These times and temperatures are starting points. Your specific oven may run hotter or cooler, so keep an eye on the crust during the first few minutes. Every oven and toaster behaves a little differently, and learning your oven’s quirks is part of the fun of bake pizza at home.
Using a Pizza Stone vs. Baking Sheet
A pizza stone absorbs moisture from the bottom of the dough as it bakes. This creates an incredibly crispy base that rivals what you get from a professional pizza oven. A pizza baking steel works even better because it conducts heat faster and more evenly.
If you do not have a stone or steel, a standard baking sheet works perfectly fine. Just make sure the baking sheet is hot before the dough goes on. You can preheat it in the oven for a few minutes to mimic the effect of a pizza stone.
For the best results with a baking sheet, consider using an inverted baking sheet. Place it upside down on the middle rack during preheating, then slide your dough onto the hot surface. This gives you a flat, even cooking surface that promotes pizza crust browning and crispiness.
Final Bake Temperature After Toppings
After you add your sauce, cheese, and toppings, reduce the oven temperature to 450°F (230°C) for the final bake. This higher temperature melts the cheese quickly while keeping the pre baked base from overcooking. The total bake time after adding toppings is usually around 10 to 12 minutes.
Tips for Getting the Perfect Crispy Crust
Getting a crispy pizza crust every time comes down to a few key details. These pizza crust tips will help you master the art of pre baking pizza crust in the oven like a pro.
Brush with Garlic Butter
After your crust comes out of the oven during pre baking, brush it with a mix of melted butter and minced garlic. This adds incredible flavor and creates a slightly crispier outer layer. It is one of the simplest pizza crust tips that makes the biggest difference.
Use Cornmeal or Semolina
Dust your pizza peel or baking surface with cornmeal or semolina flour. This not only prevents sticking but also adds a subtle crunch to the bottom of your crust. It is a small detail that elevates your homemade pizza to the next level.
Do Not Overload with Toppings
Even with a perfectly par baked crust, too many wet toppings will make the base soggy. Use a light layer of sauce and moderate amounts of cheese. If you are adding vegetables, try to pat them dry first to remove excess moisture. This keeps your thin crust pizza crispy from edge to center.
Rotate the Crust Halfway
Most home ovens have hot spots. To ensure even pizza crust browning, rotate your dough halfway through the pre baking time. This simple trick prevents one side from burning while the other stays pale and undercooked.
Par Bake and Freeze for Convenience
One of the best pizza crust tips for busy weeknights is to pre bake several crusts at once and freeze them. Let the par baked crusts cool completely, then wrap them tightly in plastic wrap and aluminum foil. When you want pizza, pull one out, add toppings, and bake. You can have fresh homemade pizza on the table in under 15 minutes.
Common Mistakes to Avoid When Pre Baking Pizza Crust
Even experienced home cooks make mistakes when pre bake pizza crust in the oven. Knowing what to avoid saves time, ingredients, and frustration. Here are the most common errors and how to fix them.
Skipping the Dough Rest
If you roll out your dough immediately after kneading, it will fight you every step of the way. The gluten is tight and the dough will snap back. Always give your homemade pizza dough enough time to rest and relax before shaping. This makes the entire pizza dough preparation process smoother and your final crust better.
Not Preheating the Oven Long Enough
A lukewarm oven produces a pale, soft crust. Make sure your oven reaches the target temperature before the dough goes in. Give it at least 30 minutes, especially if you are using a pizza stone or pizza baking steel. The extra wait time is worth it for the texture and flavor it delivers.
Overloading the Toppings
It is tempting to pile on the sauce, cheese, and meats. But too many toppings weigh down the crust and trap steam underneath. This steam softens your carefully par baked crust and turns it soggy. Keep it balanced and let the crust shine.
Using a Cold Baking Sheet
If you are using a baking sheet instead of a pizza stone, make sure it is hot before the dough touches it. A cold sheet absorbs heat from the dough immediately, which slows down the baking process and can lead to a greasy, soft base. Preheat the sheet in the oven for at least 10 minutes.
Opening the Oven Door Too Often
Every time you open the oven door, you lose heat and temperature drops. This affects the pizza crust browning and can cause the dough to deflate. Resist the urge to peek. Use the oven light to check on your crust, and only open the door when it is time to rotate or remove the pizza.
Storing and Reheating Pre Baked Crusts
If you pre bake extra crusts for later use, proper storage is key to maintaining that crispy texture you worked hard to achieve.
Refrigerating Pre Baked Crusts
Let your par baked crusts cool completely, then wrap them tightly in plastic wrap or place them in an airtight container. They will keep in the refrigerator for up to three days. When you are ready to use one, add your toppings and bake as usual.
Freezing Pre Baked Crusts
Freezing is a fantastic option for meal prep. Wrap each cooled crust individually in plastic wrap, then place them in a freezer bag. They will keep for up to three months. To use, remove from the freezer, add toppings, and bake directly from frozen. You may need to add two to three extra minutes to the final bake time.
Reheating for Crispiness
If you have a pre baked crust that has lost some crispiness from storage, you can reheat it in the oven at 375°F for three to four minutes before adding toppings. This refreshes the base and restores that satisfying crunch before you finish baking the full pizza.
Conclusion
Pre baking pizza crust in the oven is one of the simplest and most effective ways to improve your homemade pizza. It takes just a few extra minutes but delivers dramatically better results. Your crust turns out crispy, golden, and structurally sound, ready to support all your favorite toppings without getting soggy.
By following the steps in this guide, you now know how to prepare your dough, nail the oven temperature and timing, and avoid the common mistakes that trip up so many home cooks. Whether you prefer a crispy thin crust pizza or a thicker, more substantial base, pre baking pizza crust in the oven is the technique that ties it all together.
Start experimenting with different pizza crust recipes, try various oven temperature settings, and find what works best for your taste and your equipment. The beauty of making pizza at home is that you can customize everything to your liking. So fire up your oven, roll out some dough, and enjoy the process of creating a crispy pizza crust that is truly your own.
Frequently Asked Questions
Can I pre bake pizza crust without a pizza stone?
Yes, you absolutely can. A baking sheet works just fine for pre bake pizza crust in the oven. Simply preheat the baking sheet in the oven for 10 minutes before sliding your dough onto it. The hot surface will still promote pizza crust browning and crispiness, even without a stone.
How do I know when the pre baked crust is ready?
Look for a light golden color and a firm texture. The surface should feel dry and look slightly puffed. If the crust still looks pale or feels soft and doughy, give it another one to two minutes. Proper par baking sets the foundation so your final pizza turns out perfectly.
Can I pre bake pizza crust the night before?
Yes, you can pre bake pizza crust ahead of time and store it in the refrigerator for up to three days. Wrap it tightly in plastic wrap or an airtight container. When you are ready to use it, add toppings and bake as normal. This is a great time-saving trick for busy weeknight dinners.
What is the best flour for homemade pizza dough?
Bread flour is the best choice for a crispy thin crust pizza because it has a higher protein content, which develops more gluten. You can also use all-purpose flour for a softer crust. Avoid cake flour or pastry flour, as they have too little protein and will produce a dense, tender base that does not crisp up well.
Should I use olive oil or butter on my pre baked crust?
Both work well and add different benefits. Olive oil creates a light, crispy layer and complements Mediterranean-style toppings. Melted butter adds richness and a golden color, especially when mixed with garlic or herbs. Try both and see which you prefer for your homemade pizza style.
Can I freeze a par baked pizza crust?
Yes, freezing a par baked crust is a great way to meal prep. Let the crust cool completely, wrap it tightly in plastic wrap, then place it in a freezer bag. It will keep for up to three months. When you are ready to use it, add toppings and bake directly from frozen, adding a few extra minutes to the final bake time.
=== CONCLUSION ===
Pre baking pizza crust in the oven is a simple technique that transforms your homemade pizza from good to outstanding. By taking the extra few minutes to par bake your base, you ensure a crispy, golden crust that stays firm no matter what toppings you add. Follow the steps outlined in this guide, avoid the common mistakes, and experiment with your own pizza crust recipe to find your perfect style.
Whether you are using a pizza stone, a pizza baking steel, or a simple baking sheet, the principles remain the same. Preheat well, bake at the right temperature, and do not rush the process. With practice, you will be able to pre bake pizza crust in the oven almost without thinking, and your family and friends will never stop asking for your homemade pizza.
Now that you have all the knowledge you need, it is time to put it into action. Roll out some dough, fire up your oven, and enjoy the satisfying crunch of a perfectly crispy pizza crust made by your own hands. Happy baking.