How To Clean Your Dutch Oven And Restore It To Glory
Learning how to clean your Dutch oven is essential for keeping it in top shape for years. Whether you own a cast iron or enamel Dutch oven, the right cleaning method makes all the difference. This guide covers proven techniques for removing stains, burnt food, and residue without damaging your cookware. You will also discover how to restore your Dutch oven to its original glory with simple household ingredients. Follow these steps to keep your Dutch oven performing beautifully every time you cook.
There is nothing quite like a Dutch oven. It sears meat perfectly, bakes bread with a golden crust, and simmers stews until they are fall-apart tender. But here is the thing most people forget. A great Dutch oven needs proper care to keep performing at its best. Over time, food sticks, stains set in, and grease builds up. That is why knowing how to clean your Dutch oven properly matters so much.
Whether you just finished cooking a hearty chili or baked a beautiful loaf of sourdough, your Dutch oven deserves the right cleaning routine. A dirty Dutch oven not only looks bad. It can affect the taste of your next meal and even damage the cookware over time. In this guide, we will walk you through every method you need. From basic daily cleaning to deep stain removal, you will find everything you need right here. Let us bring your Dutch oven back to life.
Key Takeaways
- Know your material: Cast iron and enamel Dutch ovens need different cleaning approaches.
- Use natural cleaners: Baking soda, vinegar, and salt work wonders for removing stains.
- Avoid soap on cast iron: It can strip the seasoning and damage the surface.
- Dry immediately: Moisture is the enemy of cast iron and causes rust.
- Season regularly: Re-seasoning your cast iron Dutch oven keeps it non-stick and protected.
- Be gentle with enamel: Harsh scrubbing can chip the enamel coating.
- Clean after every use: Regular maintenance prevents buildup and makes cleaning easier.
📑 Table of Contents
- Why Cleaning Your Dutch Oven Matters
- How To Clean Dutch Oven By Material Type
- Step-By-Step Deep Cleaning Guide
- Removing Stubborn Stains And Burnt Food
- Dutch Oven Maintenance Tips For Long Lasting Use
- Common Mistakes To Avoid When Cleaning Your Dutch Oven
- Comparison: Cast Iron Vs Enamel Dutch Oven Cleaning
- How Often Should You Deep Clean Your Dutch Oven
- Conclusion
Why Cleaning Your Dutch Oven Matters
Some people think a little grime adds flavor. That might be true for a cast iron skillet used daily. But a Dutch oven is a different story. Food residue left behind can go rancid, affect future dishes, and even harbor bacteria. A clean Dutch oven cooks better and lasts longer.
Beyond hygiene, there is the performance factor. Built-up grease and carbon deposits create sticky surfaces. Your food starts to burn and stick more easily. A well-maintained Dutch oven distributes heat evenly and releases food effortlessly. That is the whole point of owning one.
Let us also talk about appearance. A Dutch oven that looks new simply makes cooking more enjoyable. There is pride in pulling out a clean, shiny pot from the cupboard. Proper cleaning keeps that look alive for decades. Many Dutch ovens are passed down through generations. With the right care, yours can be too.
How To Clean Dutch Oven By Material Type
Not all Dutch ovens are the same. The material determines the cleaning method you should use. Using the wrong approach can ruin your pot. Let us break this down by type.
Cleaning Cast Iron Dutch Ovens
Cast iron Dutch ovens are beloved for their heat retention and natural non-stick surface. But they require special care. The seasoning layer is what makes them work so well. Harsh cleaning can strip it away.
Start by letting the pot cool down after cooking. Never plunge a hot cast iron Dutch oven into cold water. The sudden temperature change can cause warping or even cracks. Once it is cool enough to handle, remove any food scraps with a wooden spoon or silicone spatula.
Rinse the pot with warm water. Use a soft sponge or brush to gently remove any residue. Avoid steel wool and abrasive scrubbers. They will damage the seasoning. For stubborn bits, add a small amount of coarse salt and scrub gently. The salt acts as a natural abrasive without harming the surface.
Dry the pot immediately with a clean towel. Then place it on a warm stove burner for a few minutes to remove all moisture. This step is critical. Any remaining water can cause rust. Once dry, apply a thin layer of cooking oil with a paper towel. This keeps the seasoning fresh and the surface protected.
Cleaning Enamel Dutch Ovens
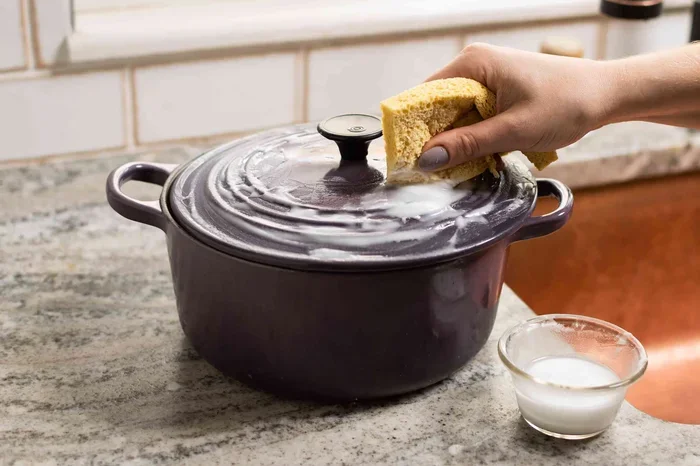
Enamel Dutch ovens have a glass-like coating that makes cleaning much easier. You can use mild dish soap without worry. The enamel surface is non-reactive and does not absorb flavors the way cast iron does.
After cooking, let the pot cool slightly. Fill it with warm water and add a few drops of dish soap. Let it soak for 15 to 20 minutes. This softens any stuck-on food. Then use a soft sponge to wipe away residue. For tougher spots, use a non-abrasive scrubber.
Never use metal utensils or harsh scouring pads on enamel. They can scratch and chip the coating. If food is really stuck, fill the pot with warm water and let it soak overnight. The next day, the residue should come off easily.
Cleaning Stainless Steel Dutch Ovens
Some Dutch ovens are made from stainless steel. These are durable and dishwasher-safe, though hand washing is always better. Use warm water, dish soap, and a soft sponge for routine cleaning. For stains, a paste of baking soda and water works well. Apply it to the affected area, let it sit for 15 minutes, and rinse thoroughly.
Step-By-Step Deep Cleaning Guide
Sometimes a regular wash is not enough. Burnt food, dark stains, and built-up grease need a deeper approach. This step-by-step guide works for most Dutch oven types.
Step 1: Remove loose debris. Throw away any food particles. Use a spatula or brush to get the big stuff out first.
Step 2: Fill with warm water. Add enough water to cover the stained or dirty areas. Let it soak for at least 30 minutes.
Step 3: Add your cleaning agent. For cast iron, use coarse salt. For enamel and stainless steel, add a squeeze of dish soap. For tough stains, try baking soda or white vinegar.
Step 4: Scrub gently. Use a soft brush or sponge. Work in circular motions. Do not press too hard, especially on enamel surfaces.
Step 5: Rinse thoroughly. Make sure all cleaning agents are washed away. Residue can affect the taste of your next meal.
Step 6: Dry completely. Use a towel and then let the pot air dry on a warm burner. Moisture is the number one enemy of cookware.
Step 7: Re-season if needed. For cast iron, apply a thin layer of oil after drying. This restores the protective coating.
Quick Tips For Deep Cleaning
- Add a tablespoon of baking soda to the soak water for extra cleaning power.
- Use white vinegar on its own for light stains. Just wipe and rinse.
- For really burnt Dutch oven messes, boil water with baking soda for 10 minutes.
- Never put a hot Dutch oven in cold water. Always let it cool first.
- Use distilled water if you have hard water. It prevents mineral spots.
Removing Stubborn Stains And Burnt Food
We have all been there. You set the Dutch oven on high heat and walked away for a moment. Now you are staring at a black, burnt mess. Do not panic. These stains are removable.
The Baking Soda Paste Method
Mix three tablespoons of baking soda with a little water to form a thick paste. Spread it over the stained areas. Let it sit for at least 30 minutes, or overnight for really tough stains. The baking soda works as a gentle abrasive and a natural deodorizer. After soaking, scrub with a soft brush and rinse clean. This method works wonders on both cast iron and enamel Dutch ovens.
The Vinegar And Baking Soda Combo
For extra cleaning power, combine baking soda and white vinegar. Sprinkle baking soda over the stains. Then spray or drizzle vinegar on top. The fizzing action lifts grime and residue. Let it sit for 15 minutes, then scrub and rinse. This is one of the most effective Dutch oven cleaning methods for burnt-on food.
The Boiling Water Trick
Fill the Dutch oven with water and bring it to a boil on the stove. Add two tablespoons of baking soda. Let it simmer for 15 minutes. The burnt bits should loosen and float to the top. Discard the water, wash the pot, and dry it completely. This method is gentle and effective for enamel Dutch ovens.
The Salt Scrub For Cast Iron
Coarse salt is your best friend for cast iron. Pour a generous amount of salt into the pot. Add a splash of water to make a paste. Scrub the inside with a paper towel or soft cloth. The salt lifts grime without damaging the seasoning. Rinse, dry, and apply oil. This is a simple and effective Dutch oven cleaning method that preserves the seasoning layer.
Dutch Oven Maintenance Tips For Long Lasting Use
Cleaning is only half the battle. Regular maintenance keeps your Dutch oven in excellent condition. A little effort after each use saves a lot of work later.
Clean After Every Use
Do not let food sit overnight. As soon as you are done eating, give your Dutch oven a quick wash. Even a quick rinse with warm water makes a big difference. This prevents residue from hardening and becoming harder to remove later.
Store It Properly
Store your Dutch oven in a dry place. If you stack it with other pots, place a towel between them. This prevents scratches and chips. For cast iron, make sure it is completely dry before storing. A light coat of oil before storage adds extra protection.
Re-Season Cast Iron Regularly
Over time, the seasoning on cast iron Dutch ovens can wear thin. Re-seasoning restores the non-stick surface and adds protection. Apply a thin layer of vegetable oil or flaxseed oil to the entire pot. Bake it upside down in the oven at 375 degrees Fahrenheit for one hour. Let it cool completely before removing.
Handle With Care
Use wooden or silicone utensils when cooking in your Dutch oven. Metal utensils can scratch the surface. For enamel Dutch ovens, avoid thermal shock. Do not place a cold pot on a hot burner or add cold liquid to a hot pot. These sudden temperature changes can cause enamel to crack or chip.
Common Mistakes To Avoid When Cleaning Your Dutch Oven
Even well-meaning cooks make mistakes. Here are the most common errors people make when cleaning their Dutch oven. Avoid these and your pot will last for years.
- Using soap on cast iron. While modern soaps are gentler, it is still best to avoid them on seasoned cast iron. They can strip the seasoning over time.
- Soaking cast iron for too long. Prolonged soaking causes rust. Keep cast iron soak time under 30 minutes.
- Using steel wool or metal scrubbers. These scratch both cast iron and enamel surfaces. Stick to soft brushes and sponges.
- Putting a hot Dutch oven in the fridge. This causes thermal shock and can crack enamel. Always let it cool to room temperature first.
- Drying with a damp towel. This leaves moisture behind. Use a completely dry towel or let the pot air dry on the stove.
- Ignoring rust spots. If you see rust, address it immediately. Scrub it off with salt and vinegar, then re-season the area.
- Using the dishwasher for cast iron. The harsh detergents and high heat strip seasoning and promote rust. Always hand wash cast iron.
Expert Insights On Dutch Oven Care
Professional chefs and cookware experts agree on one thing. The best Dutch oven cleaning method is the simplest one. Warm water, a soft sponge, and a little elbow grease handle most situations. For cast iron, less is more. The seasoning layer does the heavy lifting. Your job is simply to protect it.
Cookware expert James Martin once shared that the secret to a long-lasting Dutch oven is consistency. Clean it the right way every single time, and it will outlive you. The pot you buy today could be the pot your grandchildren use. That is the beauty of quality cookware with proper care.
Another expert tip comes from cast iron enthusiast Karen Hood. She recommends always keeping a dedicated towel for your Dutch oven. Use it to dry the pot immediately after washing and to apply oil after drying. This small habit makes a huge difference in preventing rust and maintaining seasoning.
Comparison: Cast Iron Vs Enamel Dutch Oven Cleaning
Understanding the differences helps you choose the right approach. Here is a quick comparison of cleaning methods for each type.
| Aspect | Cast Iron Dutch Oven | Enamel Dutch Oven |
|---|---|---|
| Soap Use | Avoid or use minimal | Mild dish soap is fine |
| Scrubbing Tools | Soft brush, salt, sponge | Soft sponge, non-abrasive pad |
| Soaking Time | Max 30 minutes | Overnight soaking okay |
| Dishwasher Safe | No, never | Generally not recommended |
| Stain Removal | Salt scrub, baking soda paste | Baking soda, vinegar, soap |
| Seasoning Needed | Yes, after every wash | No |
| Rust Prevention | Critical, dry immediately | Not a concern |
| Burnt Food Removal | Boil with baking soda | Soak and scrub gently |
This comparison shows that each type has unique needs. Cast iron requires more attention and care. Enamel is more forgiving but still needs proper handling. Knowing which type you own is the first step in learning how to clean your Dutch oven the right way.
How Often Should You Deep Clean Your Dutch Oven
A deep clean is different from your regular wash. You should deep clean your Dutch oven once a month if you use it frequently. If you use it less often, every two to three months is enough. A deep clean removes built-up residue, restores shine, and refreshes the seasoning on cast iron.
Watch for signs that your Dutch oven needs a deep clean. Dark, sticky residue that will not come off with a normal wash is a clear signal. Strange odors after cooking also indicate buildup. If your food starts sticking more than usual, it is time for a thorough cleaning session.
Regular deep cleaning keeps your Dutch oven performing at its peak. It also gives you a chance to inspect the pot for any damage. Catching small issues early prevents bigger problems down the road.
Conclusion
Your Dutch oven is one of the most versatile and valuable tools in your kitchen. Taking care of it does not have to be complicated. With the right Dutch oven cleaning methods, you can keep it looking and performing like new for years. Remember to always match your cleaning approach to the material. Cast iron needs gentle care and regular seasoning. Enamel can handle a bit more but still deserves a soft touch.
Avoid common mistakes like using harsh scrubbers, soaking cast iron too long, or skipping the drying step. These small habits make a huge difference. A little regular maintenance goes a long way in preserving the quality and lifespan of your pot. Follow the steps in this guide and you will never have to worry about tough stains or burnt residue again.
Now that you know how to clean Dutch oven cookware properly, it is time to put these tips into action. Grab your Dutch oven, give it the care it deserves, and enjoy cooking with a clean, well-maintained pot. Your future self and your next meal will thank you.
Frequently Asked Questions
Can I use steel wool to clean my Dutch oven?
No, steel wool is too harsh for both cast iron and enamel Dutch ovens. It strips seasoning from cast iron and scratches the enamel coating. Use a soft sponge, brush, or coarse salt instead for safe and effective cleaning.
Is it okay to put my Dutch oven in the dishwasher?
It depends on the material. Enamel and stainless steel Dutch ovens are generally dishwasher-safe, but hand washing is always better. Cast iron Dutch ovens should never go in the dishwasher. The harsh detergents strip seasoning and promote rust.
How do I remove rust from my Dutch oven?
Mix equal parts white vinegar and water and soak the rusted area for 30 minutes. Scrub with a soft brush or coarse salt. Rinse thoroughly, dry completely, and re-season the area with a thin layer of oil. For cast iron, this method works well to restore the surface.
Can I use bleach to clean my Dutch oven?
No, bleach is too harsh and can damage both cast iron seasoning and enamel coatings. Stick to natural cleaners like baking soda, vinegar, and coarse salt. These are effective and safe for all Dutch oven types.
How often should I re-season my cast iron Dutch oven?
Re-season your cast iron Dutch oven every few months or whenever you notice the surface looking dull or food sticking more than usual. A good rule of thumb is to re-season after every deep clean. Regular seasoning keeps the non-stick surface strong and protected.
What is the best oil for seasoning a Dutch oven?
Vegetable oil, canola oil, and flaxseed oil are all excellent choices for seasoning. Apply a very thin layer with a paper towel and bake upside down at 375 degrees Fahrenheit for one hour. Flaxseed oil creates a particularly hard and durable seasoning layer.