How Do I Get Melted Plastic Out Of My Oven Step By Step
This guide shows you how to get melted plastic out of your oven step by step using safe household items. You’ll learn simple cleaning methods for both regular and self-cleaning ovens. We cover removal techniques, prevention tips, and when to call a professional.
You just pulled out a casserole dish and spotted a blob of melted plastic on the oven floor. It happens to everyone. A forgotten container, a leaky wrap, or a stray piece of foil can turn into a gooey mess. How Do I Get Melted Plastic Out Of My Oven is one of the most common kitchen emergencies. The good news is that you don’t need harsh chemicals or a professional cleaner. With a few household items and some patience, you can restore your oven to its former glory. This step-by-step guide will walk you through safe, effective methods that work on most oven types. You’ll learn how to remove plastic, eliminate odors, and prevent future accidents.
Melted plastic can cling to the interior of your oven like a stubborn sticker. It releases a foul smell that lingers for days. If you ignore it, the residue can bake on and become even harder to remove. So it’s best to tackle the problem right away. Whether you have a standard electric oven or a self-cleaning model, the techniques below will help you. I’ll share the exact steps I use in my own kitchen. Let’s get started.
Key Takeaways
- Act fast: The sooner you address melted plastic, the easier it is to remove.
- Use the ice cube method: Cooling the plastic makes it brittle and simple to scrape off.
- Try a hair dryer: Gentle heat can soften plastic without damaging the oven surface.
- Baking soda paste works wonders: A natural cleaner cuts through residue and eliminates odors.
- Prevention is key: Cover food and avoid heating plastic containers in the oven.
- Know when to call a pro: Stubborn plastic or a damaged self-cleaning cycle may need expert help.
📑 Table of Contents
Why Does Plastic Melt in the Oven?
Understanding why plastic melts helps you avoid the mess in the first place. Most plastic containers have a low melting point. They simply can’t handle the high heat inside an oven. Even a few minutes of exposure can turn a container into a sticky, smelly disaster.
Common Causes of Plastic Melting
- Forgotten containers: You take food out but leave a plastic lid or wrapping behind.
- Mislabeled containers: Not all plastic is oven-safe. Check the bottom for a heat-resistant symbol.
- Plastic wrap touching the heating element: This is a very common mistake. The wrap melts instantly.
- Aluminum foil accidents: Foil can trap heat and melt plastic underneath it.
What Happens When Plastic Heats Up
When plastic reaches its melting point, it softens and releases chemicals. The fumes smell terrible. The melted plastic can bond to the oven interior, especially to the enamel or glass surfaces. It leaves behind a sticky residue that attracts grease and dirt. Over time, this residue becomes a dark, baked-on stain. That’s why quick melted plastic removal is so important.
Quick Tips:
- Always check oven-safe labels before heating anything.
- Use oven-safe glass or ceramic instead of plastic whenever possible.
- Keep plastic wrap at least 3 inches away from the heating elements.
Common Mistakes:
- Using plastic wrap too close to the heating element.
- Assuming all plastic containers can go in the oven.
- Scraping melted plastic with a metal spatula, which scratches the oven surface.
Safety First: Preparing to Clean
Before you start cleaning, make sure you’re safe. Melted plastic can be tricky to remove, and some cleaning methods involve heat or chemicals. A little preparation goes a long way.
Gather Your Supplies
You don’t need anything fancy. Here’s what you’ll need:
- Heat-resistant gloves
- Plastic or wooden scraper or spatula
- Ice cubes or a freezer bag
- Baking soda
- White vinegar
- Dish soap
- Microfiber cloths
- A hair dryer (optional)
Turn Off and Cool Down the Oven
Never attempt to clean melted plastic while the oven is warm. Wait until the oven is completely cool to the touch. This prevents burns and ensures the plastic doesn’t soften further as you work. A cool oven also gives you better control when scraping.
Expert Insights: Never use metal scrapers on non-stick surfaces. They can scratch the coating and cause permanent damage. Always use a plastic or wooden spatula. If you’re dealing with a self-cleaning oven, make sure the interior is fully cooled before you begin.
How Do I Get Melted Plastic Out Of My Oven: Step-by-Step Removal Methods
There are several proven methods to remove melted plastic. I’ll walk you through each one. You can choose the method that suits your oven type and the severity of the mess. Here’s a quick comparison to help you decide.
| Method | Time Required | Difficulty | Best For |
|---|---|---|---|
| Ice Cube Technique | 30–60 minutes | Easy | Small to medium plastic blobs on cool oven surfaces |
| Hair Dryer Method | 20–40 minutes | Medium | Plastic stuck on walls or corners |
| Baking Soda Paste | 1–2 hours | Easy | Sticky residue and light stains |
| Commercial Oven Cleaner | 30 minutes + soak | Medium | Stubborn, baked-on plastic on regular ovens |
Method 1: The Ice Cube Technique
This is my favorite method because it’s simple and uses no chemicals. The cold makes the plastic brittle, so it cracks and flakes off easily.
- Grab a handful of ice cubes or a bag of frozen vegetables.
- Place the ice directly on the melted plastic. Hold it there for 10–15 minutes.
- The plastic will become hard and brittle.
- Use a plastic scraper or an old credit card to gently chip away the plastic.
- Wipe the area with a damp cloth to remove any remaining flakes.
Quick Tip: Work in small sections. If the plastic is large, break it into smaller pieces first.
Method 2: Using a Hair Dryer
If the oven is still warm or the plastic is very stuck, a hair dryer can help. The gentle heat softens the plastic without overheating the oven surface.
- Set your hair dryer to a low or medium heat setting.
- Hold it about 6 inches from the melted plastic.
- Move the dryer back and forth for 2–3 minutes.
- The plastic will soften and become pliable.
- Use a wooden spatula to gently lift and peel the plastic away.
- Wipe the area with a cloth dampened with warm, soapy water.
Quick Tip: Never use a heat gun or open flame. These can damage the oven’s interior or release harmful fumes.
Method 3: Baking Soda Paste
Baking soda is a gentle abrasive and a natural deodorizer. It’s perfect for removing sticky residue and neutralizing the burnt plastic smell.
- Mix 3 tablespoons of baking soda with 1 tablespoon of water to form a thick paste.
- Spread the paste over the plastic residue and the surrounding area.
- Let it sit for at least 30 minutes, or up to 2 hours for tough spots.
- Use a damp cloth or a soft sponge to scrub the area in a circular motion.
- Rinse thoroughly with a clean, wet cloth.
- Repeat if any residue remains.
Quick Tip: Add a splash of white vinegar to the paste for extra cleaning power. The fizzing action helps lift stuck-on grime.
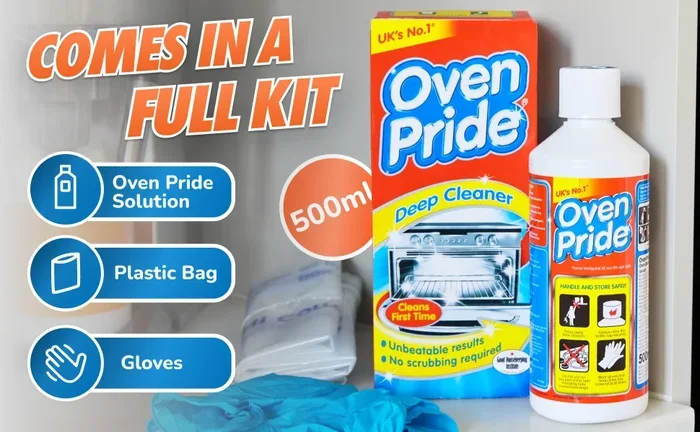
Method 4: Commercial Oven Cleaner
For stubborn plastic that won’t budge with the methods above, a commercial oven cleaner can do the job. Use this as a last resort, especially if you have a regular oven (not a self-cleaning model).
- Ventilate your kitchen by opening windows and turning on the fan.
- Spray the cleaner directly onto the plastic residue, following the product instructions.
- Let it sit for the recommended time, usually 10–20 minutes.
- Use a non-abrasive scrubbing pad to wipe away the softened plastic.
- Rinse the oven interior thoroughly with clean water and a damp cloth.
- Wipe dry to prevent any chemical residue from affecting your next cook.
Important: Never use commercial cleaner in a self-cleaning oven. The high heat of the self-cleaning cycle can cause the chemicals to release toxic fumes.
Expert Insights: If you have a self-cleaning oven, the heat cycle itself can sometimes loosen small pieces of plastic. Run the self-clean cycle only if the plastic is very small and you’ve already removed as much as possible by hand. Always supervise the cycle and open windows to vent fumes.
Cleaning After Plastic Removal
Once you’ve removed the bulk of the melted plastic, you’ll likely see some staining and smell lingering. This step ensures your oven looks and smells fresh again.
Dealing with Stubborn Stains
Plastic residue can leave dark marks on the oven floor or walls. A simple paste of baking soda and water can lift these stains. Apply the paste, let it sit for 30 minutes, then scrub gently with a damp sponge. For extra strength, add a few drops of white vinegar to the paste. The bubbling action helps break down the stain.
Eliminating the Burnt Plastic Smell
The smell of burnt plastic can fill your kitchen and even your home. Here’s how to get rid of it:
- Vinegar steam: Place a bowl of white vinegar on the oven rack and heat the oven to 200°F for 10 minutes. The steam absorbs odors.
- Lemon water: Boil a pot of water with sliced lemons on the stovetop. The citrus scent masks and neutralizes the plastic smell.
- Ventilation: Open all windows and run the exhaust fan for at least an hour.
Key Takeaways: Ventilate the oven, use natural deodorizers like vinegar or lemons, and repeat the cleaning process if the smell persists. A clean oven not only looks better but also cooks more efficiently.
Preventing Future Melted Plastic Accidents
Once you’ve cleaned the mess, take steps to prevent it from happening again. A little prevention saves a lot of scrubbing later.
Oven-Safe Containers Only
Always check the bottom of containers for an oven-safe symbol. Glass, ceramic, and metal are safe. Plastic should only go in the microwave if it’s labeled microwave-safe, and even then, it’s best to avoid high heat. Invest in a set of oven-safe glass dishes. They’re durable and easy to clean.
Use Foil and Lids Wisely
Aluminum foil can be a great helper, but it can also trap heat and melt plastic. If you use foil to cover a dish, make sure the foil doesn’t touch the heating elements. Use oven-safe lids made of glass or silicone instead of plastic wrap. If you must use plastic wrap, keep it at least 3 inches away from the top heating element.
Regular Oven Maintenance
Wipe down your oven after every use while it’s still slightly warm. This prevents food and grease from baking on. A quick wipe with a damp cloth can save you from tough stains later. For a deeper clean, use a baking soda paste once a month. This keeps the interior fresh and makes any future plastic removal much easier.
When to Call a Professional
Most melted plastic messes can be handled at home. But there are times when it’s best to call in the experts.
Signs You Need Expert Help
- The plastic has melted into the heating element or burner.
- You notice deep scratches or damage to the oven interior after scraping.
- The self-cleaning cycle didn’t fully remove the plastic and now the oven smells strongly of chemicals.
- You’re dealing with a large amount of melted plastic that has hardened deep in the oven’s crevices.
Cost vs. DIY Considerations
Professional oven cleaning typically costs between $100 and $200, depending on your location and the severity of the mess. If the plastic damage is minor, DIY methods save you money. But if the oven’s interior is damaged or the heating element is compromised, a professional can assess and repair the issue safely. Always weigh the cost of a service call against the risk of further damaging your oven with aggressive DIY methods.
Final Thoughts
Learning how do I get melted plastic out of my oven is a valuable kitchen skill. It’s a common problem with simple solutions. Whether you use the ice cube method, a hair dryer, baking soda, or a commercial cleaner, the key is to act quickly and work gently. Melted plastic removal doesn’t have to be stressful. With the right approach, you can clean your oven effectively and keep it smelling fresh. Remember to always use oven-safe containers and stay vigilant when cooking. A little care goes a long way in preventing these messes. Now that you know the steps, you’re ready to handle any plastic emergency with confidence.
Frequently Asked Questions
Can I use a razor blade to scrape melted plastic out of my oven?
It’s best to avoid razor blades or metal scrapers. They can scratch the oven’s interior, especially on non-stick or enamel surfaces. Use a plastic scraper or an old credit card instead. These tools are gentle yet effective for removing brittle plastic.
Is it safe to use the self-cleaning cycle if there’s plastic residue left?
No, it’s not safe. The extreme heat of the self-cleaning cycle can melt the remaining plastic further, causing smoke and potentially damaging the oven. Always remove as much plastic as possible by hand before running any cleaning cycle.
What household items remove melted plastic from an oven?
You can use ice cubes, a hair dryer, baking soda, white vinegar, and dish soap. These items are safe, affordable, and effective for most melted plastic situations. The ice cube method is the simplest and requires no chemicals at all.
How do I get the plastic smell out of my oven completely?
Use a vinegar steam treatment or boil lemon water on the stovetop. Open windows for ventilation and run the exhaust fan. If the smell lingers, wipe the interior with a cloth dampened with a mixture of baking soda and water. Repeat the process until the odor is gone.
Will melted plastic damage my oven permanently?
Usually, no. Most plastic residue can be cleaned without permanent damage. However, if you use abrasive metal tools or harsh chemicals, you might scratch or discolor the interior. Always use gentle methods and soft materials to protect your oven’s surface.
Can I prevent plastic from melting in the oven in the future?
Absolutely. Always use oven-safe glass, ceramic, or metal containers. Never heat plastic containers unless they are specifically labeled microwave-safe and even then, avoid direct contact with heating elements. Cover food with oven-safe lids or foil, and keep plastic wrap far away from the top burner.