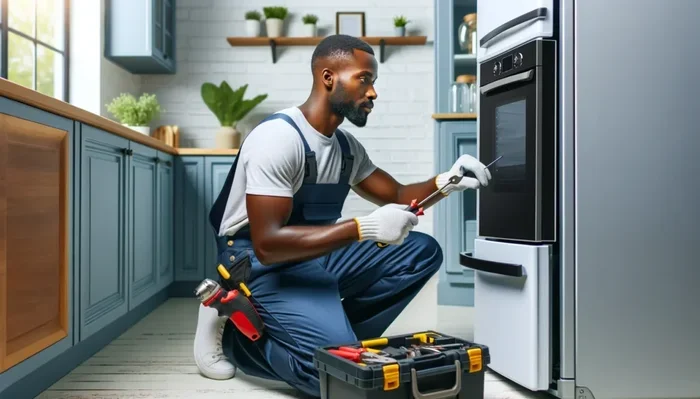
Why Would My Oven Stop Working And How To Fix It Fast
Why would my oven stop working? It could be a blown thermal fuse, a faulty heating element, or a broken igniter. Oven troubleshooting is easier than most people think, and many fixes take just minutes. This guide walks you through every common cause and the oven repair steps you can take at home. You will learn to diagnose the problem quickly and save money on home appliance repair calls.
There is nothing worse than prepping a meal and then realizing your oven has quit on you. You turn the dial, press the buttons, and… nothing happens. The oven not heating problem is one of the most common household frustrations. Whether you have a gas oven or an electric oven, the reasons behind a broken oven tend to fall into a few predictable categories. The good news? Most of these issues are fixable without calling a professional.
This guide will walk you through every reason your oven might have stopped working. We will cover oven troubleshooting steps you can do right now. You will also learn how to identify the root cause and apply the right oven repair fix. By the end, you will feel confident tackling the problem yourself. Let us get your kitchen back in business.
Key Takeaways
- Power issues are the #1 culprit: A tripped breaker or faulty outlet stops your oven cold.
- Heating elements fail over time: The bake and broil elements are common wear-and-tear parts.
- Igniters go bad in gas ovens: A weak igniter prevents gas from lighting properly.
- Thermal fuses blow when ovens overheat: Replacing a blown fuse is a simple fix.
- Control boards can fail unexpectedly: This requires professional diagnosis in many cases.
- Many fixes cost under $50: DIY repairs save you hundreds vs. calling a technician.
- Regular maintenance prevents breakdowns: Clean your oven often to avoid common problems.
📑 Table of Contents
- Why Would My Oven Stop Working? The Most Common Causes
- How To Diagnose Your Oven Problem Step by Step
- Quick Tips To Keep Your Oven Running Smoothly
- When To Call a Professional For Oven Repair
- Common Mistakes People Make When Their Oven Stops Working
- Understanding Your Oven: Gas vs. Electric Models
- Cost Breakdown for Common Oven Repairs
- How To Prevent Future Oven Failures
- Final Thoughts: Getting Your Oven Back to Working Order
Why Would My Oven Stop Working? The Most Common Causes
When your electric oven not working or your gas oven fails to heat, the cause usually falls into one of several categories. Understanding these root causes is the first step toward a fix. Below we break down the most common reasons ovens stop working.
1. Power Supply Problems
This is the number one reason ovens stop working, and it is also the easiest to fix. Your oven needs a steady flow of electricity to operate. If the power is interrupted, the oven will not turn on at all.
Start by checking your home’s electrical panel. Look for a tripped breaker. The breaker for your oven is usually labeled. Flip it back to the “on” position and see if the oven responds. If the breaker trips again right away, there may be a deeper electrical issue.
Next, check the outlet itself. Unplug the oven and plug in another device. If that device also does not work, the outlet is the problem. You may need an electrician to replace a faulty outlet. Oven power supply issues are surprisingly common in older homes with outdated wiring.
2. Faulty Heating Elements
The bake element and broil element are the metal coils at the bottom and top of your oven. These elements glow red when hot. Over time, they can burn out, crack, or develop holes. A faulty heating element is one of the top reasons for oven not heating problems.
To check the bake element, remove the racks and look at the bottom of the oven. If the element has visible damage like blistering or holes, it needs replacement. You can also test it with a multimeter for continuity. A broken oven element is one of the simplest and cheapest repairs you can do yourself.
Replacement elements cost between $15 and $50. The swap usually takes about 15 minutes. Make sure you unplug the oven before starting any repair work. Safety always comes first when dealing with oven repair tasks.
3. Gas Oven Igniter Failure
If you have a gas oven problems situation, the igniter is often to blame. The igniter is the small glow plug that lights the gas burner. When it weakens over time, it may not get hot enough to ignite the gas.
Signs of a bad igniter include a long delay before the oven heats up or no heat at all. You might also smell gas without the oven lighting. This is a serious safety concern. If you suspect a gas leak, leave the house immediately and call your gas company.
Replacing a gas oven igniter is straightforward. The part costs around $30 to $75. You will need a screwdriver and about 20 minutes. Always shut off the gas supply before working on any gas appliance. Oven troubleshooting for gas models starts with the igniter 90% of the time.
4. Blown Thermal Fuse
The thermal fuse is a safety device inside your oven. It shuts the oven off if it overheats. Once a thermal fuse blows, it cannot be reset. You must replace it. This is a very common reason for a broken oven that shows no signs of life.
Overheating can happen if your oven vents are clogged with grease and food debris. Regular oven cleaning helps prevent thermal fuse failures. The fuse itself is a small, inexpensive part. You can find it near the back wall of the oven cavity or near the heating element.
Testing a thermal fuse requires a multimeter. Set it to continuity mode and touch the probes to the fuse terminals. If there is no continuity, the fuse is blown. Replacement takes about 10 minutes and costs under $20. This is a quick oven repair that anyone can handle.
5. Control Board Malfunction
The control board is the brain of your oven. It sends power to the heating elements and regulates temperature. When the control board fails, the oven may not turn on, may not heat properly, or may show oven display error codes.
Control board failures are less common than heating element issues. They also require more advanced oven troubleshooting. Before replacing a control board, rule out all the simpler causes first. Check the wiring connections to the board. Sometimes a loose wire mimics a control board failure.
If the board is truly defective, replacement costs range from $100 to $300. Professional installation is recommended for this repair. Home appliance repair technicians can diagnose control board issues quickly and accurately.
6. Temperature Sensor or Thermostat Issues
The temperature sensor tells your oven how hot it is. If it malfunctions, the oven may not heat to the right temperature or may not heat at all. Oven calibration problems often stem from a faulty sensor.
You can test the sensor with a multimeter. Remove it from the oven and check for resistance. The reading should change as the sensor heats up. If the reading stays the same, the sensor is bad. Replacement sensors cost around $20 to $40 and are easy to install.
Sometimes the issue is not the sensor itself but the thermostat. The thermostat controls the overall temperature cycle. A malfunctioning thermostat can cause uneven heating or complete oven failure. This is another area where oven repair professionals can help if you are unsure.
7. Door Latch and Safety Switch Problems
Modern ovens have safety switches that prevent operation when the door is not properly closed. If the oven door latch is broken or misaligned, the oven may refuse to start. This is a safety feature designed to prevent heat exposure and burns.
Check the door latch mechanism carefully. Look for visible damage, loose hinges, or worn springs. The safety switches are usually located near the latch. Test them for continuity with a multimeter. A self-cleaning oven issues scenario can also involve the door latch, since the oven locks during the self-cleaning cycle.
Replacing a door latch assembly costs between $30 and $80. The repair involves removing the inner door panel and swapping the latch. It is a manageable DIY project for most homeowners. Just make sure the oven is unplugged before you start.
How To Diagnose Your Oven Problem Step by Step
Diagnosing a broken oven does not have to be overwhelming. Follow this systematic approach to narrow down the cause. This oven troubleshooting method works for both gas and electric models.
Step 1: Check the power source. Verify the breaker has not tripped. Test the outlet with another device. Confirm the oven is properly plugged in if it is a countertop model.
Step 2: Listen for sounds. A gas oven should click when you turn it on. An electric oven should show indicator lights. No sound at all often points to a power issue or control board failure.
Step 3: Inspect the heating elements. Look for visible damage on the bake and broil elements. Check for continuity with a multimeter. A failed element is the most common cause of oven not heating in electric models.
Step 4: For gas ovens, check the igniter. Does it glow when you turn the oven on? A weak or non-functioning igniter means the gas will not light. Replace it if needed.
Step 5: Test the thermal fuse and temperature sensor. These safety and monitoring components can fail without warning. A multimeter makes this quick and easy.
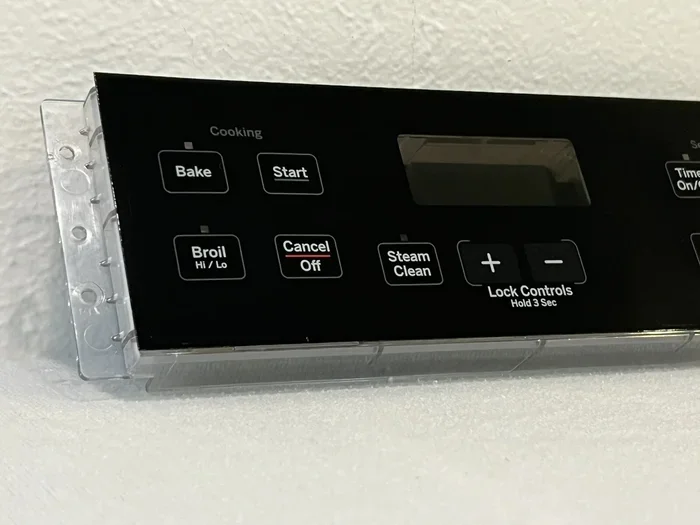
Step 6: Check for error codes. Modern ovens display codes on the oven display error panel. Look up the code in your owner’s manual or online. This gives you a direct clue about the problem.
Quick Tips To Keep Your Oven Running Smoothly
Prevention is always better than repair. Follow these simple tips to avoid oven troubleshooting headaches in the future.
- Clean your oven regularly: Grease buildup causes overheating and can blow fuses. Wipe down the interior after every use.
- Do not ignore unusual smells: Burning smells during oven use can signal a failing element or wiring problem. Investigate immediately.
- Check seals and gaskets: Damaged door seals let heat escape, forcing the oven to work harder. Replace worn gaskets promptly.
- Use the right cookware: Oversized pots can block vents and cause overheating. Keep airflow paths clear inside the oven.
- Schedule annual inspections: A professional home appliance repair checkup catches small problems before they become big ones.
- Replace parts proactively: If your oven is over 10 years old, consider replacing heating elements before they fail completely.
When To Call a Professional For Oven Repair
Many oven repair tasks are perfect DIY projects. But some situations call for a trained technician. Knowing when to call for help saves you time, money, and potential safety risks.
Call a professional if you smell gas and cannot find the source. Gas leaks are dangerous and require immediate expert attention. Also call a pro if the control board needs replacement. This involves complex wiring and diagnostic work that most homeowners are not comfortable doing.
If your oven is still under warranty, contact the manufacturer first. DIY repairs can void your warranty. A home appliance repair technician can fix the issue while keeping your warranty intact. This is especially important for self-cleaning oven issues that involve complex electronic systems.
Cost is another factor. Simple part replacements like elements and igniters cost $15 to $75. Control board repairs can run $100 to $300 for parts alone. If the repair cost exceeds half the price of a new oven, replacement might be the smarter choice. A technician can give you an honest assessment of whether oven repair or replacement makes more sense for your situation.
Common Mistakes People Make When Their Oven Stops Working
Avoid these common pitfalls when your electric oven not working or your gas oven fails. These mistakes can turn a simple fix into a costly repair.
Mistake 1: Assuming the oven is dead. Many people immediately call a repairman for a simple power issue. Always check the breaker and outlet first. You might save yourself a service call fee.
Mistake 2: Ignoring error codes. Modern ovens are smart appliances. The error codes they display are diagnostic tools, not annoyances. Take a photo of the code and look it up. The answer is often right there.
Mistake 3: Using the wrong replacement part. Not all heating elements or igniters are universal. Check your oven model number before ordering parts. The wrong part will not fit or function correctly.
Mistake 4: Skipping safety steps. Always unplug the oven before opening it up. For gas ovens, shut off the gas valve. Working on a live appliance is dangerous and unnecessary.
Mistake 5: Overlooking simple causes. Sometimes the oven timer is set to a delayed start. Sometimes the child lock is engaged. Before diving into complex oven troubleshooting, check all the basic settings first.
Understanding Your Oven: Gas vs. Electric Models
Gas and electric ovens work differently, and their failure points are distinct. Understanding these differences helps you troubleshoot more effectively.
Gas ovens rely on a gas valve, igniter, and burner assembly. The most common failure point is the igniter. Gas ovens also have safety valves that can fail. Gas oven problems tend to involve ignition or gas flow issues rather than electrical component failures.
Electric ovens use heating elements, thermostats, and control boards. The bake element and broil element are the most likely parts to fail. Electric ovens also have thermal fuses that blow during overheating events. Electric oven not working scenarios most often trace back to elements, fuses, or wiring.
Both types share some common failure points. The control board, temperature sensor, and door safety switches apply to both gas and electric models. A systematic approach to oven troubleshooting covers all these bases regardless of your oven type.
Cost Breakdown for Common Oven Repairs
Knowing the cost of common oven repair jobs helps you decide whether to DIY or hire a professional. Here is a realistic cost breakdown.
| Repair | Part Cost | DIY Difficulty | Professional Cost |
|---|---|---|---|
| Bake Element Replacement | $15 – $50 | Easy | $100 – $200 |
| Broil Element Replacement | $15 – $50 | Easy | $100 – $200 |
| Gas Igniter Replacement | $30 – $75 | Moderate | $150 – $250 |
| Thermal Fuse Replacement | $10 – $20 | Easy | $80 – $150 |
| Temperature Sensor | $20 – $40 | Easy | $100 – $180 |
| Control Board Replacement | $100 – $300 | Hard | $200 – $400 |
| Door Latch Assembly | $30 – $80 | Moderate | $120 – $250 |
As you can see, DIY repairs save significant money. The parts are inexpensive and most swaps take less than 30 minutes. If you are comfortable using a multimeter and following safety precautions, you can handle most oven repair tasks yourself. The only exception is the control board, which benefits from professional installation.
How To Prevent Future Oven Failures
Once you have fixed your broken oven, take steps to prevent the same problem from happening again. Prevention is the best oven repair strategy there is.
Keep the interior clean. Grease and food debris build up over time. This residue can cause overheating, smoke, and even fire hazards. Clean spills immediately after the oven cools. Do a deep clean at least once a month.
Check door seals regularly. A worn door seal lets heat escape and forces the oven to work harder. This strains the heating elements and shortens their lifespan. Replace damaged gaskets as soon as you notice wear.
Do not overload the oven. Blocking vents with oversized cookware restricts airflow. Poor ventilation causes overheating, which blows thermal fuses and damages components. Give your oven room to breathe.
Use your oven correctly. Follow the manufacturer’s guidelines for maximum temperatures and load capacities. The self-cleaning cycle generates extreme heat. Use it sparingly and only when the oven is empty. Self-cleaning oven issues often result from users running the cycle too frequently.
Replace old parts proactively. If your oven is more than 10 years old, keep an eye on the heating elements. Replace them at the first sign of wear. A $30 element replacement today prevents a $200 control board failure tomorrow.
Final Thoughts: Getting Your Oven Back to Working Order
A broken oven disrupts your daily routine and adds stress to meal preparation. But the vast majority of oven not heating problems have straightforward solutions. Start with the basics. Check the power supply, inspect the heating elements, and test the igniter. These simple steps solve the problem 80% of the time.
Do not let a simple oven troubleshooting task intimidate you. Most fixes require nothing more than a screwdriver and a multimeter. The parts are affordable and widely available online. With a little patience and the right guidance, you can bring your oven back to life in under an hour.
Remember that safety always comes first. If you are ever unsure about a repair, especially involving gas lines or electrical wiring, call a professional. A qualified home appliance repair technician can diagnose complex issues quickly and safely. The goal is a working oven and a happy kitchen. Whether you fix it yourself or hire help, you now have the knowledge to take action fast.
Frequently Asked Questions
Why did my oven suddenly stop working?
The most common reason is a power supply issue like a tripped breaker or blown fuse. Other sudden failures include a burnt-out heating element, a blown thermal fuse, or a faulty igniter in gas models. Start by checking the breaker and outlet before investigating internal components.
How much does it cost to repair an oven?
Simple repairs like replacing a heating element or thermal fuse cost $15 to $50 for the part. Professional repair services typically charge $100 to $200 for labor and parts combined. Control board replacements can cost $100 to $300 for parts alone. Always get a quote before committing to expensive repairs.
Can I fix my oven myself?
Yes, most common oven repairs are DIY-friendly. Replacing heating elements, thermal fuses, and temperature sensors are straightforward tasks. You will need a multimeter and basic tools. Always unplug the oven and turn off the gas supply before starting any repair work.
How do I know if my oven heating element is bad?
Look for visible damage like blistering, holes, or cracks on the element. If the element does not glow red when the oven is on, it has likely failed. You can also test it with a multimeter for continuity. No continuity means the element needs replacement.
What should I do if my gas oven igniter glows but does not light?
A weak igniter may glow but not reach the temperature needed to light the gas. This is a clear sign the igniter needs replacement. Shut off the gas supply, remove the old igniter, and install the new one. If you smell gas at any point, leave the area and contact your gas company immediately.
How often should I have my oven professionally inspected?
An annual inspection is ideal for most households. Professional technicians can spot wear and tear before it leads to a complete failure. This is especially important for gas ovens where undetected issues can pose safety risks. Regular maintenance extends your oven’s lifespan significantly.
=== CONCLUSION ===
Why would my oven stop working is a question with many possible answers, but most of them are fixable. From power supply problems to faulty heating elements, igniter failures, and blown thermal fuses, the causes are predictable and the solutions are within reach. You do not need to be an electrician or a plumber to handle most oven repair jobs. A little knowledge, the right tools, and a cautious approach go a long way.
Start with the simple checks. Work your way through the diagnostic steps systematically. Replace worn parts promptly and keep your oven clean to prevent future issues. Your broken oven does not have to mean a trip to the store for frozen dinners or a costly repair bill. With the information in this guide, you have everything you need to get back to cooking with confidence. Take action today and bring warmth back to your kitchen.