What Oven Temperature Cooks Five Boneless Skinless Breasts
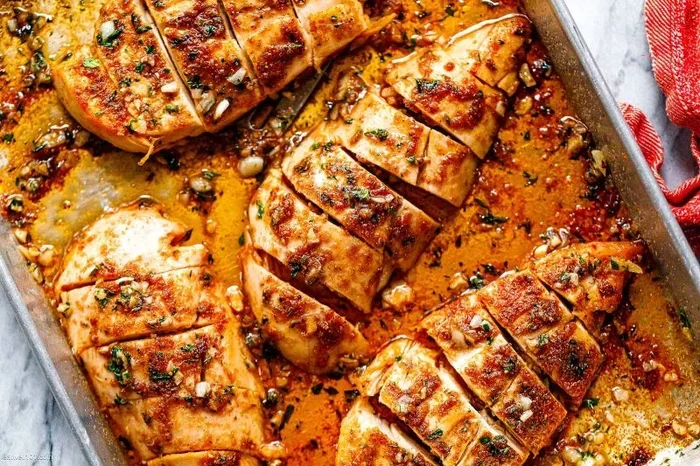
The ideal oven temperature to cook five boneless skinless breasts is 400°F for about 20 to 25 minutes. This heat level ensures the chicken cooks evenly while staying juicy and tender on the inside. Using a meat thermometer to check for an internal temperature of 165°F is the best way to guarantee doneness. Whether you are meal prepping for the week or feeding a crowd, this method delivers consistent results.
Cooking five boneless skinless chicken breasts in the oven might sound simple, but getting it right takes a little know-how. Many people end up with dry, rubbery chicken because the temperature or timing is off. The good news is that once you know the right oven temperature for boneless skinless chicken breasts, the process becomes foolproof.
This guide covers everything you need to know about what oven temperature cooks five boneless skinless breasts perfectly. You will learn the best heat setting, how long to bake them, and pro tips that keep the meat juicy every single time. Whether you are a beginner cook or someone looking to speed up weeknight dinners, this article has you covered.
Let us be real for a second. Chicken breasts are one of the most popular proteins in homes around the world. They are lean, versatile, and easy to pair with almost any side dish. But cooking five of them at once can feel tricky. You want each piece to come out the same. You do not want some pieces overdone and others still raw in the middle. That is exactly why this guide exists.
Key Takeaways
- 400°F is the sweet spot: This oven temperature cooks five boneless skinless breasts evenly and efficiently.
- Cook time is roughly 20 to 25 minutes: Thicker breasts may need a few extra minutes.
- Always use a meat thermometer: The internal temperature must reach 165°F for safe eating.
- Rest the chicken for 5 minutes: This locks in juices and keeps the meat moist.
- Pound breasts to even thickness: This prevents some pieces from drying out while others stay undercooked.
- Season generously: Simple olive oil, salt, and garlic go a long way in boosting flavor.
- Avoid overcooking: Boneless skinless chicken dries out fast, so watch the time closely.
📑 Table of Contents
- The Best Oven Temperature for Five Boneless Skinless Breasts
- How Long to Cook Five Boneless Skinless Chicken Breasts
- Step-by-Step Guide to Baking Five Boneless Skinless Chicken Breasts
- Tips for Juicy, Flavorful Chicken Every Time
- Common Mistakes to Avoid When Baking Chicken Breasts
- Expert Insights and Pro Tips
- Frequently Asked Questions
- Conclusion
The Best Oven Temperature for Five Boneless Skinless Breasts
So, what is the magic number? The answer is 400°F (200°C). This temperature hits the sweet spot between cooking the chicken through quickly and keeping it moist. When you roast chicken breasts at 400 degrees, the outside gets a light golden sear while the inside stays tender and juicy.
You might wonder why not 350°F. Some recipes do call for a lower temperature. But here is the thing. Lower temperatures mean longer cook times. And longer cook times mean more moisture loss. With boneless skinless chicken breasts, you are already working with less fat to keep the meat succulent. So you want to cook them fast enough to preserve that natural juiciness.
Why 400°F Works So Well
At 400°F, the oven heat surrounds each chicken breast quickly. This high heat helps create a slight crust on the outside. That crust helps seal in the juices. The inside cooks through at a steady pace without drying out. For five breasts, this temperature also means they all fit comfortably on a single baking sheet with some space between them.
If you try to crowd five breasts too close together, the steam builds up. That steam actually lowers the effective temperature around the chicken. The result? Uneven cooking and soggy outsides instead of a nice light browning. Give each breast about an inch of space on the pan. This small detail makes a big difference.
Another reason 400°F is ideal is that it reduces the risk of overcooking. Boneless skinless chicken breasts are thin and lean. They go from perfectly done to dry and chalky in a matter of minutes. A hotter oven means less time in the oven overall. Less time means more moisture retained.
Can You Use 375°F Instead?
Yes, you can. Some home cooks prefer 375°F because it feels safer. At this temperature, there is a wider margin of error. The chicken takes a bit longer to cook, which gives you more time to check and adjust. However, the trade-off is that the chicken may release slightly more moisture during the extra cooking time.
If you choose 375°F, plan on adding about 5 minutes to the cook time. The chicken will still come out great. It just might not have quite as much of that roasted, golden exterior that 400°F delivers. Both temperatures work. But for the best balance of flavor and texture, 400°F is the top recommendation.
What About 425°F or Higher?
You can go higher, but it comes with risks. At 425°F or above, the outside of the chicken can brown too fast. The inside might still be undercooked while the outside looks done. This is called the “false golden” problem. The surface looks ready, but the center is not at a safe temperature yet.
For five boneless skinless breasts, sticking with 400°F is the safest and most reliable choice. It gives you a beautiful golden color without the risk of burning. If you do decide to push the temperature higher, flip the breasts halfway through. This helps both sides cook evenly and reduces the chance of hot spots.
How Long to Cook Five Boneless Skinless Chicken Breasts
Now that you know the temperature, the next question is timing. How long should you bake five boneless skinless breasts at 400°F? The general answer is 20 to 25 minutes. But the exact time depends on a few factors that are worth understanding.
Thickness Matters Most
The single biggest factor in cook time is thickness. A thin chicken breast that is about half an inch thick will cook in roughly 15 to 18 minutes. A thicker breast, say one inch or more, might need the full 25 minutes or even a little longer. This is why pounding your chicken breasts to an even thickness is such a smart move.
When you buy boneless skinless chicken breasts, they rarely come in uniform thickness. One end is thin, and the other end is thick. That thick part needs more time to cook through. If you just toss five uneven breasts on a pan, the thin ones will be overcooked by the time the thick ones are done.
The Uniform Thickness Trick
Here is a quick and easy trick. Place each chicken breast between two sheets of plastic wrap. Use a meat mallet or a rolling pin to gently pound it to an even thickness of about three-quarters of an inch. This takes just a few minutes per breast, but it pays off huge in the oven.
Uniform thickness means every piece cooks at the same rate. No more guessing which breast needs extra time. No more cutting into one to check while another is still underdone. When all five breasts are the same thickness, they all come out of the oven at the same time, perfectly done.
Using a Meat Thermometer
Time estimates are helpful, but they are not foolproof. The only way to truly know your chicken is done is to use a meat thermometer. Insert the probe into the thickest part of the breast. Make sure it does not touch the bone or the pan. You are looking for an internal temperature of 165°F.
If the thermometer reads 160°F, pull the chicken out. The temperature will rise a few degrees as the meat rests. This is called carryover cooking. It is a natural process that continues to cook the chicken even after you take it out of the oven. Pulling it at 160°F prevents the chicken from drying out.
Adjusting Time for Five Breasts
Cooking five breasts at once is different from cooking one or two. The oven has to work harder to maintain the set temperature. When you open the oven door to place the chicken on the pan, heat escapes. This means the oven may need an extra minute or two to recover to 400°F before the actual cooking time starts.
To account for this, preheat your oven fully before adding the chicken. Give it at least 15 to 20 minutes to reach the target temperature. Also, try not to open the oven door during the first 15 minutes of cooking. Every time you open that door, you lose heat and extend the cook time.
Step-by-Step Guide to Baking Five Boneless Skinless Chicken Breasts
Now let us put it all together. Here is a clear, easy-to-follow process for baking five boneless skinless breasts at 400°F. Follow these steps and you will get restaurant-quality results at home.
Step 1: Prep the Chicken
Remove the chicken breasts from the refrigerator about 15 to 20 minutes before cooking. Letting them come to room temperature helps them cook more evenly. Cold chicken straight from the fridge takes longer to heat through, which can lead to uneven results.
Pat each breast dry with paper towels. Dry chicken browns better and develops a nicer texture. If the surface is wet, it will steam instead of roast, and you will lose that appealing golden color.
Step 2: Season Generously
Seasoning is where you can get creative. A simple blend of olive oil, salt, black pepper, and garlic powder works beautifully for a classic flavor. Drizzle a tablespoon of olive oil over the breasts and rub it in with your hands. Then sprinkle the seasonings evenly on both sides.
Do not be shy with the seasoning. Boneless skinless chicken breasts have very little flavor on their own. They are a blank canvas that absorbs whatever you put on them. Some great seasoning combinations include:
- Italian style: dried oregano, basil, garlic powder, and a pinch of red pepper flakes
- Smoky BBQ: smoked paprika, cumin, brown sugar, and a dash of cayenne
- Lemon herb: fresh lemon zest, thyme, rosemary, and a drizzle of olive oil
- Simple and classic: salt, pepper, garlic powder, and a squeeze of lemon juice
Step 3: Arrange on the Baking Sheet
Line a large baking sheet with parchment paper or lightly grease it with cooking spray. Place the five breasts on the sheet with space between each one. Remember, you want air to circulate around every piece. Crowding leads to uneven cooking and steaming instead of roasting.
If your baking sheet is small, use two sheets and rotate them halfway through cooking. This ensures all the chicken gets equal exposure to the oven heat.
Step 4: Bake at 400°F for 20 to 25 Minutes
Place the baking sheet on the middle rack of your oven. Set a timer for 20 minutes. At the 20-minute mark, check the internal temperature with your meat thermometer. If it has not reached 165°F yet, give it 3 to 5 more minutes.
Do not rely solely on the timer. Every oven is slightly different. Some ovens run hot, and some run cool. The thermometer is your best friend here. It removes all the guesswork and takes the stress out of the process.
Step 5: Rest Before Serving
Once the chicken reaches 165°F, take it out of the oven. Let it rest on the pan for at least 5 minutes. This resting period is critical. During resting, the juices redistribute throughout the meat. If you cut into the chicken immediately, those juices run out onto the cutting board instead of staying in the meat.
Five minutes is the minimum. Ten minutes is even better if you have the time. After resting, the chicken will be noticeably juicier and more flavorful. This one simple step separates good baked chicken from great baked chicken.
Tips for Juicy, Flavorful Chicken Every Time
Even with the right temperature and timing, there are a few extra steps that take your baked chicken from good to amazing. These tips are easy to follow and make a noticeable difference in the final result.
Brine the Chicken for Extra Moisture
Brining is a technique that soaks the chicken in a saltwater solution before cooking. It sounds fancy, but it is incredibly simple. Mix 1 quart of water with 3 tablespoons of salt and 1 tablespoon of sugar. Submerge the chicken breasts for 30 minutes to 2 hours. Then pat them dry before seasoning and baking.
The salt in the brine helps the chicken retain moisture during cooking. It also seasons the meat from the inside out. You do not need to brine every time, but it is a game-changer when you want the juiciest possible result.
Use a Wire Rack Instead of a Flat Pan
If you really want even cooking, place a wire rack on top of your baking sheet. Put the chicken breasts on the rack instead of directly on the pan. Hot air circulates around the chicken on all sides, which means the bottom cooks just as evenly as the top.
With a flat pan, the bottom of the chicken can get soggy from sitting in its own juices. The wire rack solves this problem. It also makes cleanup easier since the juices drip onto the pan below instead of pooling around the chicken.
Add Vegetables for a One-Pan Meal
Cooking five chicken breasts is a great opportunity to make a full meal in one pan. Toss chopped potatoes, bell peppers, zucchini, or cherry tomatoes around the chicken on the baking sheet. Season the vegetables the same way you season the chicken.
The vegetables will roast alongside the chicken and absorb all those delicious juices. A one-pan meal like this saves time on cooking and cleanup. Just make sure the vegetables are cut into small, even pieces so they cook at the same rate as the chicken.
Let the Chicken Rest Before Slicing
This tip cannot be stressed enough. Resting the chicken after it comes out of the oven is just as important as getting the temperature right. When hot chicken hits a cutting board and gets sliced, the juices escape immediately. A proper rest keeps those juices locked inside where they belong.
Use a clean cutting board and a sharp knife. Slice against the grain for the most tender result. If you are meal prepping, let the chicken cool completely before storing it in the fridge. Properly stored cooked chicken lasts up to 4 days in the refrigerator.
Common Mistakes to Avoid When Baking Chicken Breasts
Even experienced cooks make mistakes with baked chicken. Knowing what to avoid saves you from dry, disappointing results. Here are the most common errors and how to prevent them.
Skipping the Preheat
Never put chicken into a cold oven and hope for the best. A preheated oven ensures the chicken starts cooking at the right temperature from the moment it goes in. Cold starts lead to uneven cooking and longer bake times, which dry out the meat.
Always give your oven at least 10 to 15 minutes to reach 400°F before the chicken goes in. Most ovens beep or signal when they are ready. Trust that signal and wait the full time.
Overcooking the Chicken
Boneless skinless chicken breasts have almost no fat to protect them from drying out. Every minute beyond the optimal cook time pulls more moisture from the meat. This is the number one reason people end up with dry chicken.
Set your timer and watch the chicken closely. Start checking at the 18-minute mark. The difference between perfectly done and overcooked can be just 2 to 3 minutes. If in doubt, pull the chicken out early. Carryover cooking will bring the temperature up during the resting period.
Not Pounding to Even Thickness
This mistake is so common it almost seems inevitable. Uneven chicken breasts cook at different rates. The thin parts dry out while the thick parts are still undercooked. Taking 5 minutes to pound the breasts to an even thickness saves you from this frustration every single time.
Using a Dirty or Crowded Pan
A pan that is not properly prepared can cause sticking and uneven browning. Always grease the pan or use parchment paper. And give each breast enough room. When chicken pieces are touching or overlapping, they steam instead of roast, and the texture suffers.
Expert Insights and Pro Tips
Professional chefs and cooking instructors have shared a lot of wisdom about baking chicken breasts. Here are some insights that elevate your cooking game.
The Reverse Sear Method
Some cooks swear by a two-step approach. First, bake the chicken at a lower temperature like 350°F until it reaches 160°F internally. Then, blast it at 450°F for 2 to 3 minutes to get a golden, crispy exterior. This method gives you the best of both worlds. Tender, juicy meat inside with a beautifully browned outside.
This technique works especially well when you have time to monitor the chicken closely. It is not the fastest method, but it produces outstanding results. If you are new to baking chicken, stick with the straightforward 400°F approach first. Once you are comfortable, try the reverse sear for an extra level of quality.
Brine vs. Dry Rub
Brining adds moisture to the meat. Dry rubs add flavor to the surface. Both have their place. For boneless skinless chicken breasts, a dry rub is usually enough because the chicken does not need as much help staying moist as bone-in, skin-on pieces do.
If you find your chicken is still drying out despite using the right temperature, try brining. It adds a layer of protection against moisture loss that a dry rub alone cannot provide. Even a quick 30-minute brine makes a real difference.
Storage and Reheating Tips
If you are cooking five breasts for meal prep, proper storage is key. Let the chicken cool completely, then store it in an airtight container in the refrigerator. It stays fresh for up to 4 days.
When reheating, avoid the microwave if possible. Microwaves tend to make chicken rubbery and dry. Instead, reheat in the oven at 300°F for about 10 minutes. This gentle heat warms the chicken without further drying it out. Adding a splash of chicken broth or a few drops of water before reheating helps keep the meat moist.
Frequently Asked Questions
What is the best oven temperature for boneless skinless chicken breasts?
The best oven temperature for boneless skinless chicken breasts is 400°F. This heat cooks the chicken quickly enough to retain moisture while still achieving a nice golden color on the outside. It is the most reliable temperature for consistent, juicy results every time you bake chicken breasts.
How long does it take to bake five boneless skinless chicken breasts at 400°F?
At 400°F, five boneless skinless chicken breasts typically take 20 to 25 minutes. The exact time depends on the thickness of each breast. Thinner breasts may be done in 18 minutes, while thicker ones might need up to 28 minutes. Always use a meat thermometer to check that the internal temperature reaches 165°F.
Can I cook frozen boneless skinless chicken breasts in the oven?
Yes, you can cook frozen chicken breasts, but you need to adjust the cooking time. Frozen breasts take about 50% longer than thawed ones. Increase the bake time to 30 to 40 minutes at 400°F. Make sure the internal temperature reaches 165°F before serving. For the best results, thaw the chicken first in the refrigerator overnight.
How do I keep chicken breasts from drying out in the oven?
To prevent drying out, do not overcook the chicken. Pull it off the heat when it reaches 160°F and let carryover cooking bring it to 165°F. Also, pound the breasts to even thickness so they cook uniformly. Brining before baking adds extra moisture, and letting the chicken rest for 5 minutes after cooking locks in the juices.
Should I cover chicken breasts with foil while baking?
Covering chicken with foil is not necessary at 400°F. In fact, leaving the chicken uncovered allows the outside to brown and develop a light crust. If you find the tops are browning too quickly, you can loosely tent the pan with foil for the last 5 minutes of cooking. This protects the surface without trapping too much steam.
Can I bake five chicken breasts on one baking sheet?
Yes, five chicken breasts can fit on one standard baking sheet if you give each piece enough space. Arrange them in a single layer with at least an inch between each breast. If your pan is too small, use two baking sheets and rotate them halfway through cooking for even results.
Conclusion
Now you know exactly what oven temperature cooks five boneless skinless breasts perfectly. The answer is simple. 400°F for 20 to 25 minutes, with a final internal temperature of 165°F measured by a meat thermometer. That is the foundation for juicy, flavorful, evenly cooked chicken every single time.
Beyond the temperature, the small details make the biggest difference. Pounding the breasts to even thickness, seasoning generously, giving them space on the pan, and letting them rest before serving. These steps take just a few extra minutes, but they transform ordinary chicken into something truly delicious.
Remember that cooking is a skill that improves with practice. Every time you bake chicken breasts, you learn something new. Maybe the first batch is not perfect. That is okay. Adjust the time, check the temperature, and try again. Soon enough, you will be able to pull a tray of perfectly baked chicken out of the oven without even thinking about it.
Use this guide as your go-to reference whenever you need to cook five boneless skinless chicken breasts. Bookmark it, share it with friends, and make it your standard for weeknight dinners and meal prep alike. The right oven temperature combined with a little attention and care is all you need to serve chicken that everyone will love.