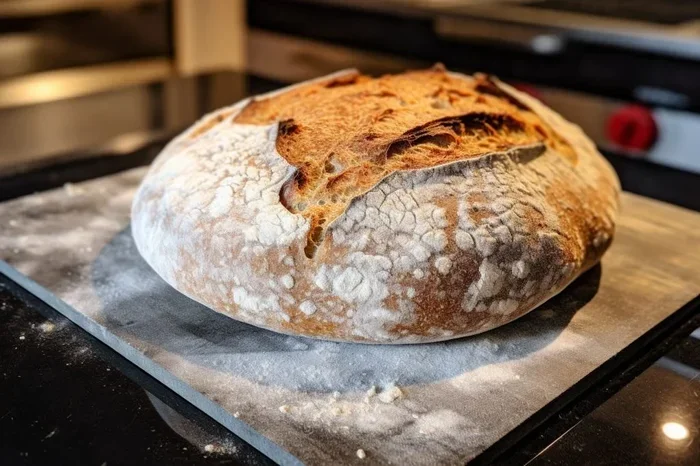
How To Bake Sourdough No Dutch Oven Made Easy Today
Baking sourdough no Dutch oven is easier than most home bakers think. You can achieve a crispy crust, open crumb, and beautiful rise using simple tools you already own. This guide walks you through every step, from shaping your loaf to nailing the perfect bake. Whether you are a beginner or a seasoned baker, these methods will transform your sourdough baking at home.
Key Takeaways
- No Dutch oven needed: You can bake amazing sourdough using a baking stone, steel, or even a simple sheet pan.
- Steam is the secret: Adding steam in the first few minutes creates that professional, crackly sourdough crust.
- Shaping matters: A tight, well-shaped loaf holds its form and rises beautifully in the oven.
- Temperature control is key: Baking at the right temperature ensures proper oven spring and a golden finish.
- Scoring helps your loaf expand: A few strategic cuts guide the sourdough bread as it bakes.
- Alternative tools work great: A baking stone, pizza steel, or even a deep roasting pan can replace a Dutch oven.
- Practice makes perfect: Each bake teaches you something new about your sourdough starter and oven.
📑 Table of Contents
- Why You Don’t Need a Dutch Oven to Bake Sourdough
- Essential Tools for Baking Sourdough No Dutch Oven
- How to Prepare Your Sourdough for Baking
- Step-by-Step Baking Process for Sourdough No Dutch Oven
- Common Mistakes When Baking Sourdough No Dutch Oven
- Tips for Perfect Sourdough Every Time You Bake
- Conclusion
Why You Don’t Need a Dutch Oven to Bake Sourdough
Many people believe you need a heavy Dutch oven to bake great sourdough no Dutch oven style bread. That idea is simply not true. A Dutch oven traps steam and heat, which helps the bread rise and form a crust. But you can get similar results with other tools. The key is understanding what a Dutch oven actually does for your loaf.
When you place sourdough inside a Dutch oven, the pot traps moisture from the dough. This moisture turns into steam. Steam keeps the crust soft during the first part of baking. That soft crust allows the loaf to expand fully. This process is called oven spring. Without it, your bread may be dense and flat.
So the real question is: how do you add steam without a Dutch oven? The answer is simpler than you think. You can use a baking stone, a baking sheet, or even a few ice cubes. Let us explore the best ways to bake sourdough without one.
What a Dutch Oven Actually Does
A Dutch oven works as a mini oven inside your oven. It surrounds the loaf with heat from all sides. The lid traps steam and pushes it back into the dough. This creates a thick, blistered crust. Many bakers love this method because it is foolproof. But Dutch ovens are heavy and expensive. Not everyone wants to invest in one.
Here is the good news. You can replicate the same environment using lighter and cheaper tools. The sourdough no Dutch oven method gives you just as much control. You just need to learn a few simple techniques.
The Real Problem With Dutch Ovens
Dutch ovens are bulky. They take up a lot of space in your kitchen. They are also heavy, which makes them hard to handle. Hot Dutch ovens can cause burns if you are not careful. Plus, you can only bake one loaf at a time. If you want to bake multiple loaves, a Dutch oven is not practical.
Using alternatives also saves money. A baking stone or steel costs less than most Dutch ovens. And they last for years. These tools give you more flexibility too. You can bake different sizes and shapes of sourdough bread without being limited by the pot size.
Essential Tools for Baking Sourdough No Dutch Oven
You do not need much to bake great sourdough at home. In fact, most of what you need is probably already in your kitchen. Let us look at the essential tools that make baking sourdough no Dutch oven a breeze.
Baking Stone vs Baking Steel
A baking stone is a thick slab of stone or ceramic. It stores heat and transfers it evenly to your dough. This creates a crispy bottom crust. A baking steel works similarly but conducts heat faster. Steel heats up more quickly than stone. It also stores more heat. This means better oven spring for your sourdough.
Both tools are excellent for sourdough baking without a Dutch oven. Here is a quick comparison:
| Feature | Baking Stone | Baking Steel |
|---|---|---|
| Heat Retention | Good | Excellent |
| Heat-Up Time | Slower | Faster |
| Price Range | $20-$50 | $40-$100 |
| Crust Quality | Great | Excellent |
| Weight | Heavy | Very Heavy |
| Durability | Very Good | Excellent |
If you are on a budget, a baking stone is a great starting point. If you want the best results, go with a baking steel. Either one will serve you well for baking sourdough at home.
Other Useful Tools
Beyond a stone or steel, a few other items make sourdough baking much easier. A rimmed baking sheet is essential. You can place it under your stone to catch drips. A pizza peel makes it easy to slide your dough onto hot surfaces. Parchment paper helps with transferring the loaf. A spray bottle filled with water is perfect for adding steam.
You will also want a sharp knife or a sourdough lame for scoring. Scoring is the act of cutting the top of your loaf before baking. It guides the bread as it expands. Without scoring, your loaf may burst in random places. A few clean cuts give your sourdough loaf a professional look.
How to Prepare Your Sourdough for Baking
Proper preparation makes all the difference when you bake sourdough no Dutch oven. The steps you take before the dough goes in the oven matter a lot. Let us walk through the process.
Shaping Your Loaf
Shaping is one of the most important steps in sourdough bread making. A well-shaped loaf holds its form during baking. It rises evenly and develops a beautiful crust. Start by gently turning your dough onto a lightly floured surface. Use your hands to tighten the surface tension. Pull the edges of the dough toward the center.
For a round boule, fold the edges into the middle and flip the dough over. For an oval batard, roll the dough into a rectangle and fold it lengthwise. Then roll it up tightly. The tighter the shape, the better the oven spring. Practice makes this process faster and easier over time.
Place the shaped dough onto a piece of parchment paper. This makes it easy to transfer the loaf to your baking surface. You can also use a banneton, which is a proofing basket. A banneton supports the dough during the final rise and gives it a nice pattern.
Scoring Your Sourdough
Scoring is the art of cutting the top of your loaf before baking. It might look decorative, but it serves a very important purpose. As the bread bakes, the sourdough crumb expands. Without scores, the loaf has to find its own weak spots to burst open. Scores give it a controlled path to expand.
Use a sharp blade for clean cuts. A sourdough lame with a razor blade works perfectly. Hold the blade at a 30 to 45 degree angle. Make cuts about a quarter inch deep. You can create simple slash patterns or decorative designs. The most common pattern is a single cross or an ear-forming slash.
Scoring also helps you track how your sourdough fermentation is going. Deep scores mean the dough was well-proofed. Shallow scores may mean the dough needed more time. Over time, you will learn to read your dough through its scores.
The Final Proof
Before baking, your shaped and scored loaf needs one final rest. This is called the final proof. It allows the dough to relax and rise one more time. You can proof at room temperature for one to two hours. Or you can proof in the refrigerator overnight for deeper flavor.
Cold proofing is a great technique for baking sourdough at home. It gives you more flexibility with your schedule. The dough develops a tangier flavor and a better crust. When you are ready to bake, take the dough straight from the fridge to the oven. The cold dough reacts beautifully with the hot baking surface.
Step-by-Step Baking Process for Sourdough No Dutch Oven
Now that your loaf is shaped, scored, and proofed, it is time to bake. This is where the magic happens. Follow these steps for a perfect sourdough bake every time.
Preheat Your Oven and Baking Surface
Preheating is critical for great sourdough baking. Place your baking stone or steel on the middle rack of your oven. Turn the oven to its highest setting, usually 450 to 500 degrees Fahrenheit. Let the oven preheat for at least 45 minutes to one hour.
The baking surface needs to be fully heated before the dough touches it. A hot surface gives your loaf an immediate burst of heat. This creates strong oven spring right from the start. If your surface is not hot enough, the bread will spread out instead of rising up.
If you are using a baking stone, place it on the lowest rack. This puts the heat source closest to the bottom of your loaf. For a baking steel, the middle rack works best. Steel conducts heat quickly, so it does not need to be as low.
Adding Steam Without a Dutch Oven
Steam is the secret ingredient that makes sourdough no Dutch oven baking successful. In a Dutch oven, the trapped moisture acts as steam. Without one, you need to add steam manually. There are several easy ways to do this.
The simplest method is to spray water into the oven right after loading your loaf. Use a spray bottle and mist the walls of the oven. Do not spray the heating elements directly. Do this three to four times in the first five minutes of baking. This creates a humid environment that keeps the crust soft.
Another method is to place a pan of hot water on the bottom rack. Fill a metal pan with boiling water and slide it into the oven. The water evaporates and creates steam. You can also toss a few ice cubes into a hot pan for an instant burst of steam.
Some bakers use a deep roasting pan with a wire rack. Place the rack above the pan and put the dough on the rack. Pour hot water into the pan before closing the oven door. This creates a steamy chamber around your loaf. It works almost as well as a Dutch oven.
Temperature and Timing for the Perfect Bake
After the first 15 to 20 minutes with steam, reduce the oven temperature. Drop it to 425 to 450 degrees Fahrenheit. This allows the bread to bake through without burning the crust. The total bake time is usually 35 to 45 minutes.
Watch the color of the crust carefully. A deep golden brown is the goal. If the top is browning too fast, tent it with aluminum foil. This prevents burning while the inside continues to bake.
Use an instant-read thermometer to check the internal temperature. The center of the loaf should reach 205 to 210 degrees Fahrenheit. This ensures the crumb is fully set. A well-baked sourdough loaf will sound hollow when you tap the bottom.
Cooling Your Sourdough
Once your sourdough bread is done, remove it from the oven. Place it on a wire rack immediately. Do not slice into the loaf right away. The bread needs time to cool and set. Cutting too early releases steam and makes the crumb gummy.
Wait at least one hour before slicing. This is the hardest part for most bakers. The smell of fresh bread is irresistible. But patience gives you the best texture and flavor. A properly cooled sourdough bake has a crisp crust and a tender, open crumb.
Common Mistakes When Baking Sourdough No Dutch Oven
Even experienced bakers make mistakes. Learning from them saves time and ingredients. Here are the most common errors people make when baking sourdough no Dutch oven.
Not Preheating Long Enough
This is the number one mistake. Many bakers preheat for only 15 to 20 minutes. That is not enough for a baking stone or steel. These surfaces need at least 45 minutes to reach full temperature. A properly preheated surface gives your dough the heat shock it needs for great oven spring.
Skipping the Steam
Without steam, your crust sets too early. The loaf cannot expand fully. This results in a dense, flat sourdough loaf with a thick crust. Always add steam during the first 15 to 20 minutes of baking. It makes a huge difference in the final product.
Overproofing or Underproofing
Proofing is all about timing. Overproofed dough collapses in the oven. Underproofed dough does not expand enough. Both lead to disappointing results. Learn to recognize when your dough is ready. It should look puffy and jiggly. When you gently poke it, the indentation slowly fills back in.
Using Too Much Flour
Extra flour on the surface of your dough creates a thick, dry crust. It also prevents proper scoring. Use just enough flour to keep the dough from sticking. A light dusting is all you need for a clean, beautiful sourdough crust.
Opening the Oven Door Too Often
Every time you open the oven door, you lose heat and steam. This can cause your loaf to deflate. Resist the urge to peek too often. Trust the process. Check on your bread only when you need to add steam or check the color.
Tips for Perfect Sourdough Every Time You Bake
Baking great sourdough bread takes practice. But a few expert tips can speed up your progress. These recommendations come from experienced sourdough bakers who have refined their technique over years.
Start With a Healthy Starter
Your sourdough starter is the foundation of every loaf. Feed it regularly and use it when it is at peak activity. A healthy starter doubles in size within four to six hours of feeding. If your starter is weak, your bread will be too. Take care of it, and it will take care of your bread.
Keep Notes on Every Bake
Every sourdough recipe is different. Your oven, your flour, and your starter all behave uniquely. Keep a baking journal. Write down the temperature, timing, hydration, and results. Over time, you will see patterns. These notes become your personal guide to perfect sourdough baking.
Experiment With Different Flours
Do not be afraid to try new flours. A blend of bread flour and whole wheat adds flavor and nutrition. Rye flour creates a more traditional sourdough taste. Spelt flour gives a lighter, nuttier crumb. Each flour brings something different to your sourdough bread making journey.
Use a Pizza Peel for Easy Transfer
A pizza peel makes loading and unloading your dough so much easier. Dust it with flour or cornmeal to prevent sticking. Slide the dough gently onto your hot baking surface. This keeps the shape of your sourdough loaf intact and prevents sticking.
Invest in a Good Thermometer
An instant-read thermometer takes the guesswork out of baking. Check the internal temperature of your bread before cutting. 205 to 210 degrees Fahrenheit is the sweet spot. This one tool can transform your sourdough no Dutch oven results.
Be Patient and Have Fun
Baking sourdough is a journey, not a destination. Your first few loaves may not be perfect. That is completely normal. Every bake teaches you something new. Enjoy the process. The more you bake, the better your sourdough technique becomes. Soon, you will be baking beautiful loaves with confidence.
Quick Tips Section
- Always preheat for at least 45 minutes before baking your sourdough no Dutch oven loaf.
- Use a spray bottle to add steam quickly and easily.
- Score your dough just before baking for the cleanest cuts.
- Let your bread cool completely before slicing for the best texture.
- Keep your baking stone or steel in the oven when preheating for consistent results.
- Cold proofing overnight adds flavor and makes scheduling easier.
- Use parchment paper to transfer your shaped dough to the hot surface.
Expert Insights
Professional sourdough bakers agree that technique matters more than equipment. You do not need expensive tools to bake great bread. A simple baking sheet and a few household items can produce outstanding results. The key is understanding heat, steam, and timing. Master these three elements, and you can bake sourdough bread that rivals artisan bakery loaves.
Many experts also recommend using a banneton for the final proof. It supports the dough and creates a beautiful pattern on the crust. If you do not have a banneton, a lightly floured bowl lined with a towel works just as well. The goal is to support the shape of your loaf during proofing.
Another expert tip is to chill your shaped dough for 30 minutes before scoring. This firms up the surface and makes cleaner cuts. It also improves the shape of the ear, which is the lifted crust that forms along the score marks. A well-formed ear is a sign of a well-baked sourdough loaf.
Conclusion
Baking sourdough no Dutch oven is entirely possible and incredibly rewarding. You do not need special equipment or years of experience. With a baking stone or steel, a little steam, and some practice, you can create beautiful, artisan-quality bread at home. The methods in this guide give you everything you need to get started.
Remember that every bake is a learning opportunity. Your sourdough starter will teach you new things each time. Pay attention to how the dough responds to different temperatures, proofing times, and scoring techniques. Over time, you will develop your own style and preferences.
Start with the basic steps outlined in this article. As you gain confidence, experiment with different flours, shapes, and scoring patterns. The beauty of sourdough baking at home is that there is always something new to discover. Enjoy the process, share your loaves with friends and family, and take pride in the bread you create with your own hands.
Now it is your turn. Gather your tools, feed your starter, and bake your first sourdough no Dutch oven loaf today. You will be amazed at what you can create with just a few simple tools and a little patience. Happy baking!
Frequently Asked Questions
Can I bake sourdough without any special equipment?
Yes, you can bake sourdough with just a baking sheet and your oven. Place a cast iron skillet on the bottom rack with hot water to create steam. This simple setup works well for beginners learning sourdough baking no Dutch oven techniques.
What is the best substitute for a Dutch oven when baking sourdough?
A baking stone or baking steel is the best substitute. They provide even heat and a crispy bottom crust. A deep roasting pan with a wire rack and a pan of hot water also works great as a Dutch oven alternative for sourdough bread.
How do I add steam to my oven without a Dutch oven lid?
You can use a spray bottle to mist the oven walls, place a pan of boiling water on the bottom rack, or toss ice cubes into a hot pan. These methods create the steam needed for a great sourdough crust during the first part of baking.
Why does my sourdough bread not rise well without a Dutch oven?
This is usually caused by insufficient steam or a baking surface that is not hot enough. Make sure you preheat your stone or steel for at least 45 minutes. Also add steam during the first 15 to 20 minutes of baking to ensure proper oven spring for your sourdough loaf.
Can I use a regular baking sheet for sourdough?
Yes, a regular baking sheet works, but the crust will not be as crispy as with a stone or steel. For better results, place a baking stone or steel on the middle rack and use the baking sheet on the lower rack to catch any drips while you bake sourdough no Dutch oven style.
How long should I bake sourdough without a Dutch oven?
Bake at 450 degrees Fahrenheit for 15 to 20 minutes with steam, then reduce to 425 degrees and bake for another 20 to 25 minutes. The total bake time is typically 35 to 45 minutes. Use a thermometer to check that the internal temperature reaches 205 to 210 degrees Fahrenheit for a perfectly baked sourdough loaf.
=== CONCLUSION ===
Baking sourdough no Dutch oven is one of the most satisfying skills you can develop in your kitchen. This guide has shown you that you do not need expensive equipment to create beautiful, artisan-quality bread at home. From choosing the right tools to mastering steam and temperature, you now have everything you need to succeed.
Start simple. Use a baking stone or steel. Add steam with a spray bottle or a pan of hot water. Shape your dough tightly, score it with care, and bake with patience. Each loaf you make will teach you something new about sourdough baking and bring you closer to that perfect crust and open crumb you are aiming for.
Remember, the best sourdough bread recipe is the one you practice. Do not be afraid of mistakes. Every baker, from beginners to professionals, has had loaves that did not turn out perfectly. What matters is that you keep going. Your skills will improve, your confidence will grow, and your kitchen will fill with the wonderful aroma of freshly baked sourdough bread.
Now go ahead and bake your first sourdough no Dutch oven loaf today. You have got this!