How Long Does Oven Bake Clay Take To Cook At Home Today
Oven bake clay typically takes 15 to 30 minutes to cook at home, depending on thickness and brand. Most projects cure best at 275°F (135°C), but always check your specific clay package for exact directions. This guide covers everything you need to know about polymer clay baking time, temperature settings, and pro tips for flawless results.
Have you ever wondered how long oven bake clay takes to cook? Whether you are new to polymer clay crafts or you have been making clay jewelry for years, getting the baking time right is super important. The good news is that baking clay at home is simple once you know the basics. In this guide, we will walk you through everything you need to know about polymer clay baking time, the right temperature, and how to get perfect results every single time.
Baking oven bake clay is not complicated, but small mistakes can lead to cracks, brittleness, or even burnt pieces. That is why we put together this detailed guide. You will learn the exact times, the best temperatures, and some easy tips that make a huge difference. By the end of this article, you will feel confident baking your own polymer clay project at home like a pro.
Key Takeaways
- Standard Baking Time: Most oven bake clay pieces take 15 to 30 minutes per quarter inch of thickness at 275°F.
- Temperature Matters: Always bake at the correct temperature to avoid undercooking or burning your clay project.
- Thickness Is Key: Thicker pieces need longer baking times, but never exceed the recommended temperature.
- Use An Oven Thermometer: Home ovens often run hot or cold, so a simple thermometer ensures accuracy.
- Cooling Is Part Of The Process: Let your clay cool slowly in the oven for the best results.
- Avoid Common Mistakes: Don’t overbake, use the right baking surface, and always follow brand guidelines.
📑 Table of Contents
How Long Does Oven Bake Clay Take To Cook
The short answer is that most oven bake clay takes between 15 and 30 minutes to cook. But the full answer depends on a few things. The thickness of your piece, the brand of clay you are using, and your oven’s accuracy all play a role. Let us break it down so you can bake with confidence.
As a general rule of thumb, you should bake clay for 30 minutes per quarter inch of thickness. So if your piece is half an inch thick, you would bake it for about one hour. This is the standard guideline followed by most polymer clay baking experts and crafters around the world.
Baking Time By Thickness
Thickness is the single biggest factor that determines how long your clay needs to cook. Here is a simple breakdown:
- 1/4 inch thick: 15 to 30 minutes
- 1/2 inch thick: 30 to 60 minutes
- 3/4 inch thick: 60 to 90 minutes
- 1 inch thick: 90 minutes or more
These times are approximate. Always refer to the instructions on your specific clay package. Different brands may have slightly different recommendations for clay curing time. Sculpey, Fimo, Kato, and Premo all have their own guidelines, so it is worth checking before you start baking.
Does Clay Brand Affect Baking Time
Yes, it does. Each brand of polymer clay has its own formula, and that affects how long it needs to cure. For example, Sculpey Original bakes at 275°F for 15 minutes per quarter inch. Fimo Professional clay also bakes at 275°F but some crafters prefer slightly longer times for denser pieces. Kato clay is known for being very firm after baking and may need a bit more time. The key takeaway is to read the package directions and then adjust based on your experience.
The Right Temperature For Baking Clay
Temperature is just as important as time when it comes to baking polymer clay. Most oven bake clay brands recommend baking at 275°F (135°C). This is a relatively low temperature compared to what you might use for cooking food. The low and slow approach helps the clay cure evenly without burning.
Why 275°F Is The Standard
The temperature of 275°F has been tested extensively by clay manufacturers. At this temperature, the plasticizers in the clay slowly evaporate, leaving behind a hard, durable finished piece. If you bake at too high a temperature, the clay can burn, release fumes, or become brittle. If you bake at too low a temperature, the clay may remain soft and crumbly.
This is why using an oven thermometer is so important. Many home ovens have hot spots and temperature inconsistencies. A cheap oven thermometer placed inside your oven can tell you the real temperature. This one simple tool can save your clay projects from disaster.
Can You Bake Clay At A Different Temperature
Some crafters experiment with slightly different temperatures. For instance, if you are baking a very thin piece, you might lower the temperature to 265°F and extend the time slightly. This can help prevent browning. On the other hand, some people bake at 285°F for shorter periods with certain brands. However, sticking to the recommended 275°F is the safest approach for most polymer clay projects.
Never exceed 300°F when baking oven bake clay. The fumes released when clay burns are not pleasant and can be harmful in enclosed spaces. Always ventilate your kitchen when baking clay, and never leave the oven unattended.
Step-By-Step Guide To Baking Clay At Home
Baking clay at home is easy when you follow these simple steps. Whether you are making polymer clay jewelry, figurines, or decorative items, this guide will help you get great results.
Step 1: Prepare Your Workspace
Before you start, clear a clean workspace. Cover your surface with parchment paper or a silicone baking mat. Polymer clay can leave residue on surfaces, so protect your countertops. Wash your hands before handling the clay to keep it clean and free from oils.
Step 2: Shape Your Piece
Take your clay and shape it into whatever design you want. You can roll it, sculpt it, flatten it, or mold it. The more even the thickness, the more evenly it will bake. Use tools like clay blades, rollers, or your hands to get the shape you want. If you are making jewelry, remember to poke holes for jump rings before baking.
Step 3: Preheat Your Oven
Preheat your oven to 275°F. Give it at least 10 to 15 minutes to reach the right temperature. Use your oven thermometer to verify the actual temperature inside. This step is often skipped but makes a big difference in how your clay baking results turn out.
Step 4: Place The Clay On A Baking Surface
Put your clay piece on a piece of parchment paper or a ceramic tile. You can also use a silicone baking mat. Avoid placing clay directly on metal pans unless they are lined with parchment. The baking surface should be clean and heat-resistant.
Step 5: Bake For The Recommended Time
Place the clay in the center of the oven and set your timer. For a quarter-inch thick piece, bake for 15 to 30 minutes. For thicker pieces, increase the time accordingly. Keep the oven door slightly ajar if you are concerned about fumes, though this is not always necessary with modern ovens.
Step 6: Cool Properly
Once the baking time is up, turn off the oven and let the clay cool inside. This slow cooling process helps prevent cracking. After the oven has cooled to room temperature, remove your piece. Your polymer clay finished piece should be hard and smooth.
Common Baking Mistakes And How To Avoid Them
Even experienced crafters make mistakes when baking clay. Here are the most common ones and how to avoid them.
Overbaking The Clay
Overbaking is one of the most common clay baking mistakes. When you bake clay for too long or at too high a temperature, it can become brittle, discolored, or cracked. Some people think “longer is better,” but that is not true. Stick to the recommended times and temperatures for the best oven bake clay results.
Underbaking The Clay
Underbaking is just as problematic. If your clay is still soft after baking, it was not in the oven long enough. Soft clay can dent, scratch, and break easily. If you find your pieces are consistently underbaked, try increasing the time by 5 to 10 minutes or checking your oven temperature with a thermometer.
Skipping The Oven Thermometer
Many people assume their oven displays the correct temperature. But ovens can be off by 25 degrees or more. This is a huge deal when baking polymer clay because even a small temperature difference can affect the outcome. A simple oven thermometer costs just a few dollars and is one of the best investments you can make for clay crafting.
Using The Wrong Baking Surface
Baking clay on aluminum foil directly can cause uneven heating and shiny spots on your piece. Always use parchment paper, a silicone mat, or a ceramic tile. These surfaces provide gentle, even heat that cures the clay properly.
Tips For Perfect Baked Clay Projects
Want your polymer clay crafts to look professional? Here are some expert tips that will elevate your baking game.
Condition Your Clay Before Baking
Conditioning means kneading the clay before you shape it. This warms up the clay and makes it soft and pliable. Well-conditioned clay bakes more evenly and is less likely to crack. Spend a few minutes working the clay in your hands before you start your project.
Use A Dedicated Oven Or Toaster Oven
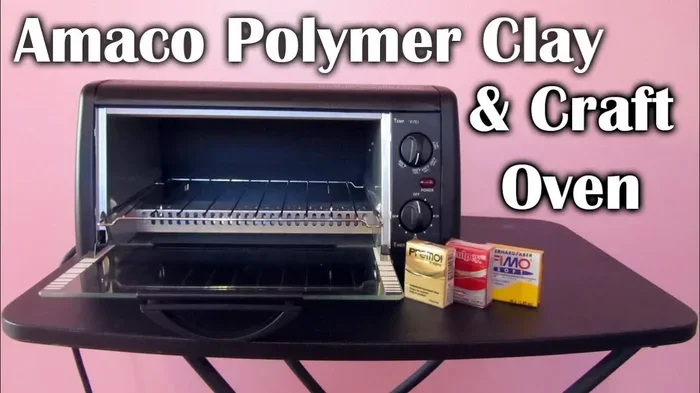
If you bake clay frequently, consider using a toaster oven or a dedicated craft oven. This prevents clay residue from getting into the oven you use for food. A toaster oven also heats up faster and uses less energy. Many crafters swear by their small ovens for bake clay at home projects.
Sand And Buff After Baking
Once your clay is baked and cooled, you can sand rough edges with fine-grit sandpaper. You can also buff the surface with a soft cloth to give it a nice shine. These finishing touches make a huge difference in the look of your polymer clay sculpture or jewelry piece.
Experiment With Layering
Layering different colors of clay can create beautiful effects. Just remember that thicker layered pieces need longer baking times. Plan your project accordingly and test bake small pieces first if you are trying a new technique.
Store Your Clay Properly
Proper storage keeps your clay workable and extends its life. Store clay in a cool, dark place away from direct sunlight and heat sources. UV light and heat can partially cure clay even before you put it in the oven, which affects your clay curing time and final results.
Different Clay Types And Their Baking Times
Not all clay is the same. Different types of oven bake clay have different baking requirements. Here is a quick comparison of the most popular brands.
Sculpey Original
Sculpey Original is one of the most popular clays for beginners. It bakes at 275°F for 15 minutes per quarter inch of thickness. It has a smooth, creamy texture and produces a slightly flexible finished piece. This clay is great for polymer clay jewelry and decorative items.
Fimo Professional
Fimo Professional is known for being firm and durable after baking. It also bakes at 275°F but many crafters prefer to bake it for slightly longer, around 30 minutes per quarter inch. Fimo has a firmer texture straight from the package, so it requires more conditioning before use.
Premo Sculpey
Premo is a versatile clay that bakes at 275°F for 30 minutes per quarter inch. It is softer than Fimo but firmer than Original Sculpey. Premo holds fine details well and is a favorite among artists who create detailed polymer clay sculptures.
Kato Polyclay
Kato Polyclay is a premium clay that bakes at 300°F for 10 minutes per quarter inch. It is known for its vibrant colors and extremely hard finish after baking. Kato is a bit different from other brands, so always follow the specific instructions on the package.
Rapid Cure And Quick-Bake Clays
Some brands offer rapid-cure formulas that bake faster than traditional clays. These are great if you are short on time. However, they may have slightly different handling characteristics. Always read the instructions carefully when using a new type of oven bake clay.
| Brand | Temperature | Time Per 1/4 Inch | Finish |
|---|---|---|---|
| Sculpey Original | 275°F | 15 minutes | Slightly flexible |
| Fimo Professional | 275°F | 30 minutes | Firm and durable |
| Premo Sculpey | 275°F | 30 minutes | Smooth and solid |
| Kato Polyclay | 300°F | 10 minutes | Very hard and vibrant |
FAQ
Can I bake oven bake clay at a lower temperature for longer?
Yes, you can lower the temperature slightly and extend the baking time. Some crafters bake at 265°F for a longer period to prevent browning. This approach works well for thin pieces or light-colored clay. Just make sure the clay is fully cured by testing with a fingernail.
How do I know if my polymer clay is fully baked?
Fully baked oven bake clay should be hard and cannot be indented with a fingernail. If it still feels soft or flexible, it needs more time in the oven. Let it cool completely before testing, as warm clay will feel softer than it actually is.
Can I use a toaster oven to bake polymer clay?
Absolutely. A toaster oven works great for baking polymer clay at home. Just make sure to use an oven thermometer to verify the temperature. Toaster ovens can heat unevenly, so you may want to rotate your piece halfway through the baking time.
Is it safe to bake polymer clay in the same oven I use for food?
Yes, it is generally safe. Polymer clay does not release harmful fumes at the recommended baking temperature of 275°F. However, if you bake clay frequently, consider using a separate toaster oven to avoid any clay residue in your food oven. Always keep your oven clean and well-ventilated.
Why did my baked clay crack or break?
Cracking usually happens when clay is baked too quickly, at too high a temperature, or is not conditioned properly before shaping. Another common cause is uneven thickness in your piece. Make sure your clay is uniformly thick and cool slowly after baking for the best results with your polymer clay project.
Can I rebake clay if I need to add more pieces?
Yes, you can rebake oven bake clay without damaging it. This is actually a common practice when building layered projects. Just make sure the additional pieces are properly attached before rebaking, and follow the recommended baking time for the total thickness of your piece.
Conclusion
Baking oven bake clay at home does not have to be intimidating. With the right temperature of 275°F and the correct baking time based on thickness, you can create beautiful, durable pieces every time. Remember that most polymer clay baking projects take 15 to 30 minutes per quarter inch of thickness, but always check your clay brand’s specific instructions.
The key to great results is patience and attention to detail. Use an oven thermometer, condition your clay before shaping, and let your pieces cool slowly after baking. Avoid the common mistakes of overbaking or underbaking, and you will be well on your way to creating stunning polymer clay crafts.
Now that you know exactly how long oven bake clay takes to cook, it is time to get started on your next project. Grab your clay, preheat your oven, and enjoy the creative process. Happy baking, and have fun crafting at home today!