How To Make Boneless Beef Ribs In The Oven Perfectly
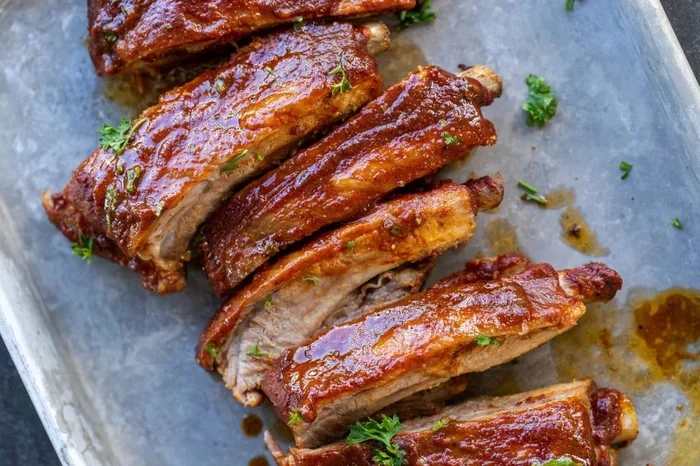
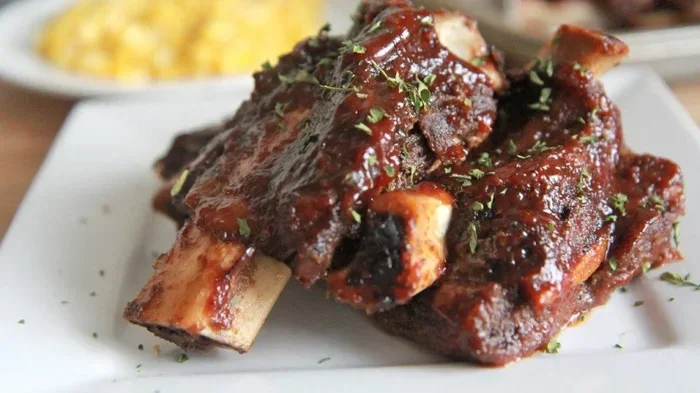
Making boneless beef ribs in the oven is simple and rewarding. You will learn how to pick the best cut, build a flavorful dry rub, and braise the ribs low and slow until they are fall-off-the-bone tender. This guide covers every step from searing to slicing so you can serve perfect oven-baked ribs with confidence.
Cooking ribs in the oven might sound intimidating, but it is actually one of the easiest ways to get amazing results. Boneless beef ribs are especially forgiving because they cook evenly and do not require precise trimming. Whether you are a beginner or a seasoned home cook, this method will give you juicy, flavorful ribs every time. The oven does all the work, so you can prep the rest of the meal while the ribs braise. You will end up with restaurant-quality ribs that melt in your mouth.
The secret to perfect boneless beef ribs oven style is patience and a little bit of seasoning. You do not need a smoker or a fancy piece of equipment. Just a good baking dish, some foil, and your trusty oven. I will walk you through every single step, from picking the right cut at the store to serving the finished ribs. By the end of this guide, you will feel confident enough to make this dish for your next family dinner or weekend gathering.
Key Takeaways
- Choose well-marbled boneless short ribs for the juiciest, most flavorful result.
- A simple dry rub with smoked paprika and garlic adds deep, savory flavor without complicated ingredients.
- Searing the ribs first creates a caramelized crust that locks in juices.
- Braising at 300°F for 3–4 hours delivers fall-off-the-bone tenderness every time.
- Rest the meat for 15 minutes before slicing to keep the juices inside.
- Slice against the grain for the most tender bite.
- Store leftovers in the fridge for up to 3 days and reheat gently in the oven.
📑 Table of Contents
- Why Boneless Beef Ribs Shine in the Oven
- Choosing the Right Ribs and Ingredients
- Crafting a Flavorful Dry Rub
- Step-by-Step Oven Braising Method
- Doneness, Resting, and Slicing
- Serving Ideas and Storage Tips
- Common Mistakes to Avoid
- Expert Insights for Next-Level Ribs
- Frequently Asked Questions
- Conclusion
Why Boneless Beef Ribs Shine in the Oven
Understanding the Cut
Boneless beef ribs are cut from the chuck or plate area of the cow. They come from the same primal cuts as bone-in ribs but have the bone removed. This makes them easier to slice and eat. The meat is rich in collagen and intramuscular fat, which breaks down during cooking. That breakdown is what gives you that fall-off-the-bone tender texture. Because there is no bone, the ribs cook more evenly and absorb flavors faster.
Why the Oven Works Best
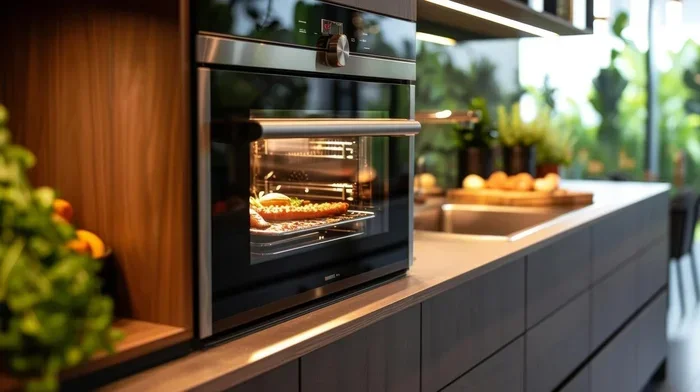
The oven provides a steady, enclosed heat that is perfect for low and slow cooking. Unlike a grill or stovetop, the oven surrounds the meat with consistent warmth. This gentle heat turns tough connective tissue into gelatin, which keeps the ribs moist. You can set the temperature and walk away. The oven also makes it easy to add liquid for braising, which creates steam and keeps the meat from drying out. For these reasons, oven-baked ribs are a favorite for weeknight dinners and holiday meals alike.
Choosing the Right Ribs and Ingredients
Look for Marbling and Color
When you shop for boneless short ribs, look for pieces with plenty of thin white streaks of fat. This is called marbling. Marbling melts during cooking and adds rich flavor. The meat should be a deep red color, not brown or dull. Avoid ribs that have a grayish tint, which means they have been stored too long. A good beef rib roast or chuck eye rib cut works wonderfully for this recipe.
Bone-in vs. Boneless: Why Boneless Wins for Oven Cooking
You can use bone-in ribs in the oven, but boneless ribs are simpler to handle. Bone-in ribs require longer cooking times to heat the bone through. Boneless ribs cook faster and more evenly. They are also easier to slice into serving pieces after cooking. If you want the most tender braised ribs with minimal effort, go with the boneless cut. The flavor difference is minimal, but the convenience is huge.
Crafting a Flavorful Dry Rub
Essential Spices for Beef Ribs
A great dry rub builds layers of flavor. You do not need a long list of ingredients. Start with smoked paprika, which adds a gentle smoky taste. Add garlic powder, onion powder, and a touch of cayenne for heat. Brown sugar helps with caramelization. Salt and black pepper are the foundation. Mix these together in a small bowl. The rub will coat the ribs evenly and create a beautiful crust during cooking.
How to Apply the Rub for Maximum Flavor
Pat the ribs dry with paper towels before you start. Moisture helps the rub stick. Sprinkle the dry rub generously over all sides of the ribs. Use your hands to press it into the meat. Do not be shy with the seasoning. Let the ribs sit at room temperature for about 30 minutes after rubbing. This allows the flavors to penetrate the surface. You can also apply the rub the night before and refrigerate the ribs for even deeper flavor.
Step-by-Step Oven Braising Method
Searing the Ribs First
Searing is a crucial step that you should never skip. Preheat your oven to 300°F. While the oven heats, place a large oven-safe skillet or baking dish on the stovetop over medium-high heat. Add a thin layer of oil. Once the oil shimmers, place the ribs in the pan. Sear them for about 2–3 minutes per side until you see a deep brown crust. This caramelized crust locks in juices and adds a rich, savory flavor. Work in batches if needed to avoid crowding the pan.
Adding Liquid and Braising
After searing, remove the ribs and set them aside. Reduce the heat to medium and add chopped onions, minced garlic, and a splash of beef broth. Scrape up any browned bits from the bottom of the pan. Those bits are packed with flavor. Return the ribs to the pan and add a little more beef broth or red wine. The liquid should come about one-third of the way up the ribs. Cover the pan tightly with foil or a lid. This creates a sealed environment that steams and braises the meat.
Oven Temperature and Time Guide
The low and slow method is the key to tender ribs. Here is a quick comparison of cooking times at different temperatures. Use the 300°F option for the most foolproof results.
| Oven Temperature | Cooking Time | Result |
|---|---|---|
| 275°F | 4–5 hours | Very tender, slightly longer braise |
| 300°F | 3–4 hours | Perfect fall-off-the-bone texture |
| 325°F | 2.5–3 hours | Tender but firmer bite |
Place the covered pan in the oven and let it braise undisturbed. Resist the urge to open the foil too often. Every time you open it, you release steam and extend the cooking time. The ribs are done when a fork slides in and out with almost no resistance.
Quick Tips for Perfect Braising
- Use a heavy baking dish or Dutch oven. It distributes heat evenly.
- Add a splash of apple cider vinegar to the liquid for brightness.
- Place a few chunks of beef fat or suet in the liquid if you want extra richness.
- Do not let the liquid boil. Keep it at a gentle simmer.
- Use foil tent to trap moisture and prevent the top from drying out.
Doneness, Resting, and Slicing
Internal Temperature for Tender Ribs
The best way to check doneness is with a meat thermometer. Insert it into the thickest part of the rib, avoiding the bone or fat pockets. You want an internal temperature of at least 200°F for fall-off-the-bone tender ribs. At this temperature, the collagen has fully broken down into gelatin. If you do not have a thermometer, use the fork test. The meat should pull away from the bone easily with gentle pressure.
Resting and Slicing Against the Grain
Once the ribs are done, remove them from the oven and take off the foil. Let the ribs rest for 15 minutes before slicing. Resting allows the juices to redistribute throughout the meat. If you cut too early, the juices will run out and the ribs will dry out. When you are ready to serve, use a sharp knife to slice against the grain. The grain is the direction of the muscle fibers. Cutting across it shortens the fibers and makes each bite more tender. This simple step makes a huge difference in texture.
Serving Ideas and Storage Tips
Best Side Dishes to Serve
Oven-baked beef ribs pair well with comforting sides. Creamy mashed potatoes soak up the braising liquid beautifully. Roasted root vegetables like carrots and parsnips add a sweet contrast. A simple green salad with a tangy vinaigrette cuts through the richness. For a Southern twist, serve the ribs over white rice with a drizzle of the pan juices. Coleslaw is another classic pairing that adds crunch and freshness to the plate.
How to Store and Reheat Leftovers
Let the ribs cool completely before storing them. Place them in an airtight container and refrigerate for up to 3 days. The flavor actually improves overnight as the spices continue to meld. To reheat, place the ribs in a baking dish, add a splash of beef broth, and cover with foil. Warm them in a 300°F oven for about 20 minutes. This method keeps the meat moist and prevents the sauce from scorching. You can also freeze cooked ribs for up to 3 months. Thaw them in the fridge overnight before reheating.
Common Mistakes to Avoid
- Skipping the sear. Searing builds a flavor foundation that you cannot replicate later.
- Using too high a temperature. High heat dries out the meat before the collagen can break down.
- Overcrowding the pan. Crowding traps steam and prevents proper browning.
- Opening the foil too often. It releases steam and slows down the braising process.
- Cutting the ribs with the grain. This makes the meat chewy instead of tender.
- Not resting the meat. Cutting immediately causes the juices to escape, leaving dry ribs.
Expert Insights for Next-Level Ribs
Chef and pitmaster Mark Johnson shares a few pro tips for elevating your oven-baked ribs. He suggests adding a tablespoon of liquid smoke to the braising liquid if you want a deeper smoky flavor without a smoker. Another trick is to brush the ribs with a thin layer of beef tallow before searing. This creates an extra-crispy crust. Johnson also recommends letting the ribs rest in the braising liquid for an extra 30 minutes after turning off the oven. This carryover cooking makes the meat even more succulent. For a sweet glaze, he suggests reducing the braising liquid on the stovetop and brushing it on the ribs during the last 15 minutes of cooking.
Quick Tips for Perfect Boneless Beef Ribs
- Bring the ribs to room temperature before cooking for even braising.
- Use a digital meat thermometer to avoid guessing doneness.
- Add a bay leaf or a few sprigs of thyme to the braising liquid for aromatic depth.
- Save the braising liquid and use it as a base for gravy or soup.
- Let the ribs rest for at least 15 minutes before serving.
Frequently Asked Questions
Can I use bone-in beef ribs in the oven?
Yes, you can use bone-in ribs, but they will need longer cooking times. The bone acts as an insulator, so the meat around it takes more time to heat through. Boneless ribs cook faster and more evenly, making them the better choice for oven cooking.
How long do boneless beef ribs take to cook?
At 300°F, boneless beef ribs typically take 3 to 4 hours to become fall-off-the-bone tender. The exact time depends on the thickness of the ribs and how well-done you prefer them. Always use a meat thermometer to check for an internal temperature of 200°F.
What is the best internal temperature for beef ribs?
The best internal temperature for tender, juicy braised ribs is 200°F to 205°F. At this range, the collagen has fully converted to gelatin, which gives the meat a silky, melt-in-your-mouth texture. If you prefer a slightly firmer bite, you can pull them at 195°F.
Do I need to sear the ribs before putting them in the oven?
Yes, searing is highly recommended. It creates a caramelized crust that adds depth of flavor and locks in juices. Searing takes just a few minutes on the stovetop but makes a noticeable difference in the final taste and appearance of the ribs.
Can I use a slow cooker instead of the oven?
Absolutely. You can transfer the seared ribs and braising liquid to a slow cooker. Cook on low for 6–8 hours or on high for 3–4 hours. The slow cooker method is even more hands-off, but you will miss out on the deep browning that the oven provides.
How do I reheat leftover oven beef ribs?
The best way to reheat is in the oven. Place the ribs in a baking dish, add a splash of beef broth or water, and cover with foil. Warm at 300°F for 20–25 minutes. This gentle reheating keeps the meat moist and prevents it from drying out. Avoid microwaving, which can make the ribs tough and chewy.
Conclusion
Making boneless beef ribs in the oven is one of the most satisfying things you can do in the kitchen. The process is simple, the results are impressive, and the leftovers taste even better the next day. By choosing well-marbled boneless short ribs, building a flavorful dry rub, and braising low and slow, you will achieve ribs that are tender, juicy, and full of flavor. Remember to sear first, braise with care, and always let the meat rest before slicing. With these steps, you can serve oven-baked ribs that rival any barbecue restaurant. Give this recipe a try, and you will wonder why you ever relied on anything else for your next rib night.