Everything You Need To Know About How To Store Dutch Oven
Proper Dutch oven storage keeps your cookware in top shape and extends its lifespan by years. Whether you own a cast iron Dutch oven or an enameled Dutch oven, the way you store it matters more than you think. This guide covers Dutch oven care tips, storage ideas for small kitchens, and common mistakes to avoid. You will learn how to store Dutch oven lids, season your pot correctly, and organize your kitchen cookware like a pro. By the end, you will have a clear plan for keeping your Dutch oven safe, clean, and ready to use every time.
You just finished cooking a delicious stew in your Dutch oven. The meal was perfect. But now you are standing in the kitchen wondering, “Where exactly should I put this thing away?”
It might seem simple. Just shove it in a cabinet, right? Wrong. How to store Dutch oven properly is one of those kitchen skills that separates people who keep their pots for decades from those who replace them every few years. The way you store your cast iron Dutch oven or enameled Dutch oven directly impacts its performance, longevity, and even the taste of your next meal.
In this guide, we will walk you through everything you need to know about Dutch oven storage. From basic cleaning routines to clever kitchen organization ideas, you will find practical advice that works for every type of kitchen and every budget. Let us get started.
Key Takeaways
- Always dry your Dutch oven completely before storing it to prevent rust and moisture damage.
- Store cast iron Dutch ovens with a light coat of oil to maintain seasoning and protect the surface.
- Never stack heavy items on top of your Dutch oven, as this can chip enamel or warp the lid.
- Use shelf risers or hanging racks to save space and keep your Dutch oven easily accessible.
- Clean your Dutch oven after every use and re-season cast iron models regularly for best results.
- Store Dutch oven lids separately or upside down to prevent dust buildup and trapped moisture.
- Long-term storage requires extra prep, including thorough cleaning, oiling, and wrapping in cloth.
📑 Table of Contents
- Why Proper Dutch Oven Storage Matters
- How To Store Dutch Oven After Every Use
- Best Ways To Store Dutch Oven in Your Kitchen
- Storing Dutch Oven Lids Separately
- Common Mistakes When Storing Dutch Oven
- How To Store Dutch Oven for Long-Term or Seasonal Use
- Dutch Oven Storage Solutions for Small Kitchens
- Expert Tips for Dutch Oven Storage
- Key Takeaways
- Frequently Asked Questions
- Conclusion
Why Proper Dutch Oven Storage Matters
You might be wondering why storage deserves so much attention. After all, a Dutch oven is a tough piece of cookware. It can handle high heat, heavy use, and all kinds of cooking tasks.
But here is the truth. Dutch oven care does not stop when you turn off the stove. How you store your pot between uses plays a huge role in maintaining its quality. A poorly stored Dutch oven can develop rust, lose its seasoning, or suffer from chips and cracks.
Protecting Your Investment
A good Dutch oven is not cheap. Whether you spent $50 or $300, you want that money to last. Proper storage protects your investment and keeps your pot performing at its best for years to come.
When you store a cast iron Dutch oven incorrectly, moisture can settle on the surface and cause rust. Even a tiny spot of rust can spread if you do not catch it early. On the other hand, enameled Dutch ovens can chip if they bump against other pots or get stacked with too much weight on top.
Maintaining Flavor and Performance
Your Dutch oven builds up seasoning over time. That seasoning is what gives your pot its natural non-stick surface and helps it cook food evenly. If you store your pot while it is still damp or with food residue left inside, you can degrade that seasoning.
Good Dutch oven maintenance means treating your pot with respect every single time you use it. Storage is just as important as cleaning and cooking when it comes to keeping your Dutch oven in great condition.
How To Store Dutch Oven After Every Use
The most important step in Dutch oven storage happens right after you finish cooking. If you get this part right, everything else becomes much easier.
Step 1: Let It Cool Down
Never put a hot Dutch oven directly into a tight, enclosed space. Let it cool to room temperature first. Placing a hot pot in a cabinet can trap steam and create moisture, which leads to rust on cast iron models.
Set your Dutch oven on a trivet or towel on the counter. Give it at least 30 minutes to cool. This simple step prevents condensation from forming inside the pot and on the lid.
Step 2: Clean It Thoroughly
Once the pot is cool, clean it properly. For cast iron Dutch ovens, avoid using soap if possible. Hot water and a stiff brush or chainmail scrubber work best. For enameled Dutch ovens, mild dish soap is perfectly fine.
Make sure you remove all food particles. Residue left behind can attract bacteria and create sticky buildup that gets worse over time. Rinse the pot well and dry it immediately.
Step 3: Dry It Completely
This step cannot be stressed enough. Always dry your Dutch oven completely before storing it. Even a small amount of trapped moisture can cause rust on cast iron.
Use a clean towel to dry the pot and lid thoroughly. For extra protection, you can place the Dutch oven on a stove burner over low heat for one to two minutes. This ensures every last drop of water has evaporated.
Step 4: Apply a Light Coat of Oil
For cast iron Dutch ovens, apply a thin layer of cooking oil after drying. Use a paper towel or cloth to spread a small amount of vegetable oil, flaxseed oil, or Dutch oven seasoning oil across the entire interior surface.
Do not use too much oil. A thick layer will become sticky and attract dust. A light, even coat is all you need. This step helps maintain the Dutch oven seasoning and creates a protective barrier against moisture.
Best Ways To Store Dutch Oven in Your Kitchen
Now that your Dutch oven is clean and dry, it is time to figure out where it will live in your kitchen. The best storage method depends on your kitchen size, your pot type, and your personal preferences.
On an Open Shelf
If you have open kitchen shelves, a Dutch oven looks great displayed there. It also keeps the pot easily accessible for everyday use. Place the Dutch oven on a shelf where it will not get knocked over by other items.
Use a shelf liner or a piece of felt under the pot to protect surfaces. This also prevents the pot from sliding if your shelves are not perfectly level. Kitchen organization is all about making things both beautiful and functional.
Inside a Cabinet or Pantry
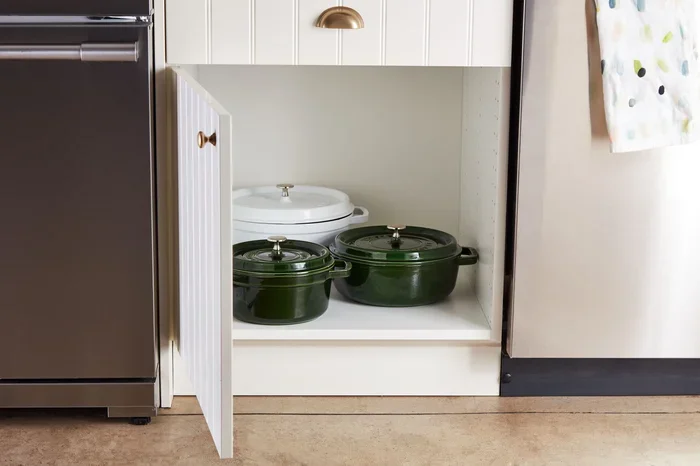
Most people store their Dutch oven inside a cabinet. This is perfectly fine as long as you do it right. Make sure the pot is completely dry and oiled before placing it inside.
Try to store the Dutch oven in a spot where it will not get buried under other items. You want to be able to pull it out easily without moving three other pots first. Cookware organization saves time and keeps your kitchen feeling calm and clutter-free.
On a Pot Rack or Hanging System
If you have limited cabinet space, consider a pot rack or hanging system. Many Dutch oven hanging solutions allow you to hang the pot by its handle from a ceiling rack or wall-mounted rail.
This is a great option for small kitchen storage. It keeps your Dutch oven visible and easy to grab. Just make sure the hanging hook is sturdy enough to support the weight. A cast iron Dutch oven can weigh 15 pounds or more when empty.
Using a Dutch Oven Stand or Caddy
A dedicated stand or caddy is one of the best Dutch oven storage solutions you can buy. These stands hold the pot upright and often include space for the lid underneath or beside it.
You can find wooden, metal, and bamboo stands online or at kitchen supply stores. They look great on countertops and make your Dutch oven a part of your kitchen decor. Some people even leave their stand out all the time for easy access.
Storing Dutch Oven Lids Separately
The lid is just as important as the pot itself. Yet many people store their Dutch oven lid on top of the pot or inside it. This is not always the best approach.
Why Lid Storage Matters
When a lid sits on top of a pot for a long time, moisture can get trapped between the two surfaces. This is especially true for cast iron. Trapped moisture leads to rust, mildew, and unpleasant odors.
For enameled Dutch oven lids, stacking or storing them face-down can cause chips on the rim. The enamel is durable but not indestructible. A little care goes a long way.
Best Practices for Lid Storage
Store your Dutch oven lid separately whenever possible. You can place it on a shelf next to the pot, hang it on a wall hook, or set it upside down on a clean towel.
If you must store the lid on the pot, place a folded cloth or paper towel between them. This absorbs any moisture and prevents scratching. It is a small step that makes a big difference in Dutch oven storage.
Common Mistakes When Storing Dutch Oven
Even experienced cooks make mistakes when storing their Dutch ovens. Here are the most common errors and how to avoid them.
Storing the Pot While It Is Still Damp
This is the number one mistake. A damp Dutch oven stored in a closed space will develop rust, especially if it is cast iron. Always, always dry your pot completely before putting it away.
Wrapping the Pot in Plastic or Airtight Materials
Wrapping your Dutch oven in plastic wrap or storing it in an airtight bag traps moisture inside. Cast iron needs to breathe. Use a breathable cloth or leave the pot uncovered in a dry cabinet.
Stacking Heavy Items on Top
Do not stack heavy pots or pans on top of your Dutch oven. The weight can crack enamel, warp the lid, or damage the handles. Treat your Dutch oven with care and give it its own space.
Ignoring the Seasoning Between Uses
If you own a cast iron Dutch oven, re-seasoning it after cleaning and before storage is essential. Skipping this step gradually strips away the seasoning layer. Over time, your pot will lose its non-stick properties and become prone to rust.
How To Store Dutch Oven for Long-Term or Seasonal Use
Do you have a Dutch oven that only comes out during the holidays or cold weather months? Long-term storage requires extra precautions to keep the pot in perfect condition.
Deep Clean Before Storage
Before putting your Dutch oven away for an extended period, give it a thorough deep clean. Remove all seasoning buildup, food residue, and any existing rust spots.
For cast iron, use a mixture of coarse salt and oil to scrub the interior. Rinse well and dry completely. For enameled models, a paste of baking soda and water can remove stubborn stains.
Apply a Fresh Coat of Oil
After deep cleaning, apply a generous but even coat of oil to the entire interior and exterior of the pot. This creates a protective layer during long periods of storage.
Place a piece of parchment paper or a paper towel between the lid and the pot to absorb any moisture that might develop over time.
Wrap and Store in a Dry Place
Wrap your Dutch oven in a clean cotton cloth or store it in a breathable cotton bag. Avoid plastic bags or airtight containers for long-term storage. Choose a dry, cool place in your home, away from humidity and temperature changes.
A closet shelf or a pantry cupboard works well. Avoid garages and basements where humidity levels tend to be higher. Proper Dutch oven storage during off-seasons keeps your pot ready to use whenever you need it.
Dutch Oven Storage Solutions for Small Kitchens
Living in a small apartment or a compact kitchen does not mean you cannot store your Dutch oven properly. There are plenty of creative solutions that save space without sacrificing Dutch oven care.
Use a Wall-Mounted Shelf
A wall-mounted shelf takes up zero counter space and keeps your Dutch oven within easy reach. Install a sturdy bracket or floating shelf near your cooking area.
This works especially well for enameled Dutch ovens, which are lighter than cast iron models. Make sure the shelf can handle the weight before hanging your pot.
Invest in a Stackable Storage System
Stackable pot storage systems use vertical space efficiently. These systems usually come with separators that prevent pots from scratching each other.
Look for systems with adjustable tiers so you can customize the height for your Dutch oven. This is one of the best kitchen storage ideas for people who own multiple large pots and pans.
Store It in a Deep Drawer
If you have a deep kitchen drawer, your Dutch oven can fit perfectly inside. Place a drawer liner or felt pad underneath to prevent scratching.
Store the lid in a separate drawer or on a shelf above. This keeps everything organized and makes it easy to grab both the pot and lid when you need them.
Expert Tips for Dutch Oven Storage
Here are some extra tips from experienced cooks and kitchen organizers that will help you get the most out of your Dutch oven storage routine.
- Label your storage spot. If you have multiple pots and pans, label where the Dutch oven goes. This prevents other family members from accidentally moving it or stacking things on top.
- Check your pot periodically. Even when stored properly, check your Dutch oven every few months for signs of rust, moisture, or damage. Catching problems early makes them much easier to fix.
- Use silica gel packets. Place a small silica gel packet inside your Dutch oven when storing it for a long time. This absorbs any residual moisture and adds an extra layer of protection.
- Keep it away from the dishwasher. Never store a Dutch oven near the dishwasher or in a damp area. Humidity is the enemy of cast iron and can damage enamel over time.
- Re-season regularly. Even when not in use, cast iron Dutch ovens benefit from occasional re-seasoning. A light oiling every few months keeps the seasoning fresh and the surface protected.
These small habits take almost no time but pay off enormously in the life of your Dutch oven. Dutch oven maintenance is not complicated. It just requires a little consistency and attention.
Key Takeaways
- Always dry your Dutch oven completely before storing it to prevent rust and moisture damage.
- Store cast iron Dutch ovens with a light coat of oil to maintain seasoning and protect the surface.
- Never stack heavy items on top of your Dutch oven, as this can chip enamel or warp the lid.
- Use shelf risers or hanging racks to save space and keep your Dutch oven easily accessible.
- Clean your Dutch oven after every use and re-season cast iron models regularly for best results.
- Store Dutch oven lids separately or upside down to prevent dust buildup and trapped moisture.
- Long-term storage requires extra prep, including thorough cleaning, oiling, and wrapping in cloth.
Frequently Asked Questions
Can I store my cast iron Dutch oven without oiling it?
You can, but it is not recommended. Oiling your cast iron Dutch oven before storage creates a protective barrier against moisture and helps preserve the seasoning. Without oil, the pot is much more likely to develop rust, especially in humid environments.
Is it okay to store a Dutch oven with the lid on?
It is better to store the lid separately or place a cloth between the lid and the pot. Storing them together traps moisture and can lead to rust on cast iron or chips on enamel. A small piece of parchment paper works as a simple and effective barrier.
How often should I re-season my cast iron Dutch oven?
Re-season your cast iron Dutch oven every few months, or whenever you notice the surface looking dull or food sticking more than usual. Regular seasoning keeps the non-stick surface strong and protects the iron from moisture damage.
Can I hang my Dutch oven from a ceiling rack?
Yes, hanging is a great storage option if you have the right hardware. Use a heavy-duty hook that can support the weight of a full Dutch oven. Hanging keeps the pot accessible and saves cabinet or shelf space in your kitchen.
What is the best way to store a Dutch oven lid?
The best way is to store the lid on a separate shelf, hang it on a wall hook, or place it upside down on a clean towel. This prevents moisture from getting trapped and keeps the lid free from dust and odors.
Can I store my enameled Dutch oven in the oven itself?
It is not a good idea to store your Dutch oven inside the oven. The enclosed space can trap heat and moisture, which may damage both the pot and the oven. Always store your Dutch oven in a cool, dry place outside the oven cavity.
Conclusion
How to store Dutch oven properly is one of the simplest yet most impactful things you can do for your kitchen. Whether you own a classic cast iron Dutch oven or a sleek enameled Dutch oven, the storage principles remain the same. Keep it clean, keep it dry, and give it a protective layer of oil before putting it away.
By following the tips in this guide, you will extend the life of your Dutch oven, maintain its performance, and keep your kitchen organized. Dutch oven storage does not have to be complicated. A little effort after each use saves you time, money, and frustration in the long run.
Start applying these practices today. Your future self will thank you every time you pull out a perfectly seasoned, ready-to-use Dutch oven for your next favorite recipe. Proper storage is the foundation of great cooking, and your Dutch oven deserves nothing less.